How to Add or Edit Lifecycle Stages to Build a Custom CRM Pipeline
With Exercise.com’s fitness business management software, you can customize the stages that your customers can move through, starting them out as a brand new lead in your system all the way to upgrading them to a paying client account.
This guide walks you through adding and editing the customer lifecycle stages on your platform.
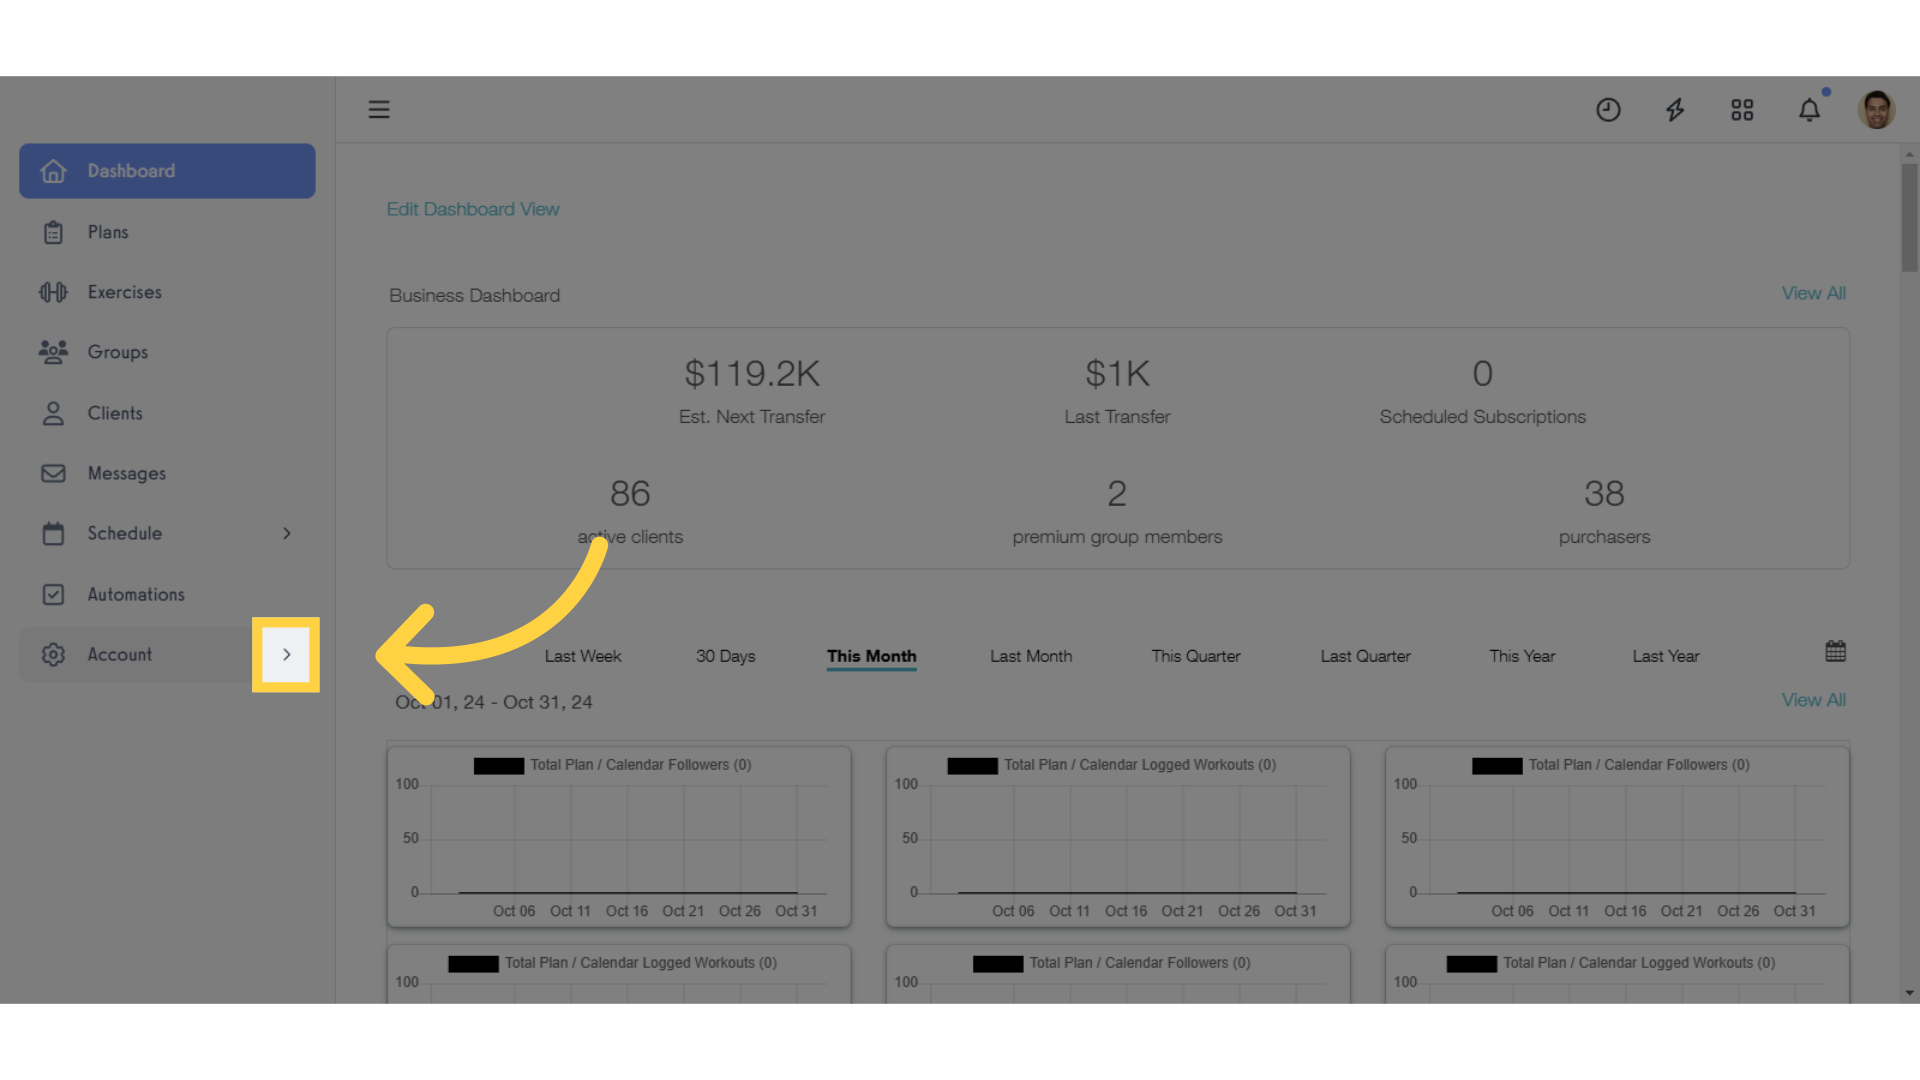
1. Click the arrow on the “Account” tab in the left side menu.
Click the arrow on the “Account” tab in the left side menu to expand the side menu options.
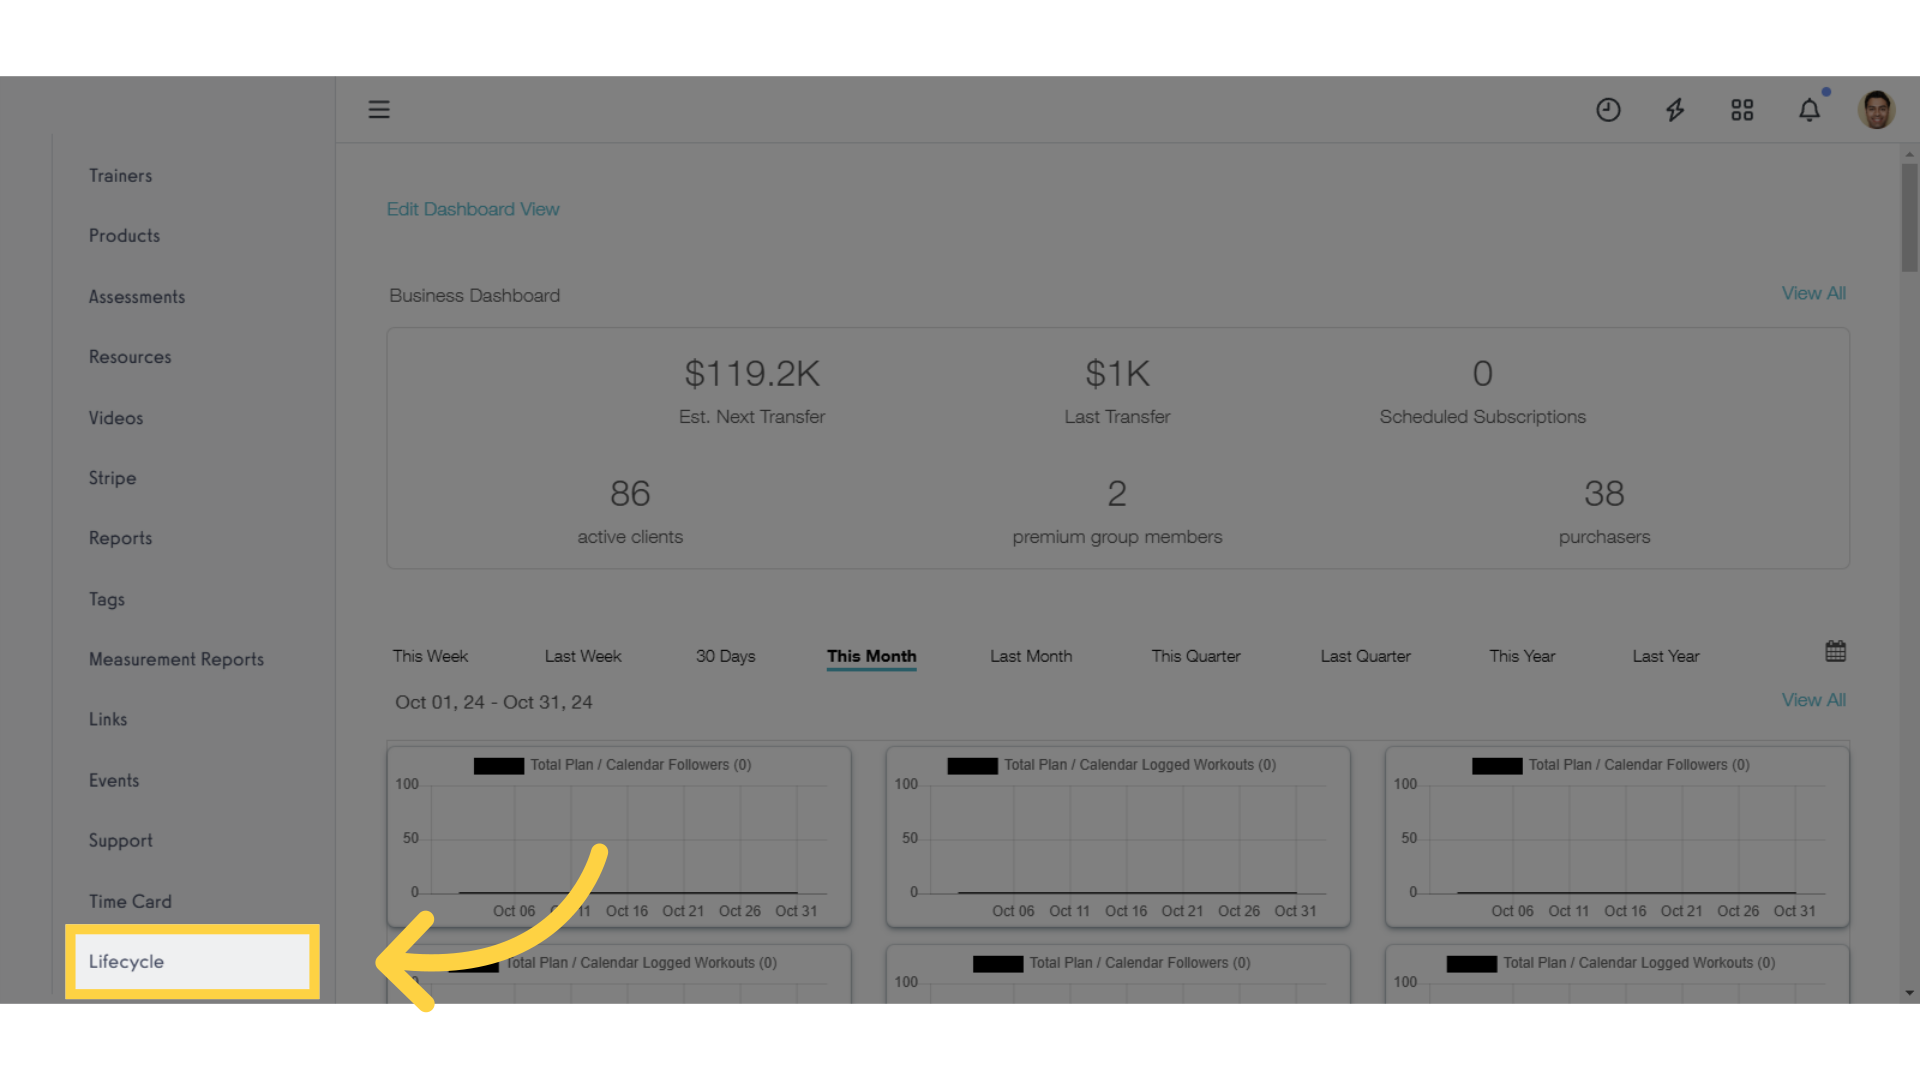
2. Click the “Lifecycle” option.
Click on “Lifecycle to configure your lifecycle setup.
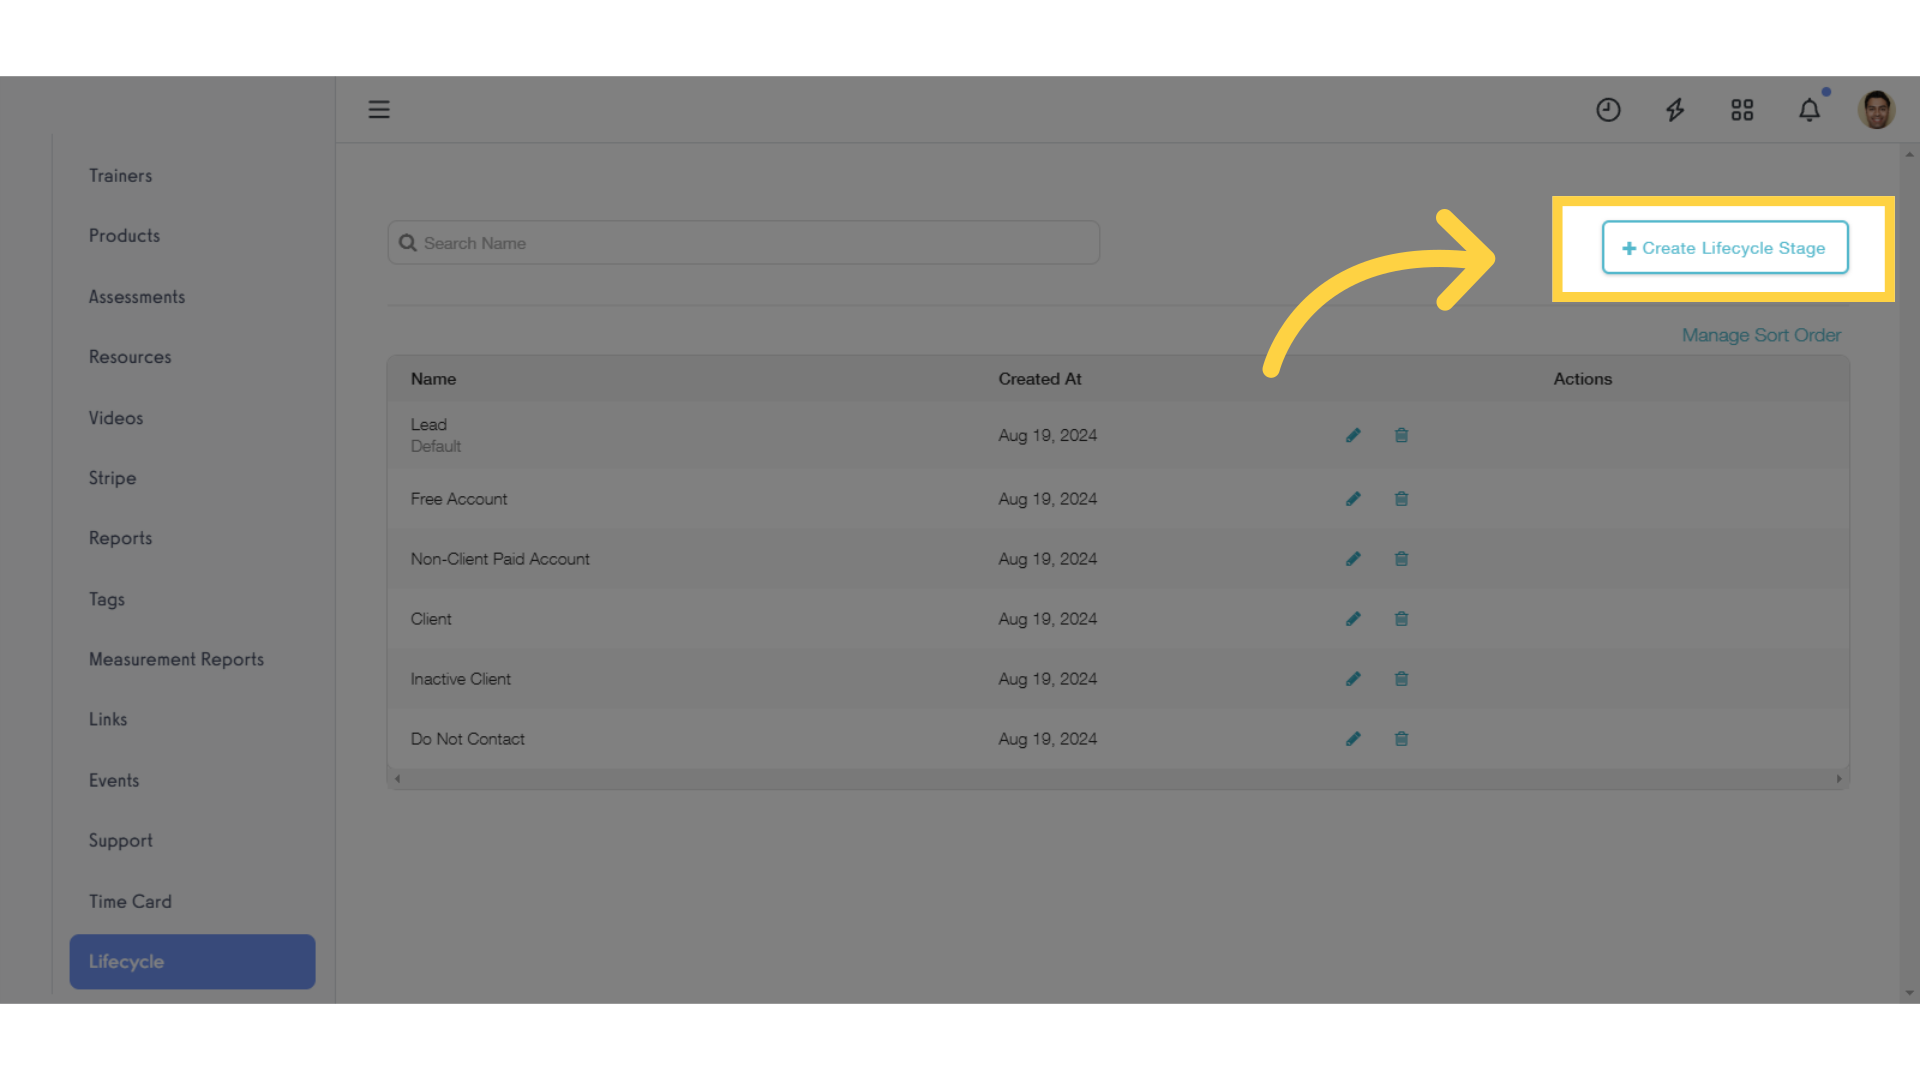
3. Click the “Create Lifecycle Stage” button.
Click the “Create Lifecycle Stage” button to create a new stage.
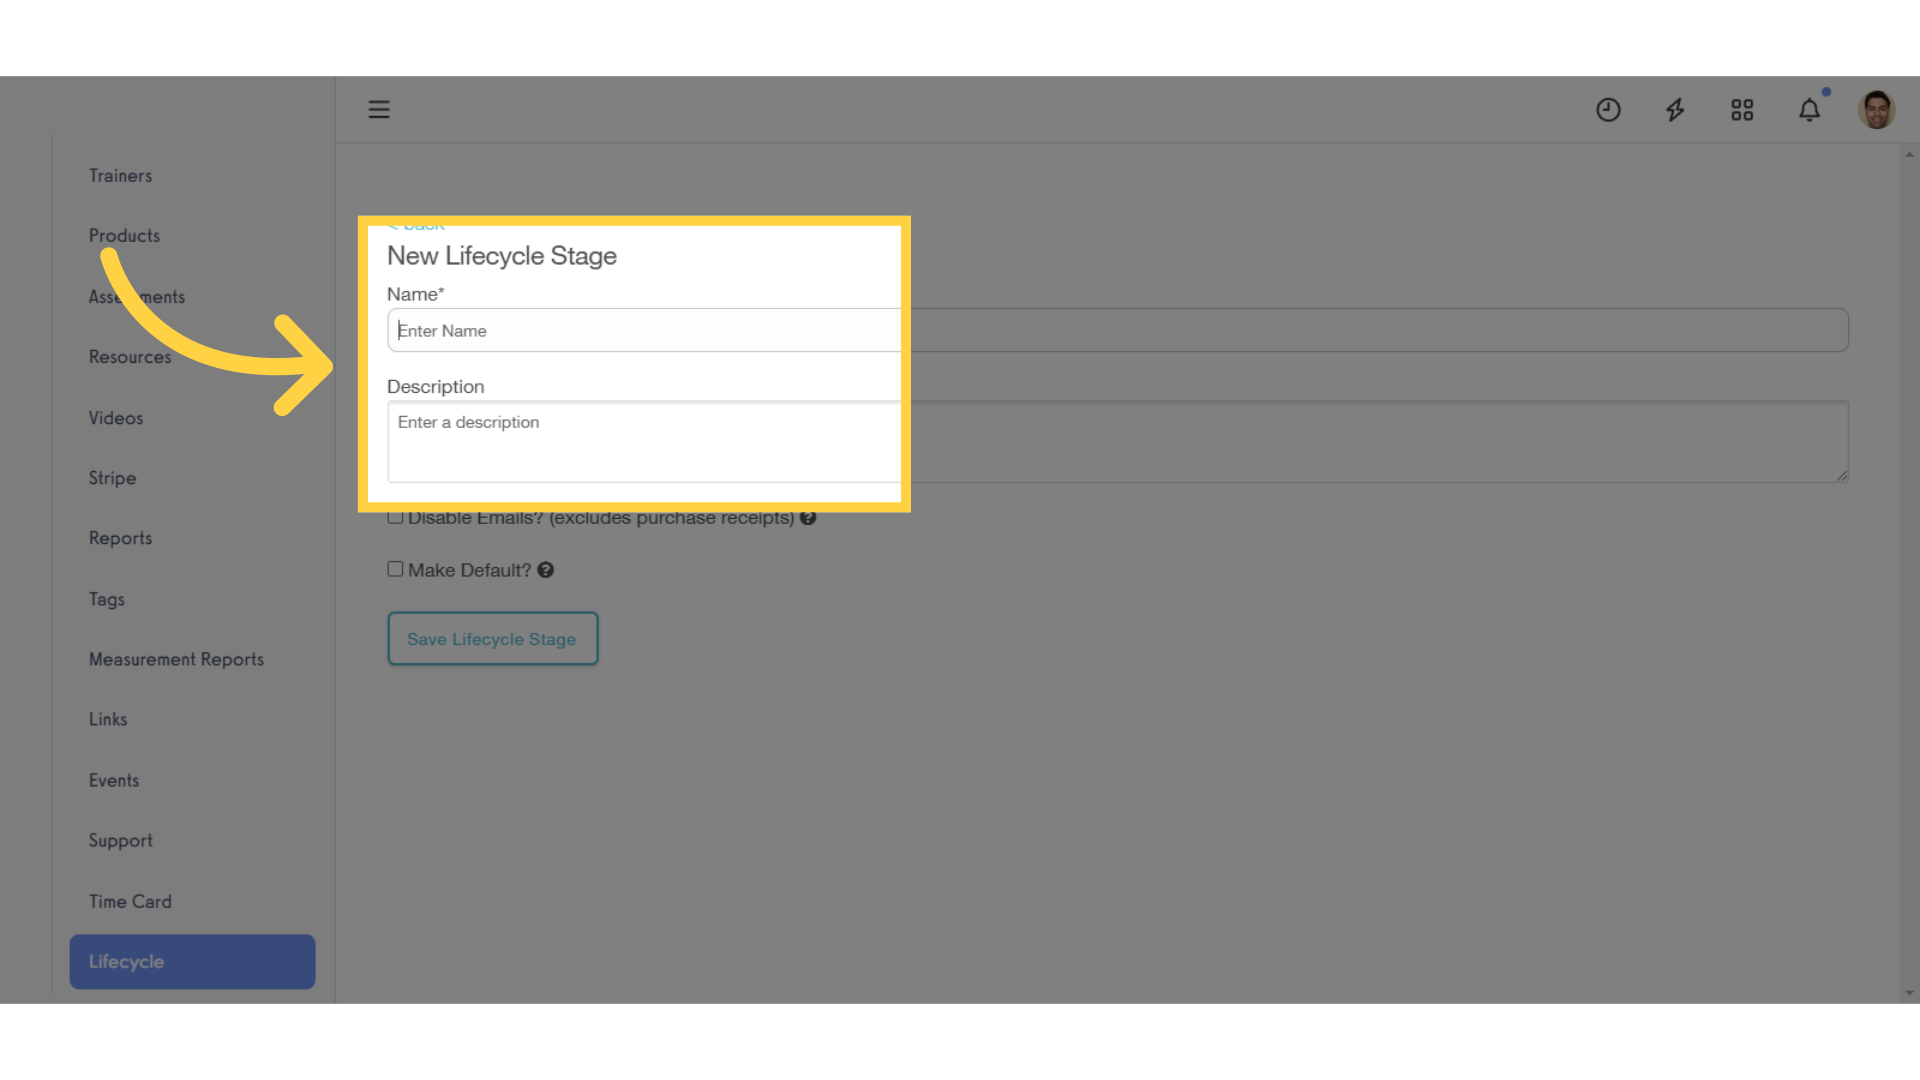
4. Enter the name and description you want for this stage.
Enter the name and description you want for this stage. Your customers won’t see the description on their end.
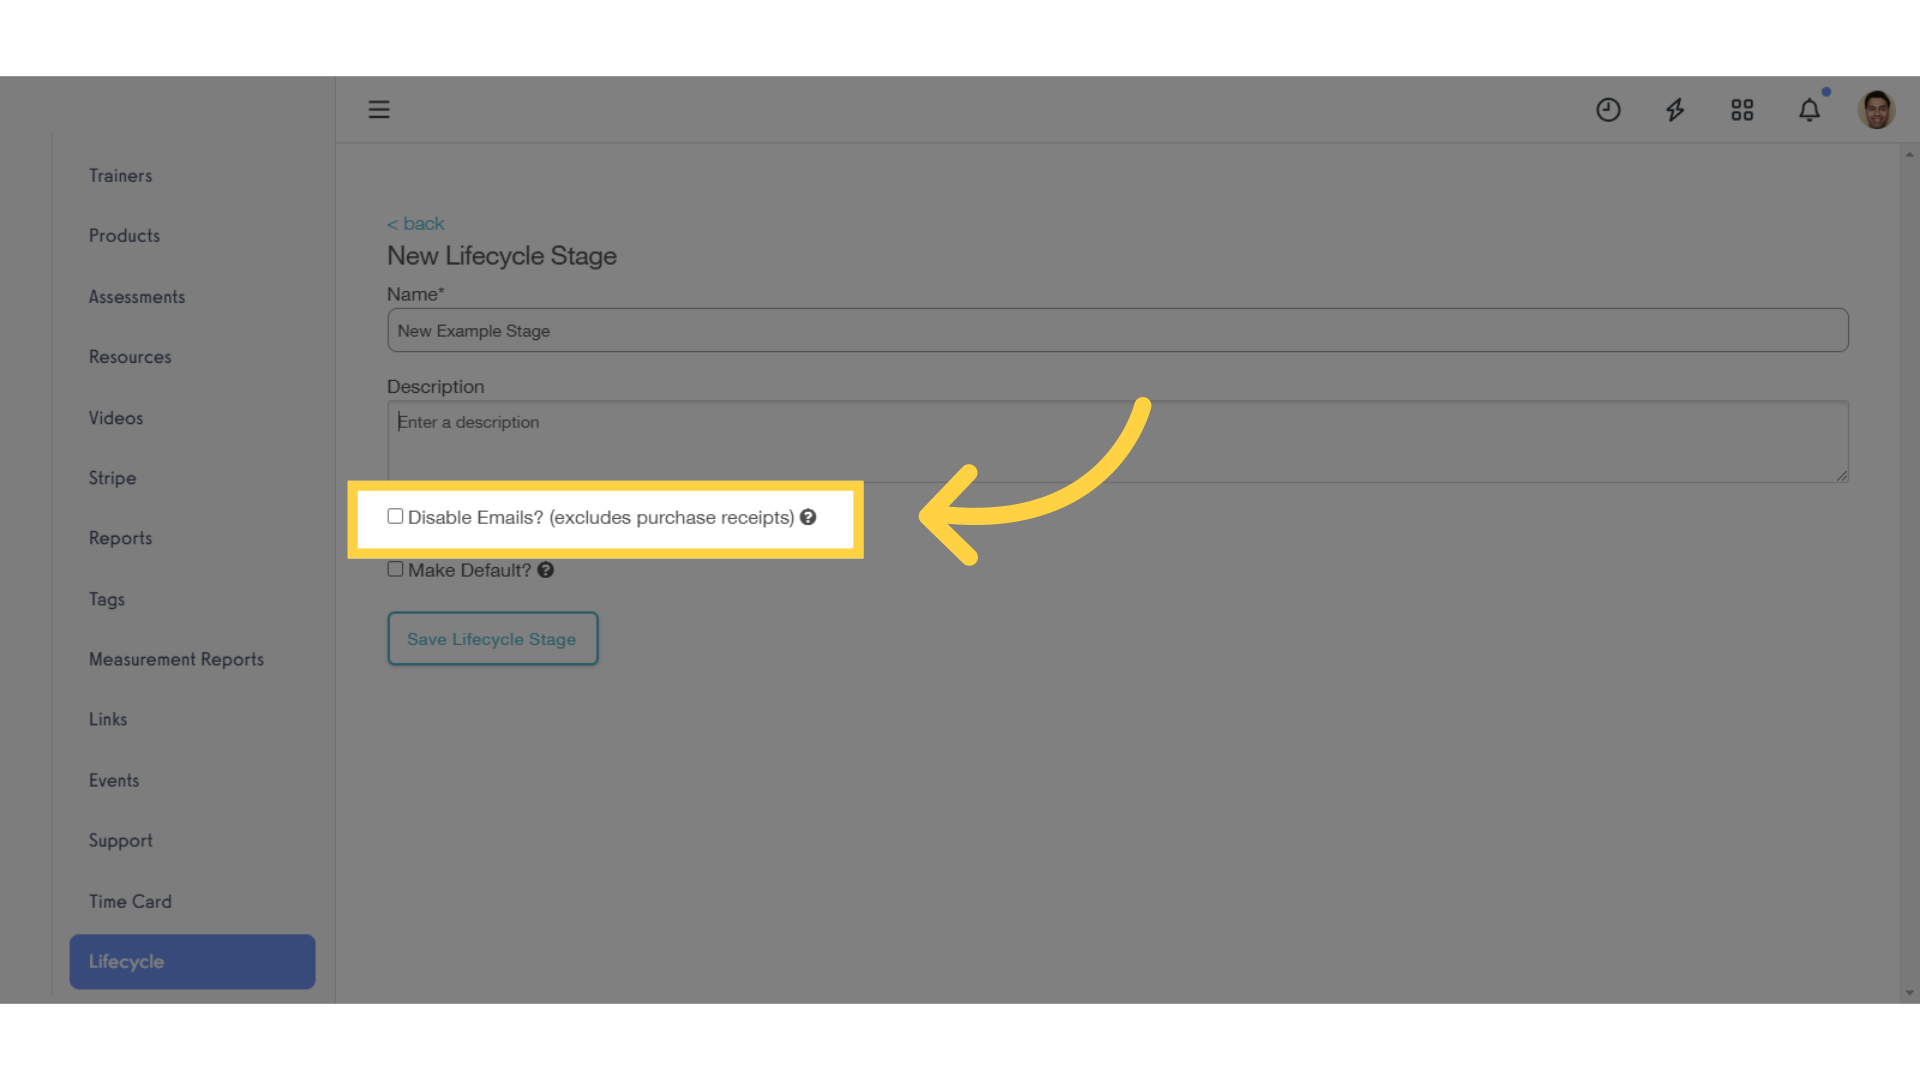
5. Check the box for the “Disable Emails?” option if you don’t want any emails sent to people in this stage.
If you don’t want to send emails to people in this stage yet, you can click the “Disable Emails” checkbox. This is helpful if someone is not an active customer, yet.
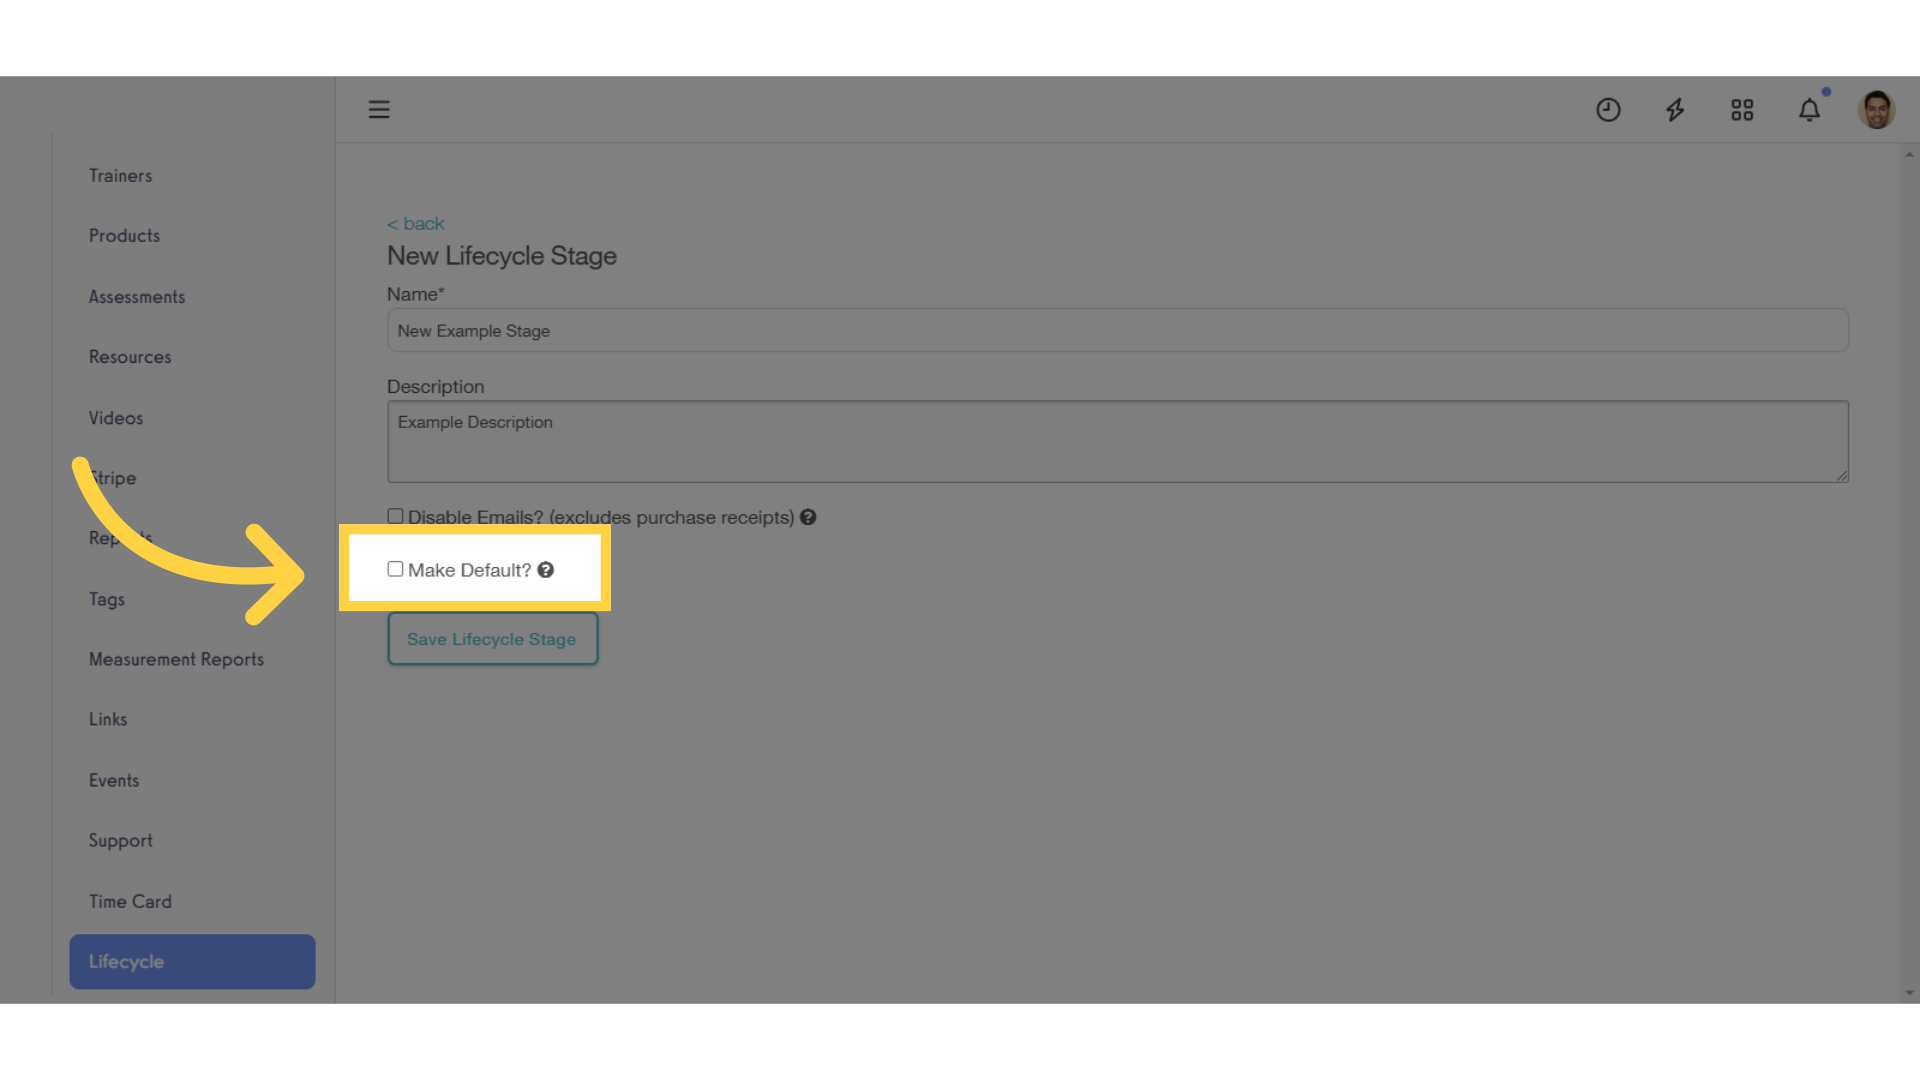
6. You can use the “Make Default?” checkbox to specify the default stage for all new accounts.
You can use the “Make Default” checkbox to specify the default stage for all new accounts. You can still manually change the stage for anyone when adding new accounts to your platform.
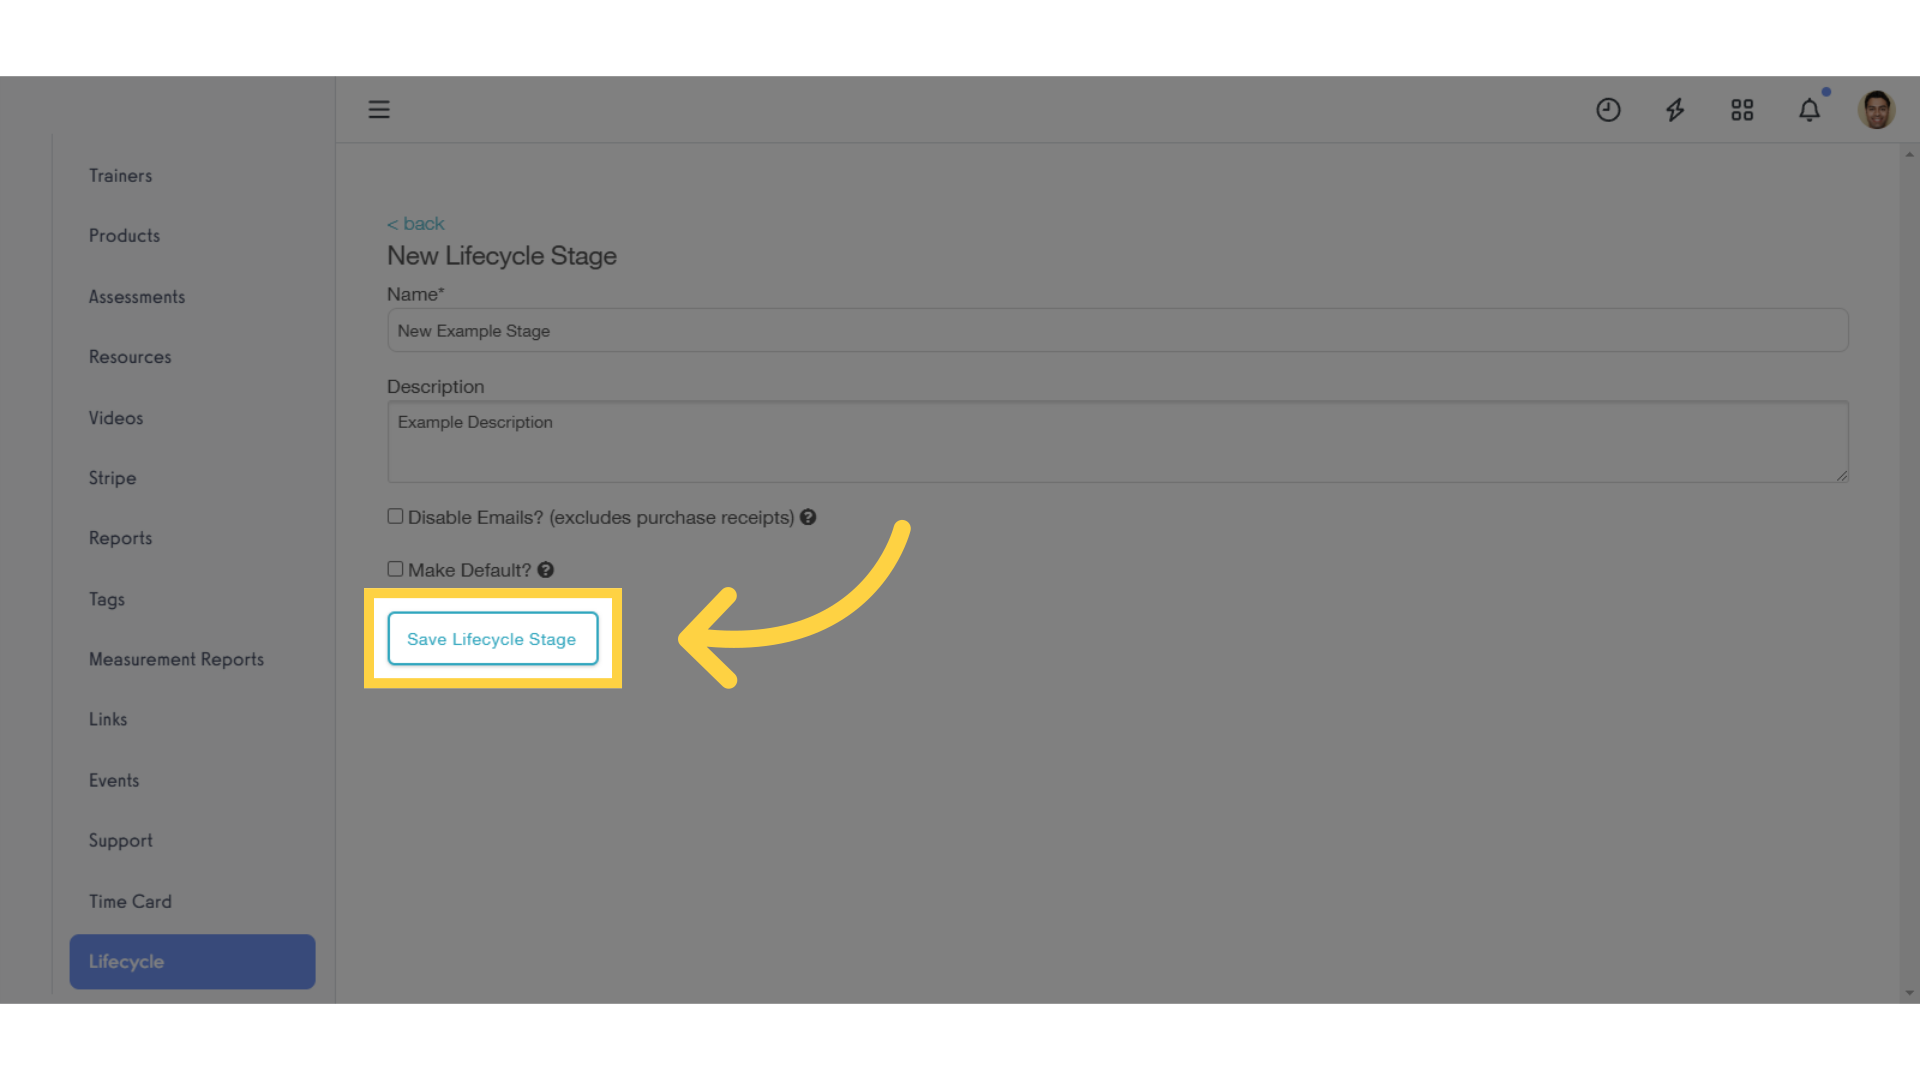
7. Click “Save Lifecycle Stage” to save your new stage.
Click the button to save your new lifecycle stage.
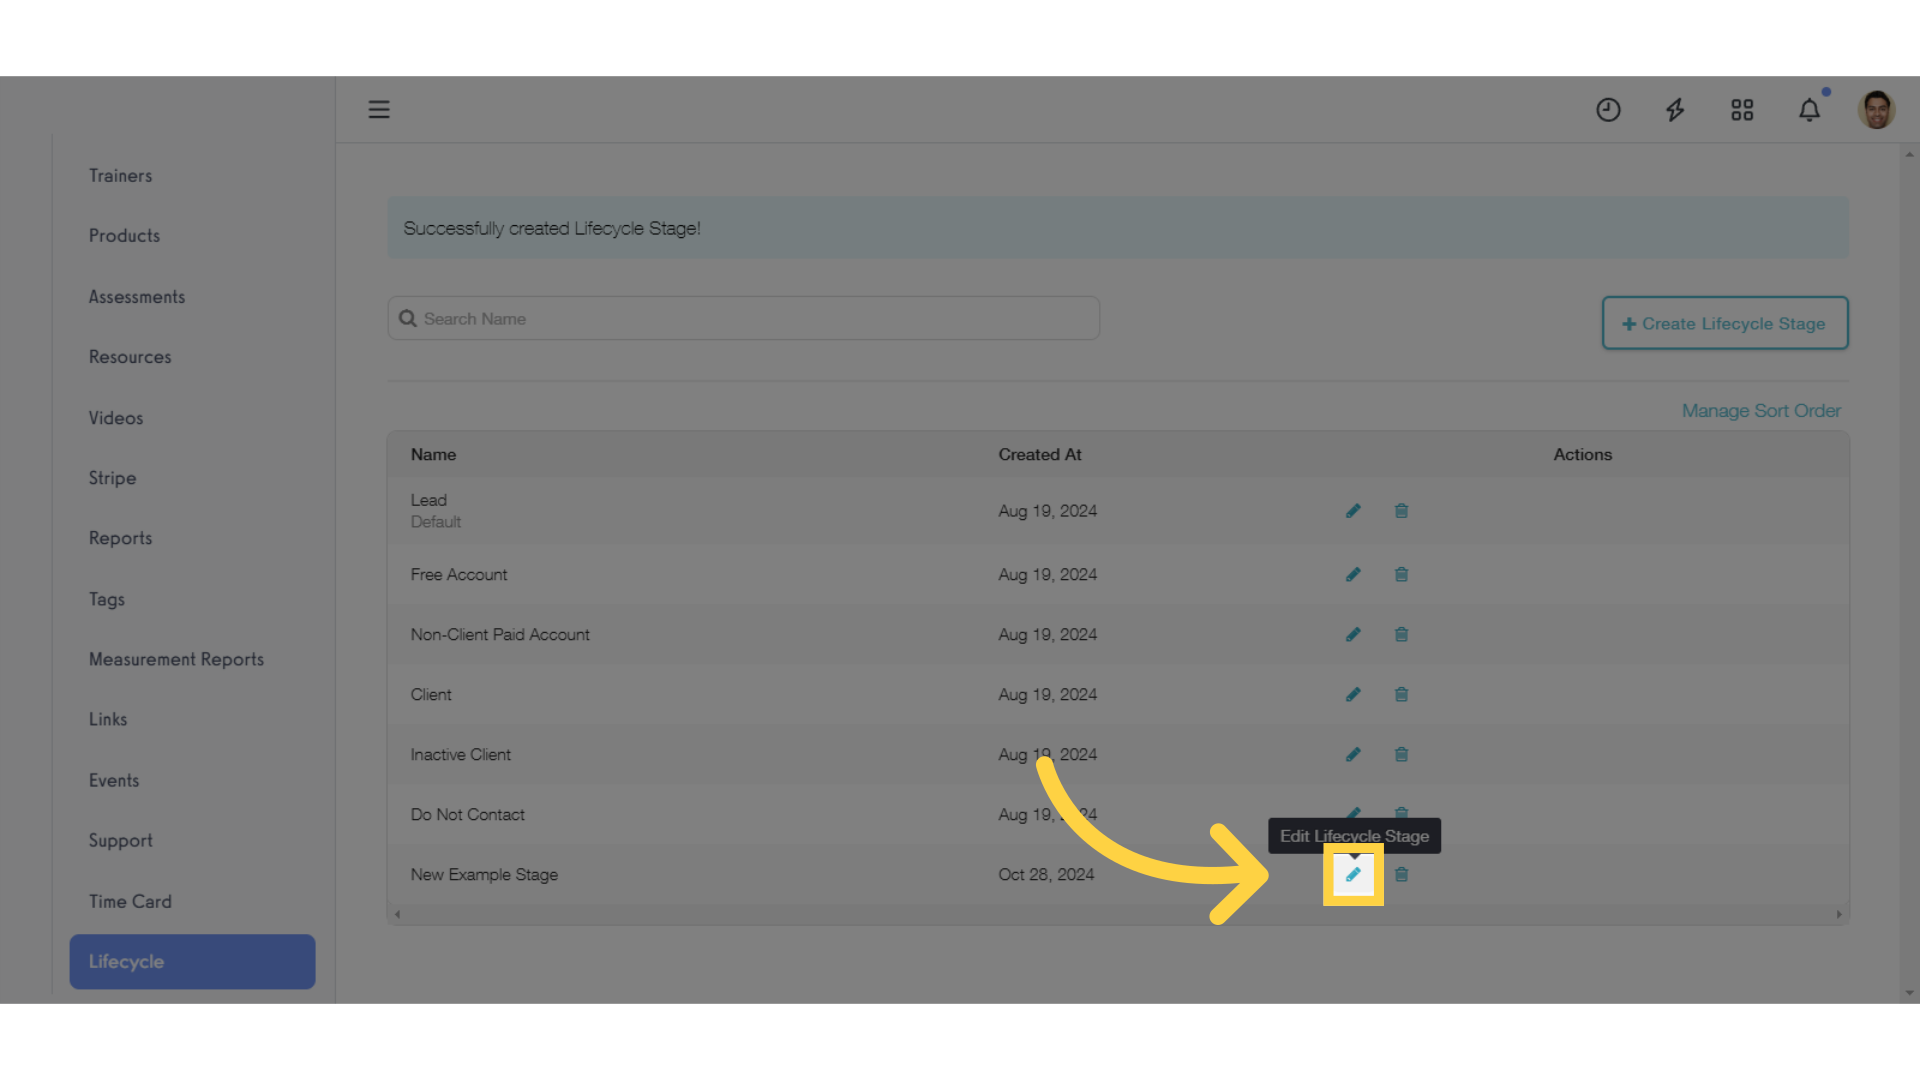
8. Use the edit icon to change existing stages.
To make changes to existing lifecycle stages, click on the pencil icon.
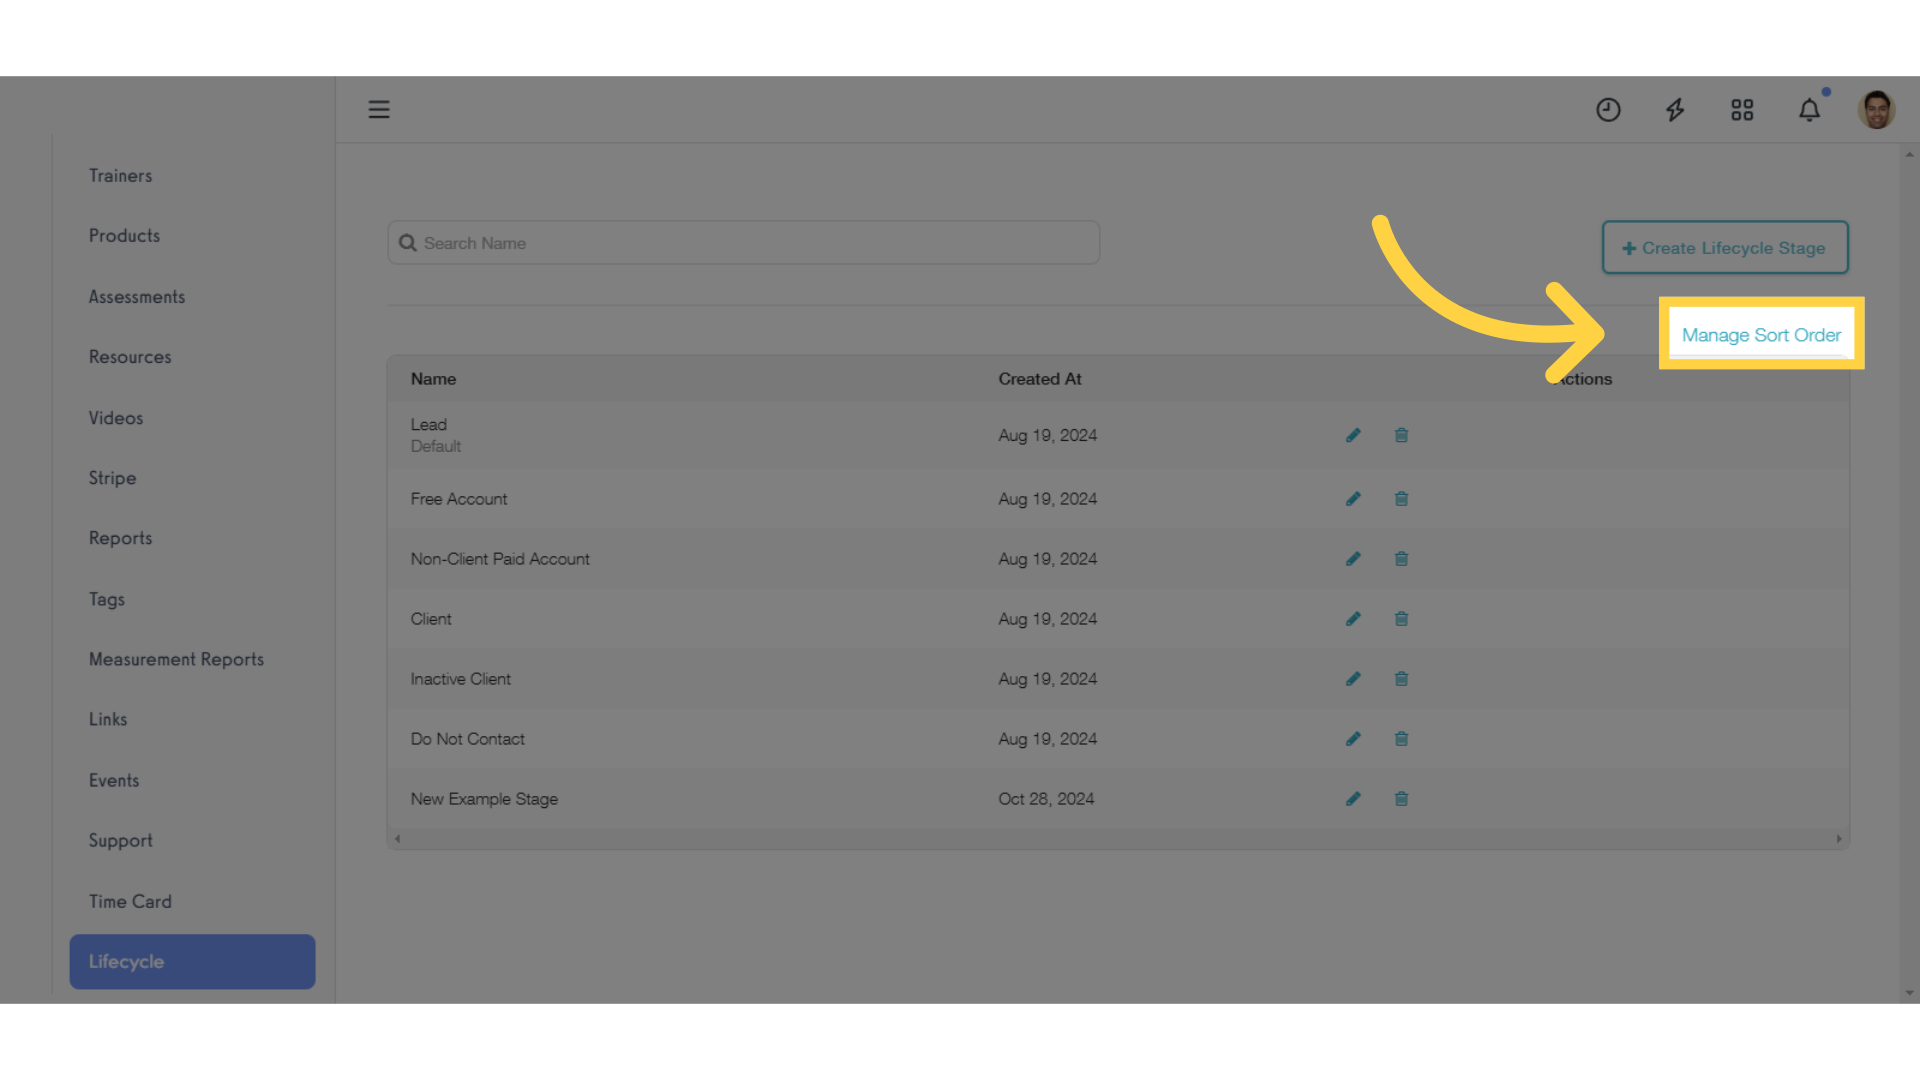
9. Click “Manage Sort Order” to re-arrange stages.
If you’d like to re-arrange the order of the stages in your pipeline, click the “Manage Sort Order” link.
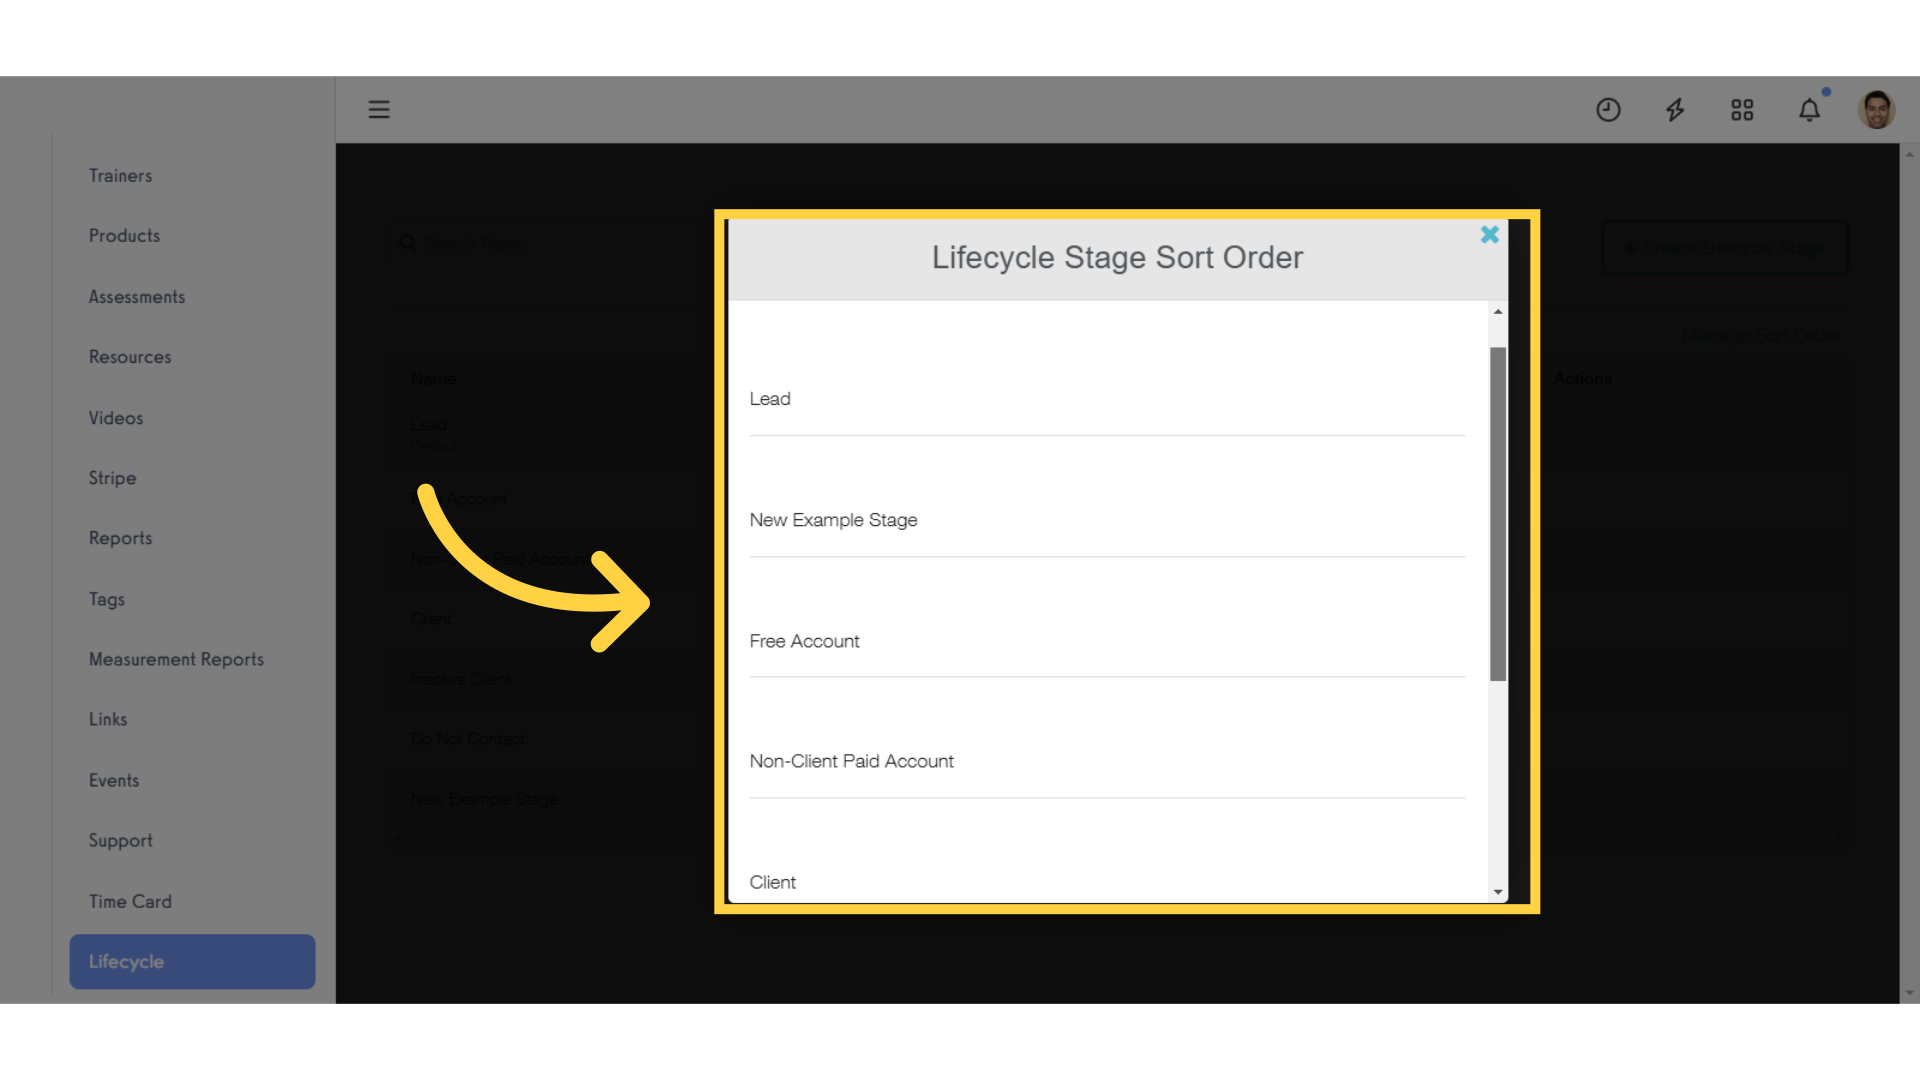
10. Click and drag to re-arrange your stages.
Click and drag to change the order of your stages, then save your changes to continue.
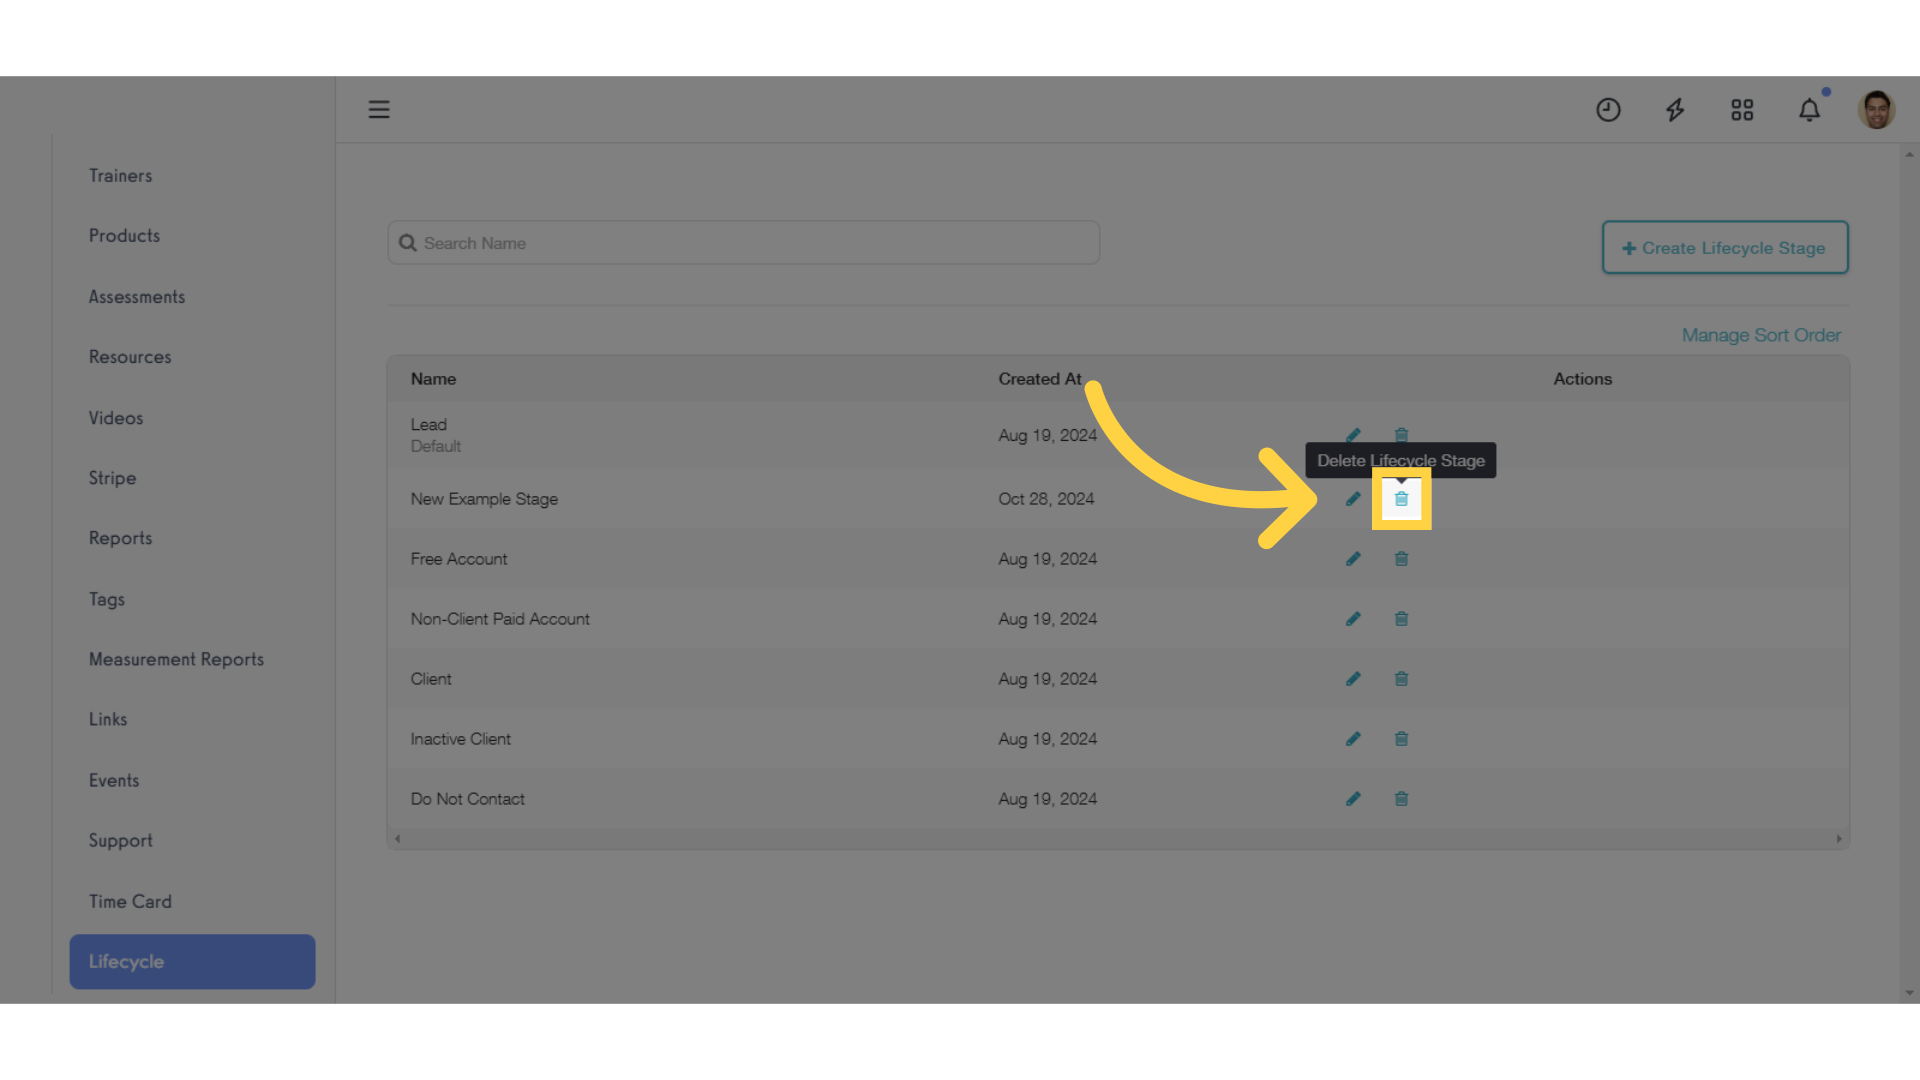
11. Click the trash can icon to delete stages.
To delete a stage from your platform, click the trash can icon. If you try to delete a stage that still contains customer accounts, you’ll see an error message reminding you to move those accounts to a different stage before deleting the selected stage.
This guide covered the essential steps to customize Lifecycle Stages in your customer pipeline, from navigating to the Lifecycle tab to creating, editing, and sorting your stages.
Now you can set up your customer pipeline to best fit your business.


