How do I create a workout plan?
Within Exercise.com’s Workout Plan Creator Software, you can create customizable workout plans with a host of powerful features to help you deliver your workouts to your clients how you want to.
This guide will show you how to create a workout plan while highlighting the most common features.
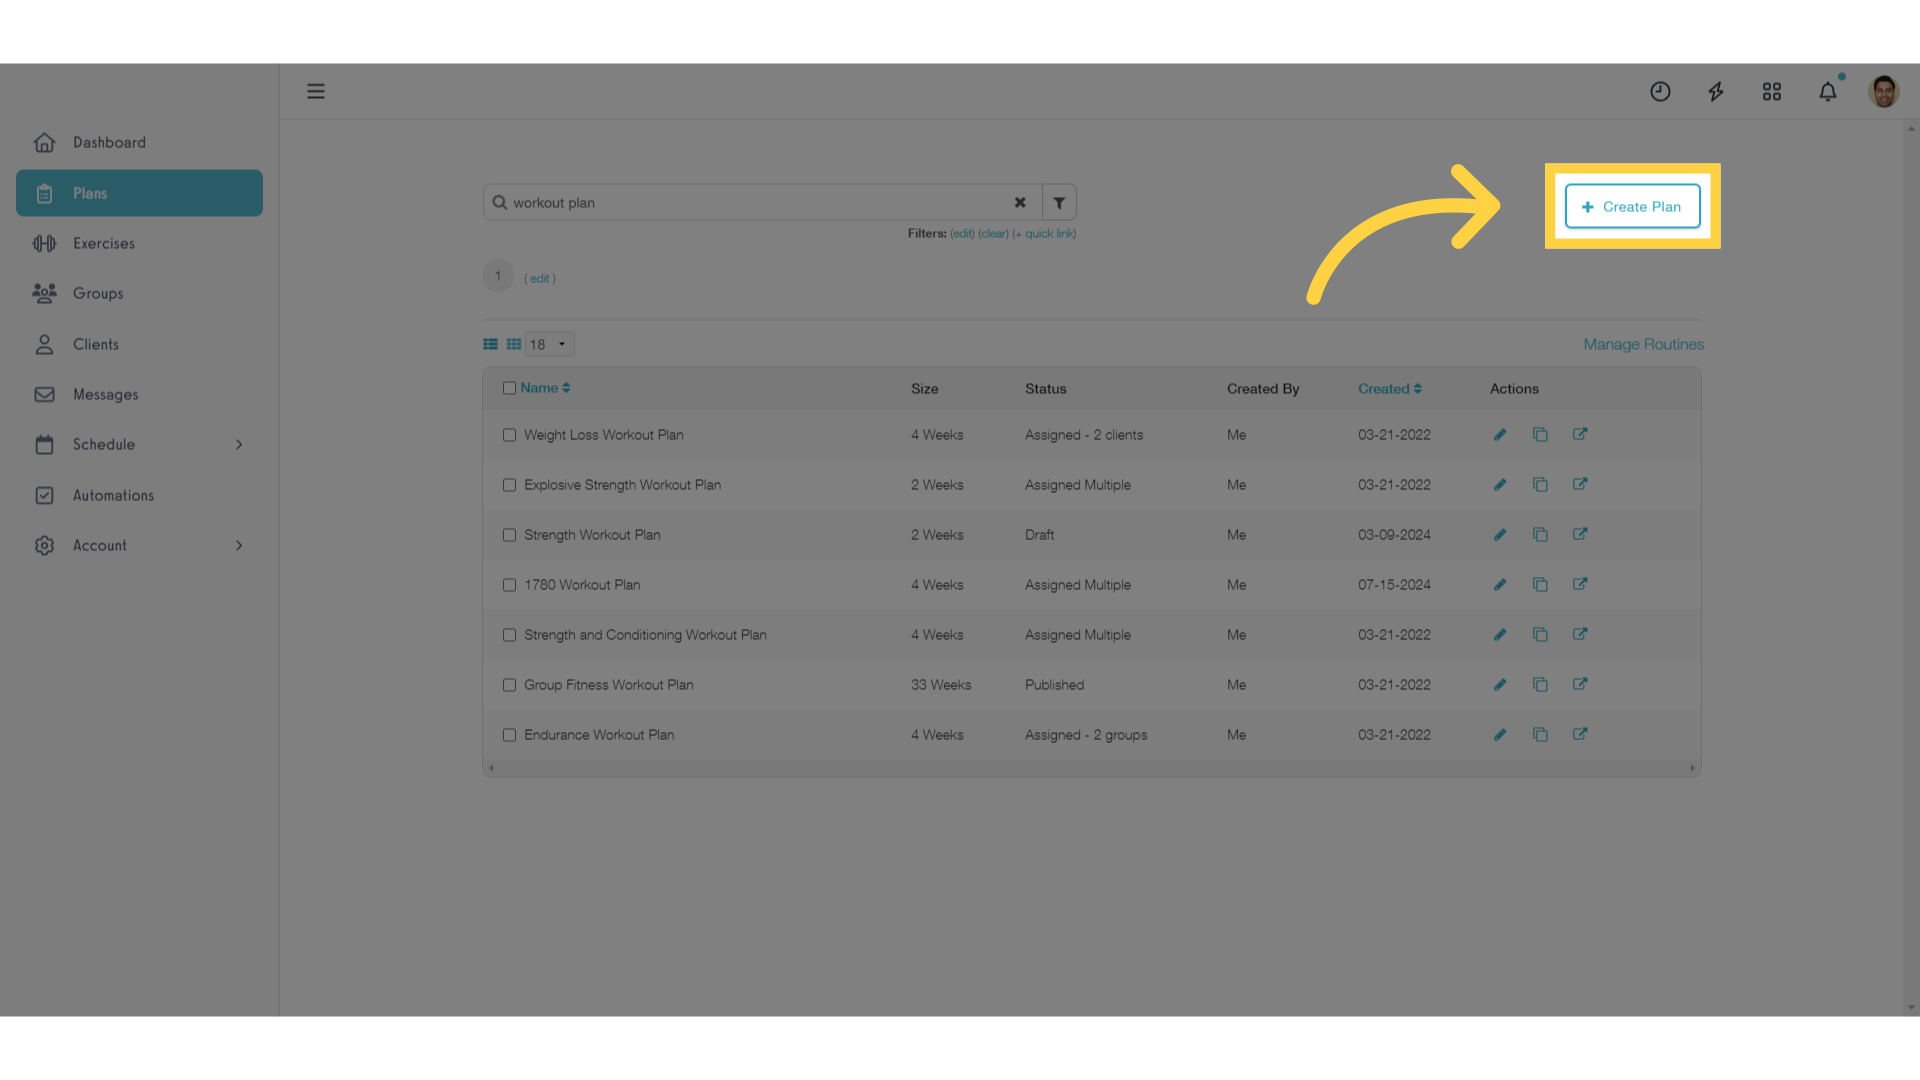
1. Click the “Create Plan” button.
We’ll start from the Plans tab on the navigation menu. Click the Create Plan button to create a new plan.
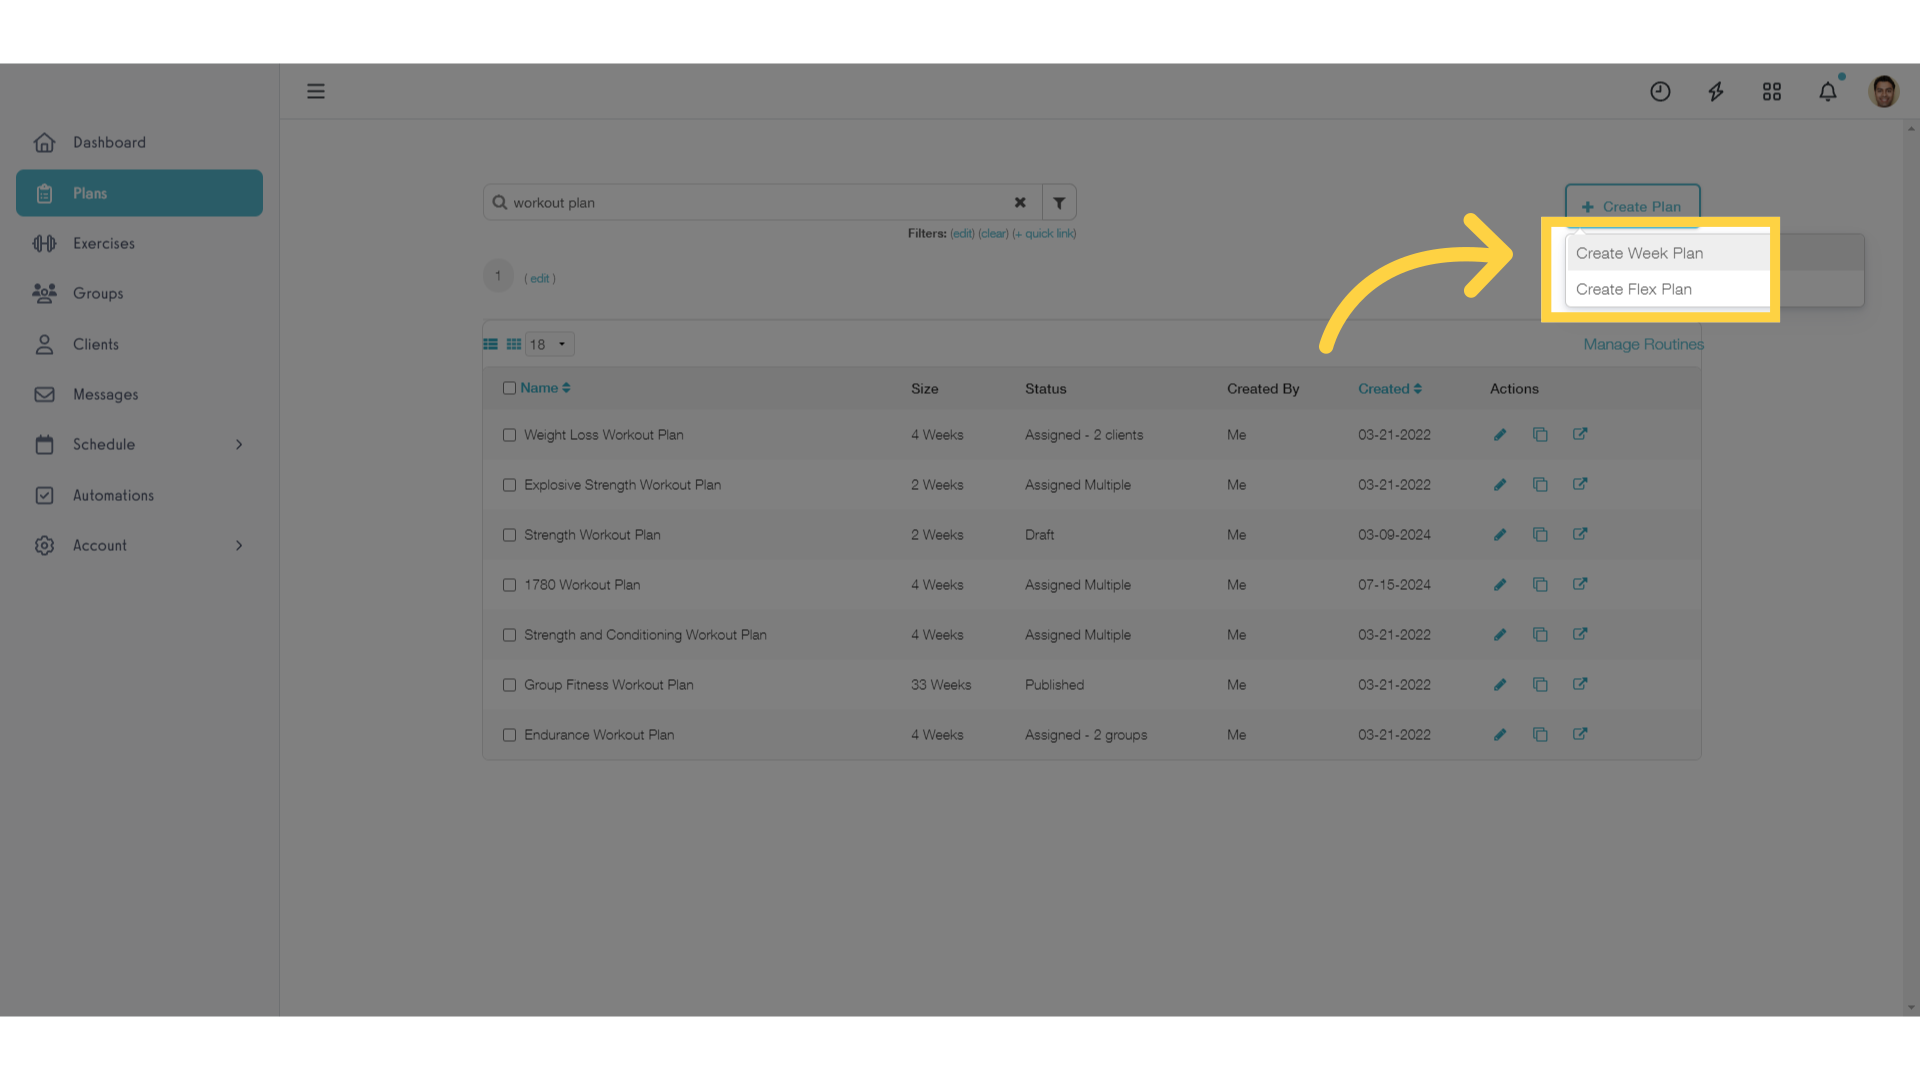
2. Choose the option for the plan you want to create.
Choose the option for the plan you want to create. A Week Plan follows the pattern of weeks and days per week, and your clients can start Week Plans to add them to their schedule in order. A Flex Plan allows you to add multiple workouts without setting a pre-determined schedule. Your clients can’t start Flex plans, but can select a single workout from the plan and log it or add it to their schedule any time.
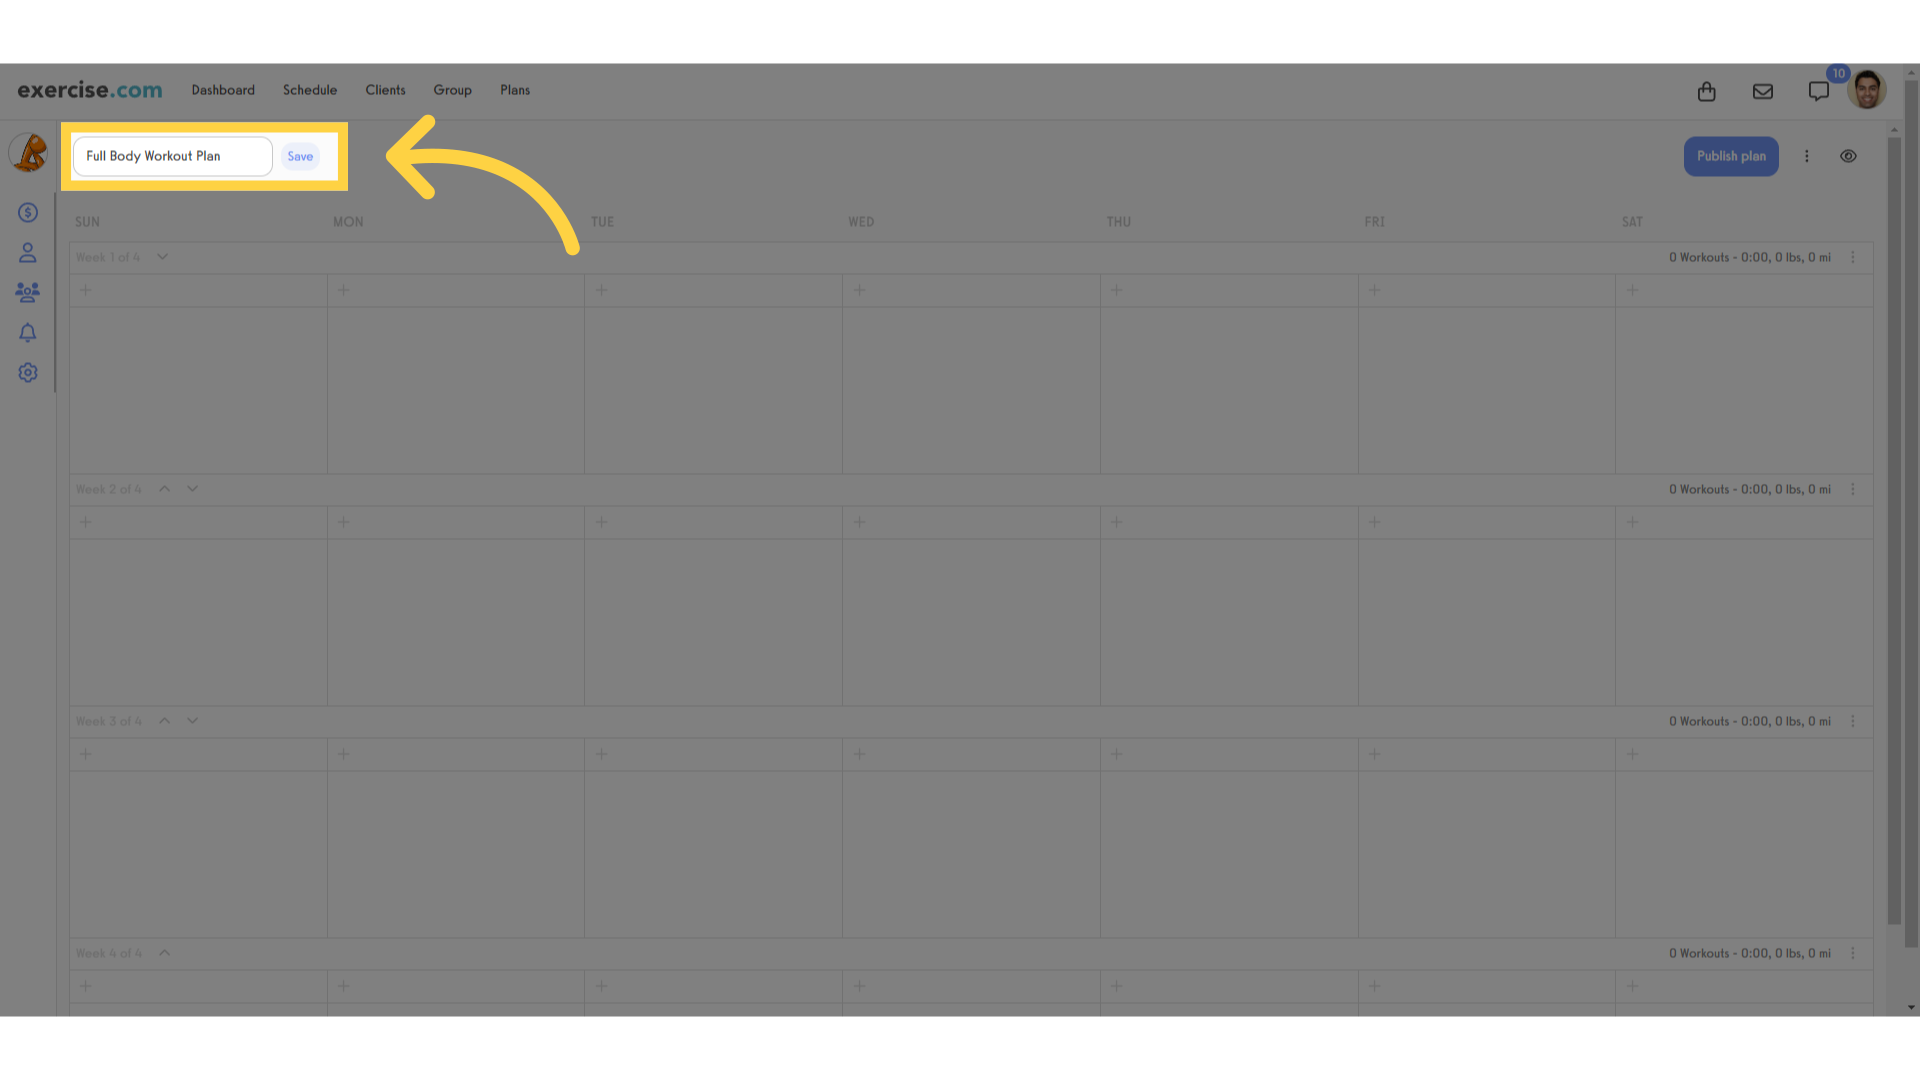
3. Give your new plan a descriptive title.
We recommend starting by giving your new plan a descriptive title.
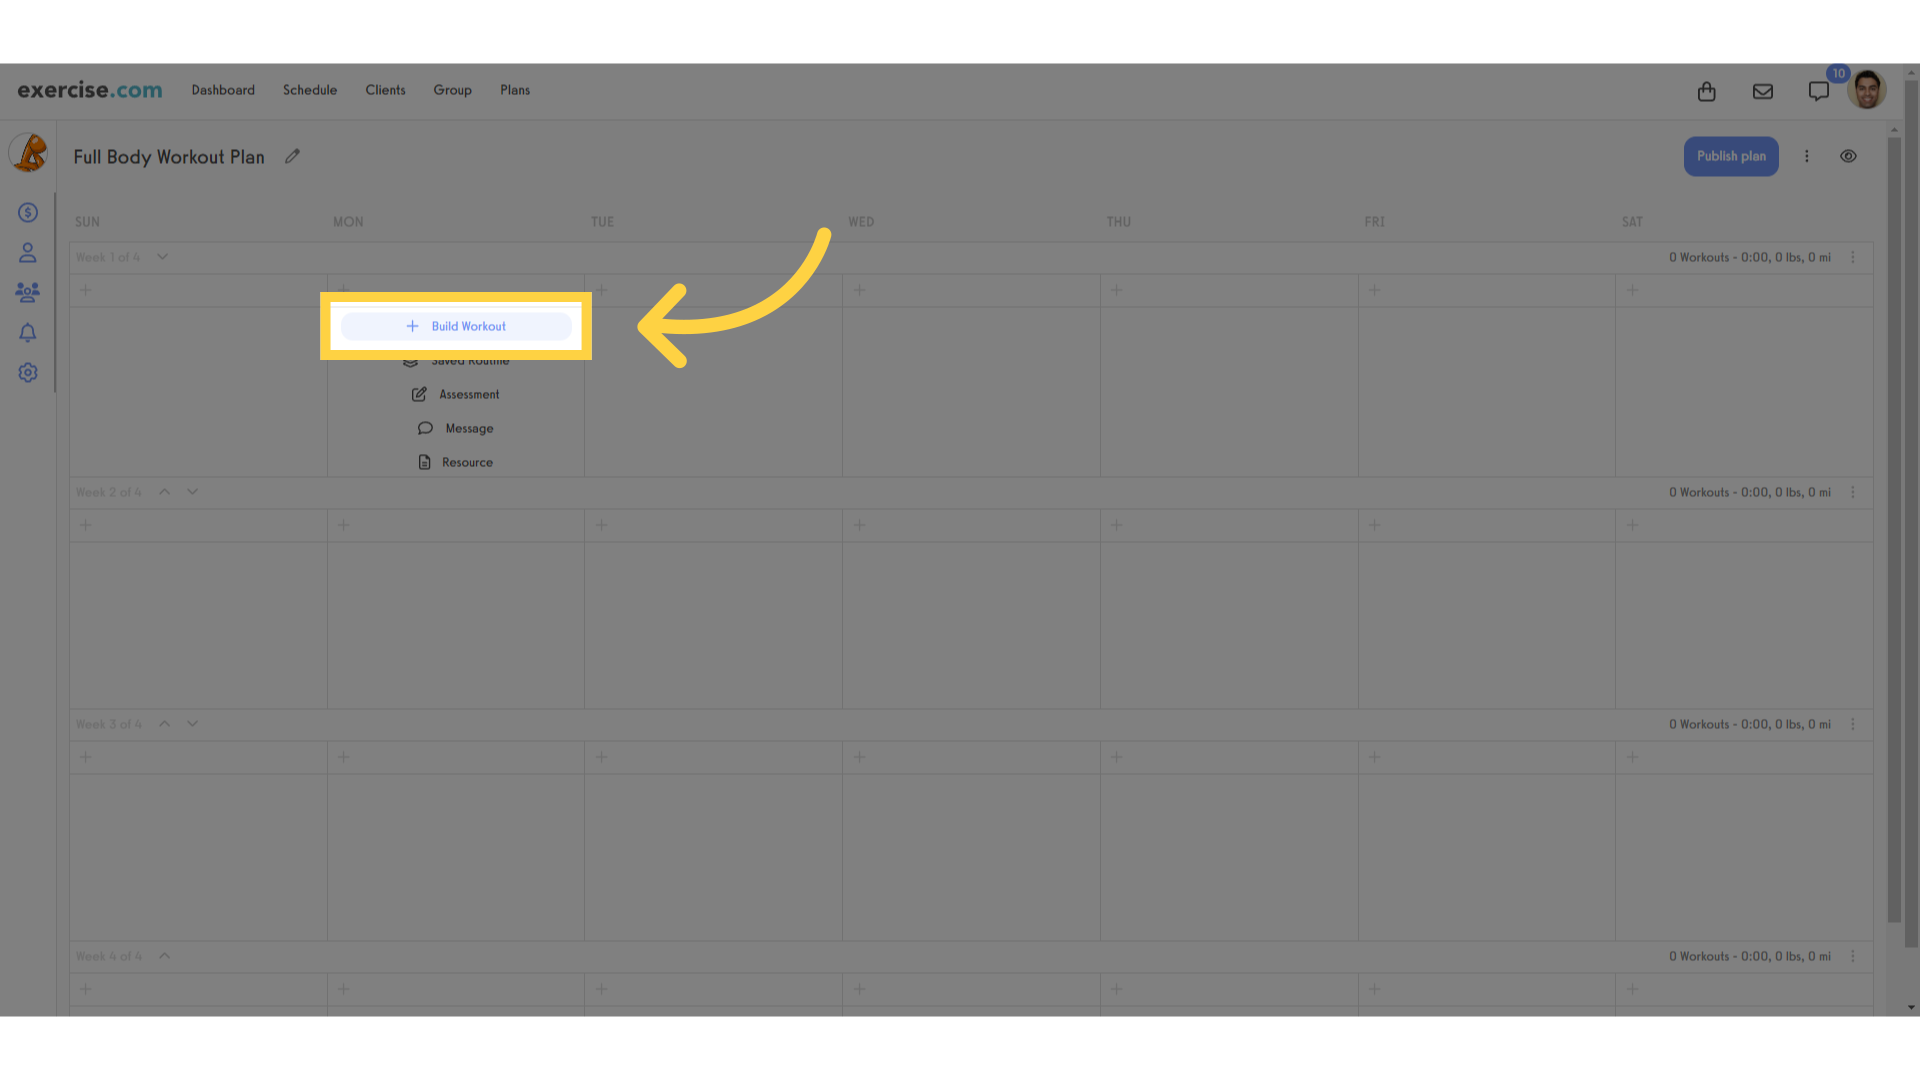
4. Click “Build Workout” on the day you want your first workout.
Then you can get started building a workout! You can click the + icon, or hover your mouse over any empty day and click the “Build Workout” button.
5. Add the name for this workout.
When adding a new workout, start by giving the workout a name.
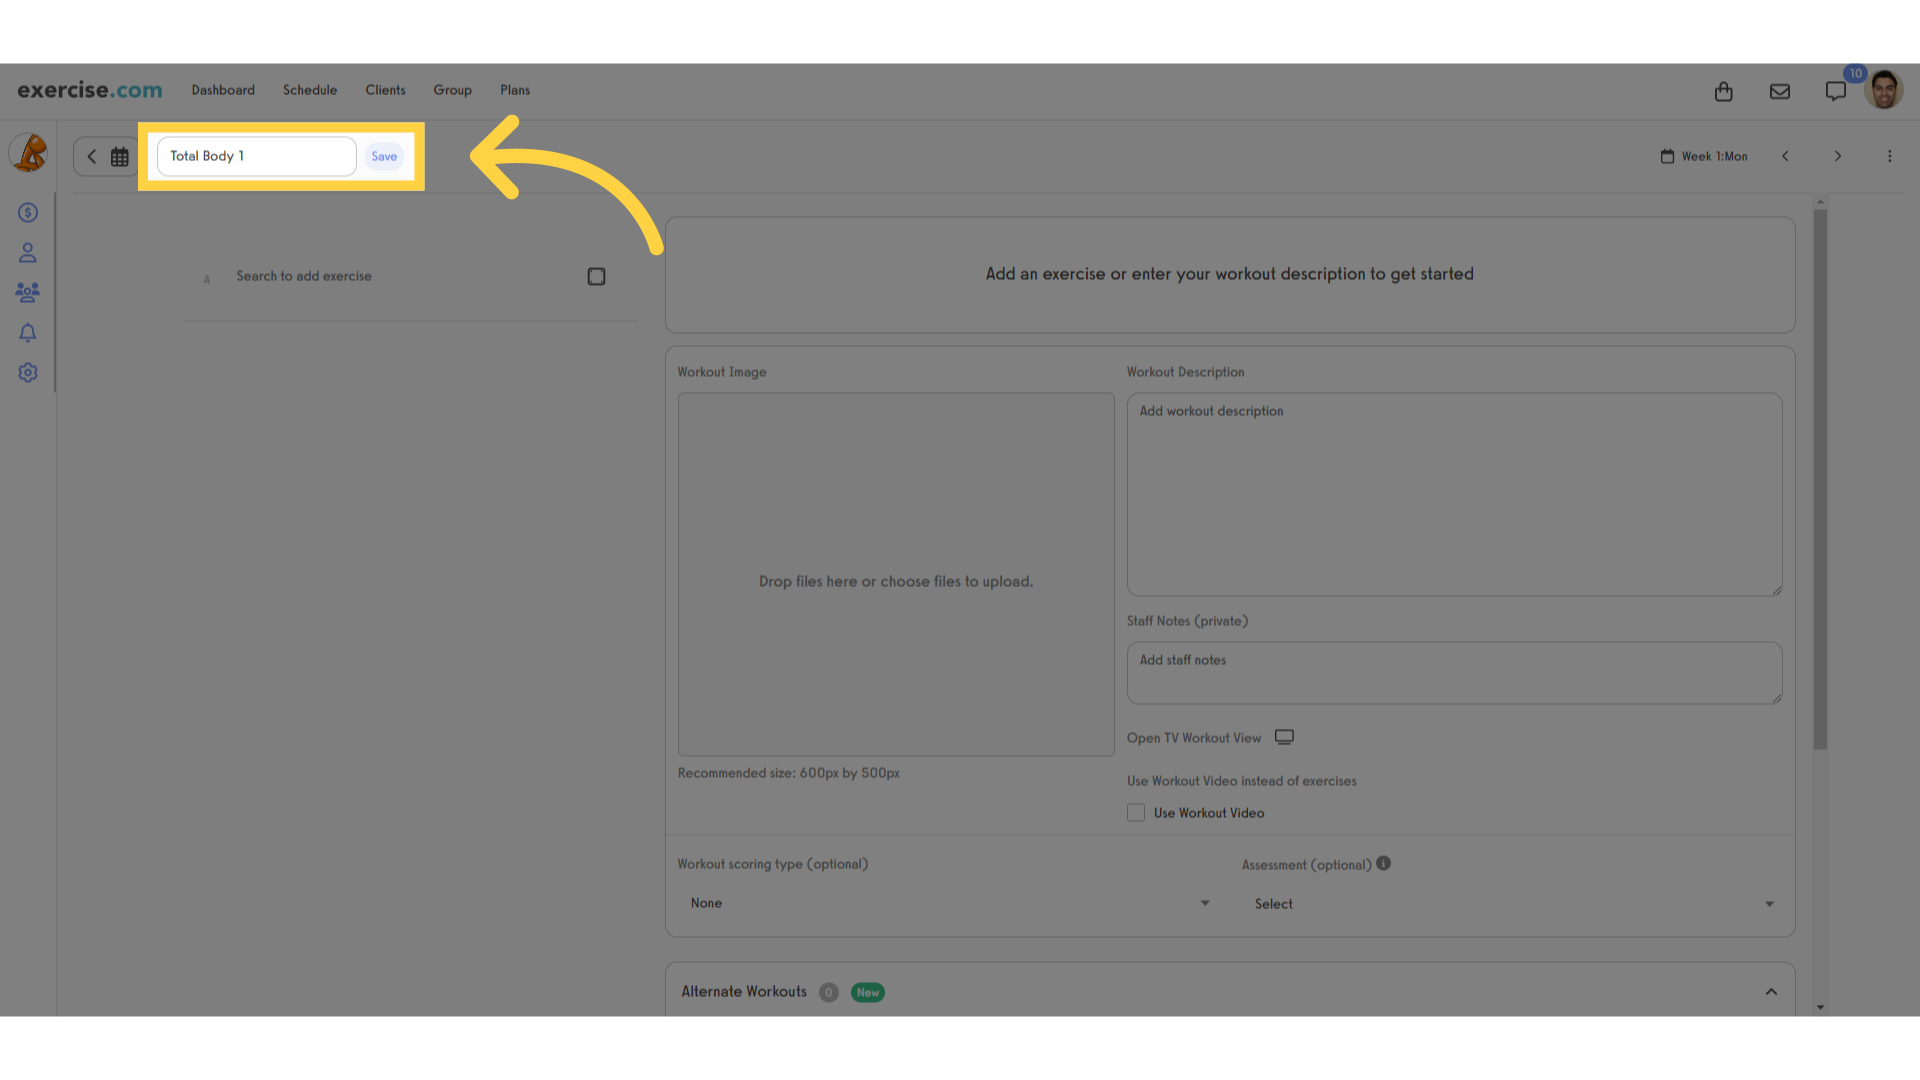
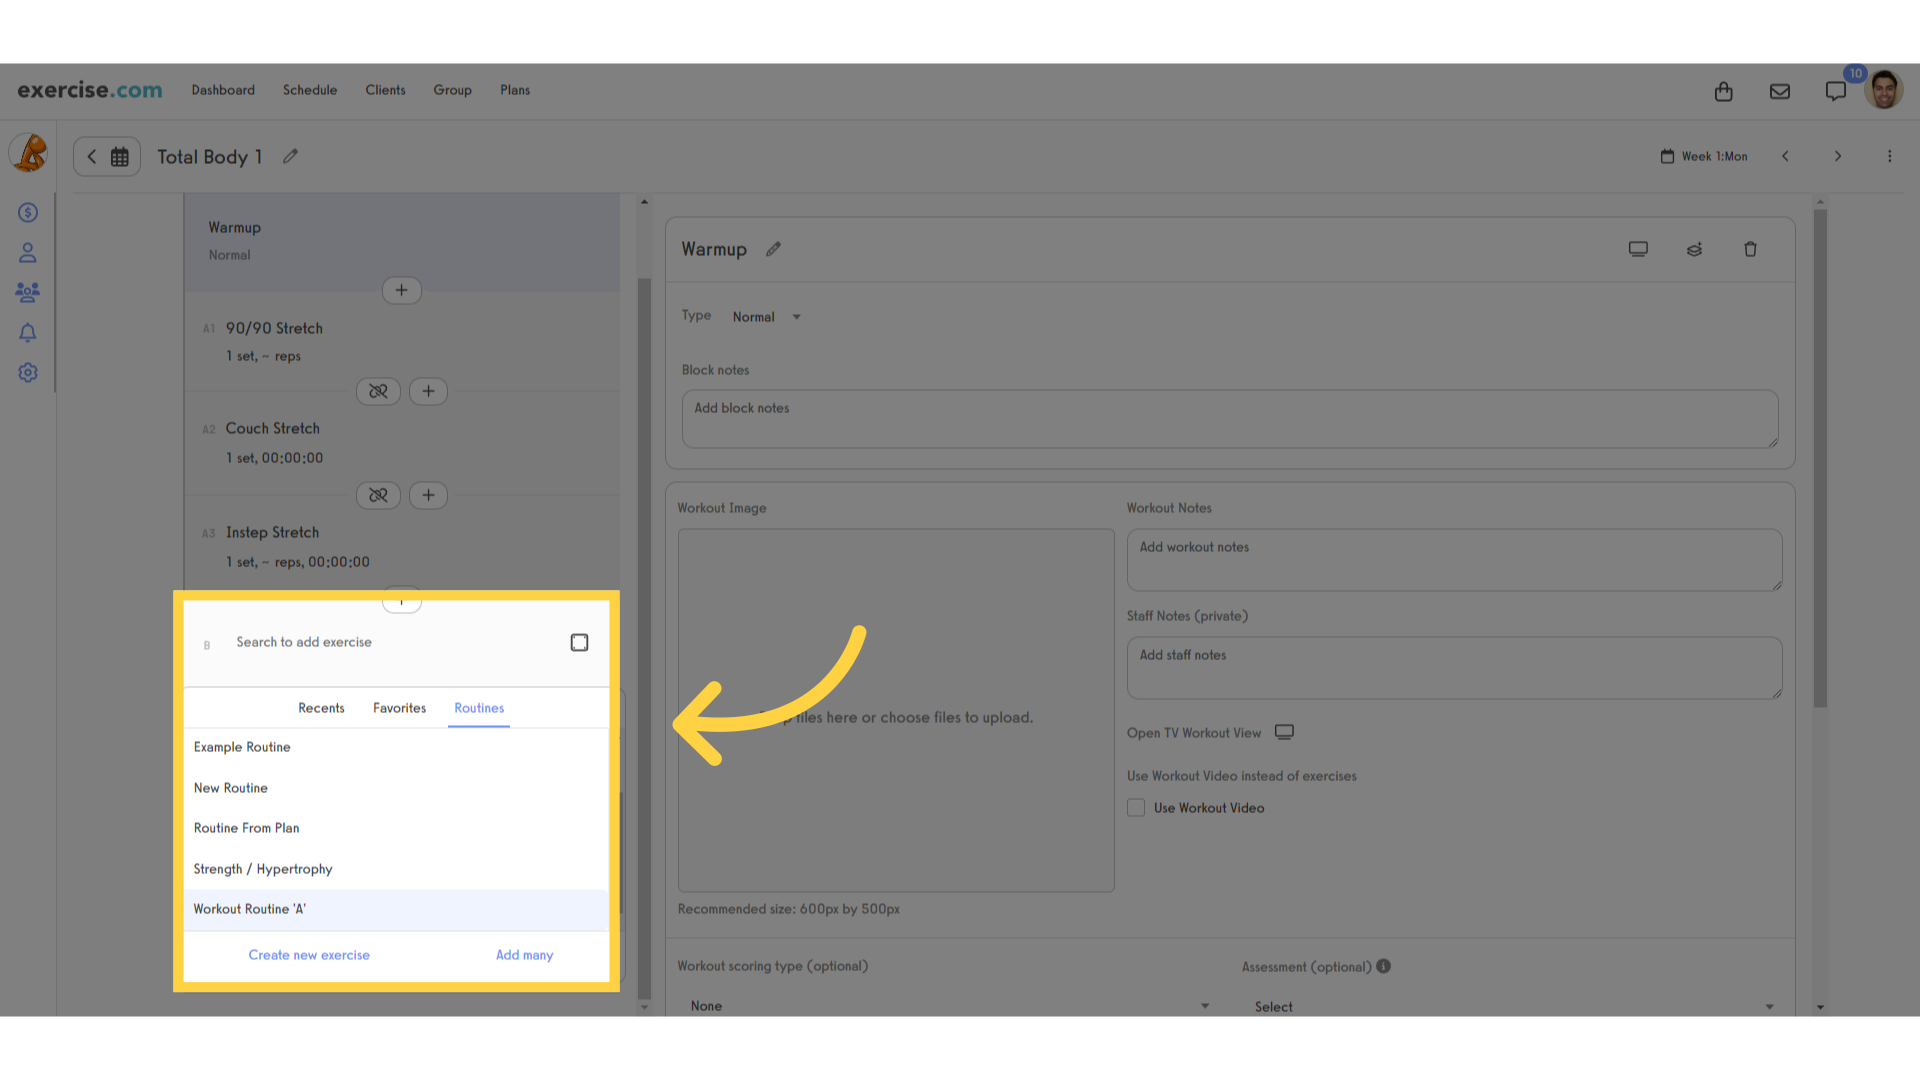
6. Use the search box to add exercises or entire routines.
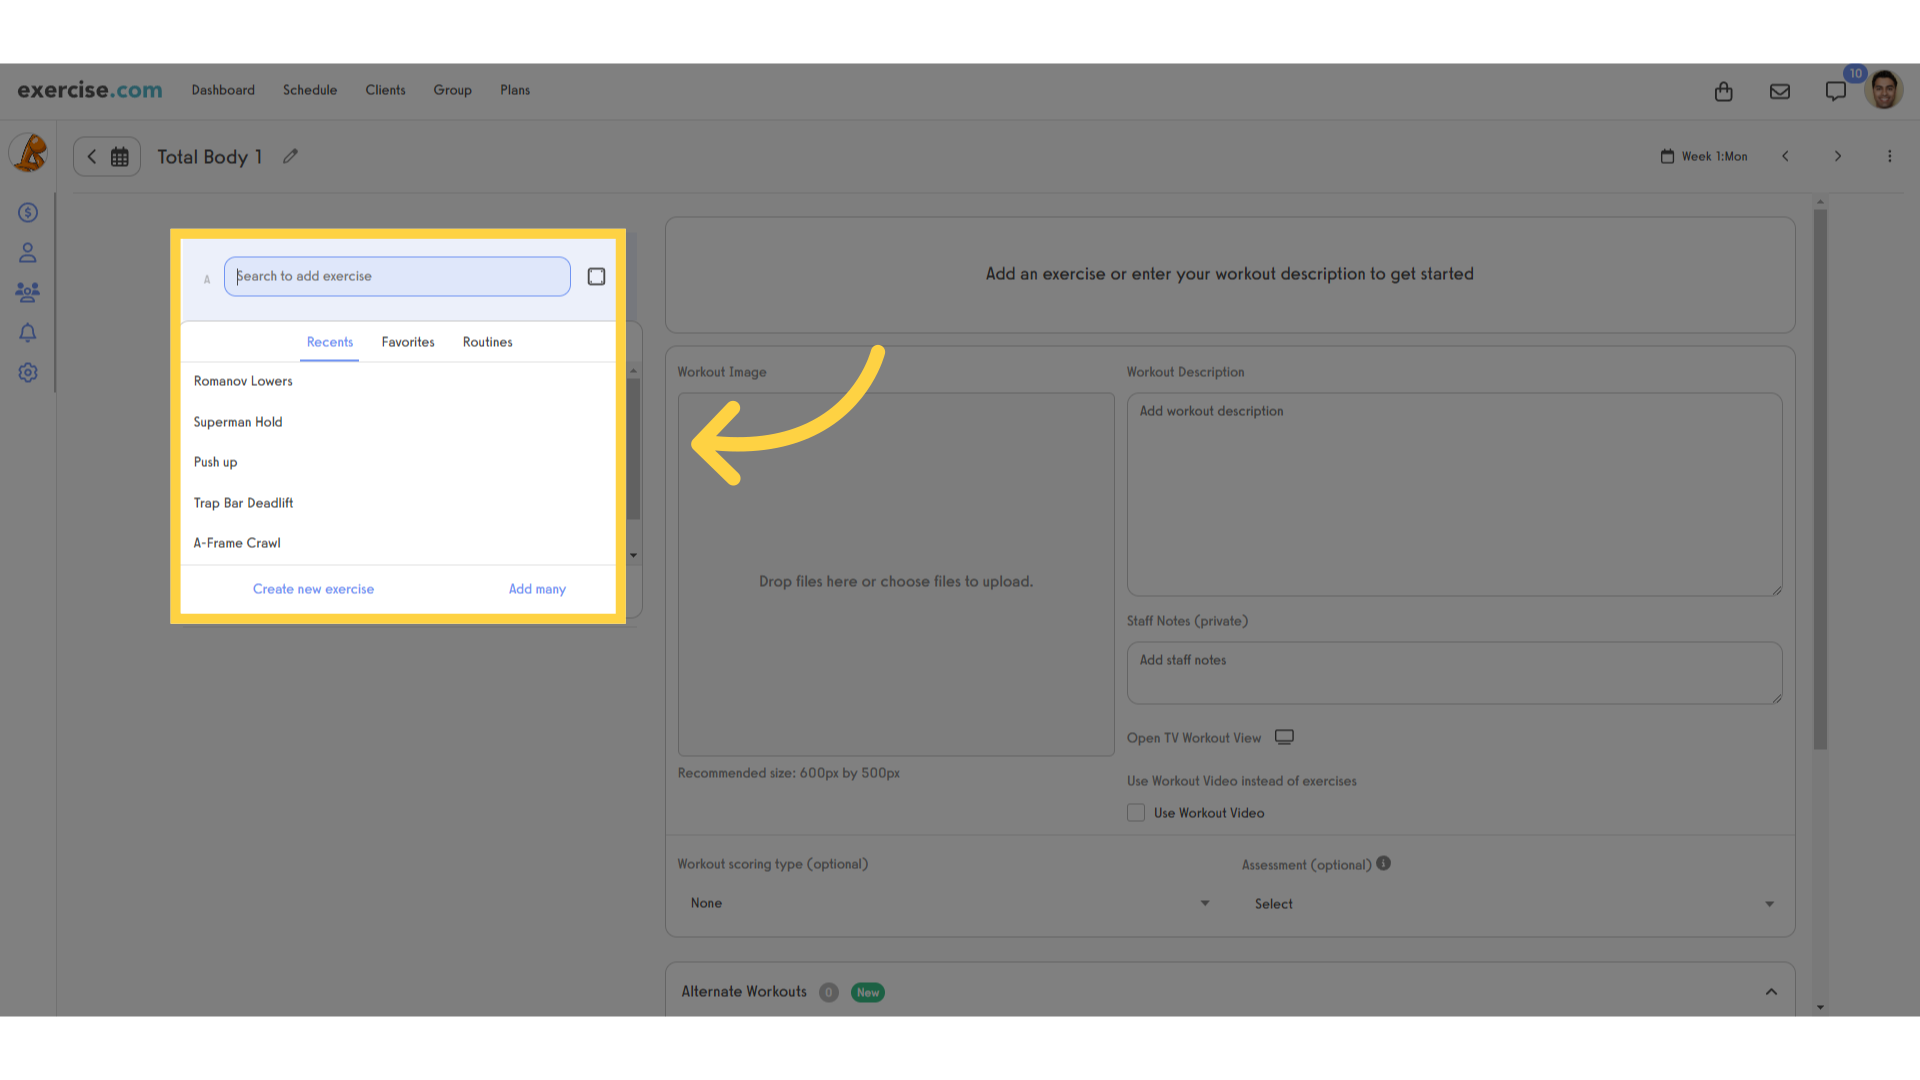
Use the search box to quickly add exercises or entire routines. Routines can be a nice shortcut if you have longer warm-ups, cooldowns, or blocks of exercises that you frequently use in your programming.
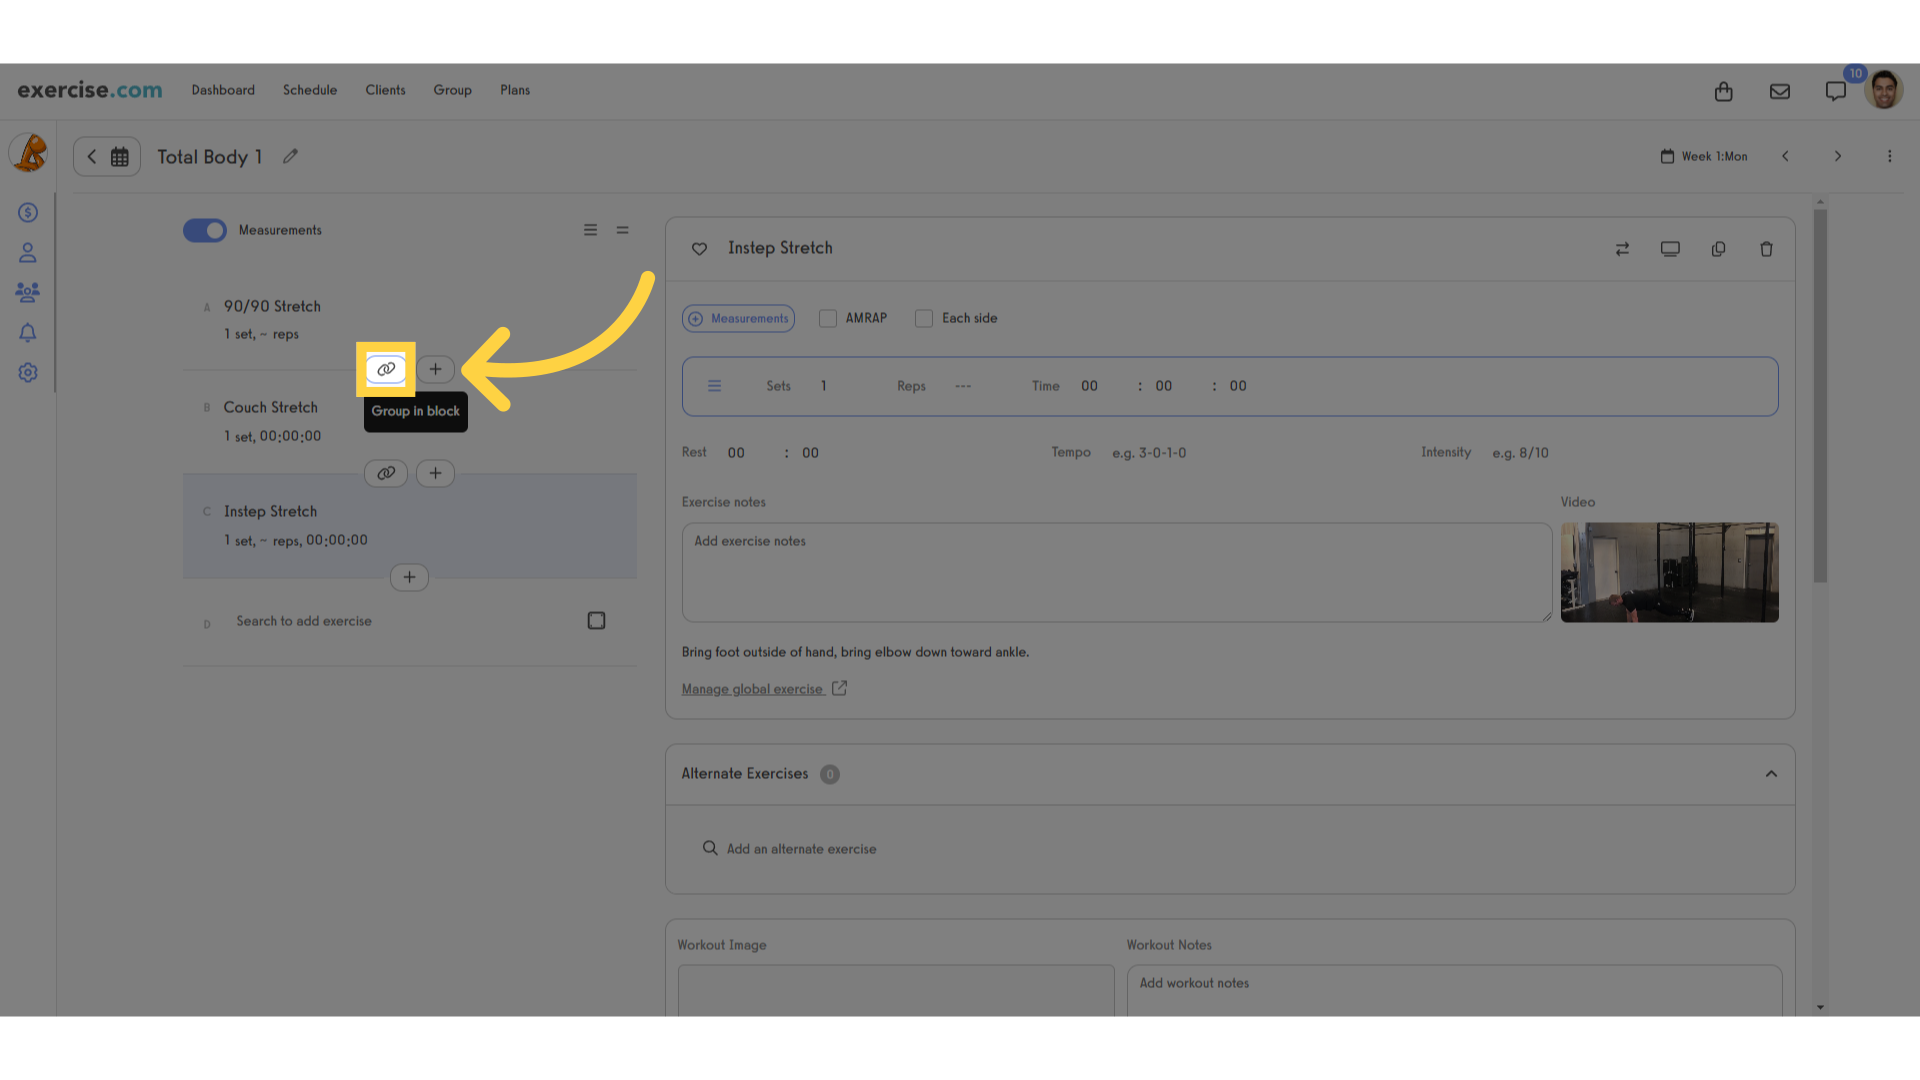
7. You can use the link buttons to group exercises into blocks.
We’ve added a few stretches to this example workout. We’ll click the link buttons to group exercises into a single block.
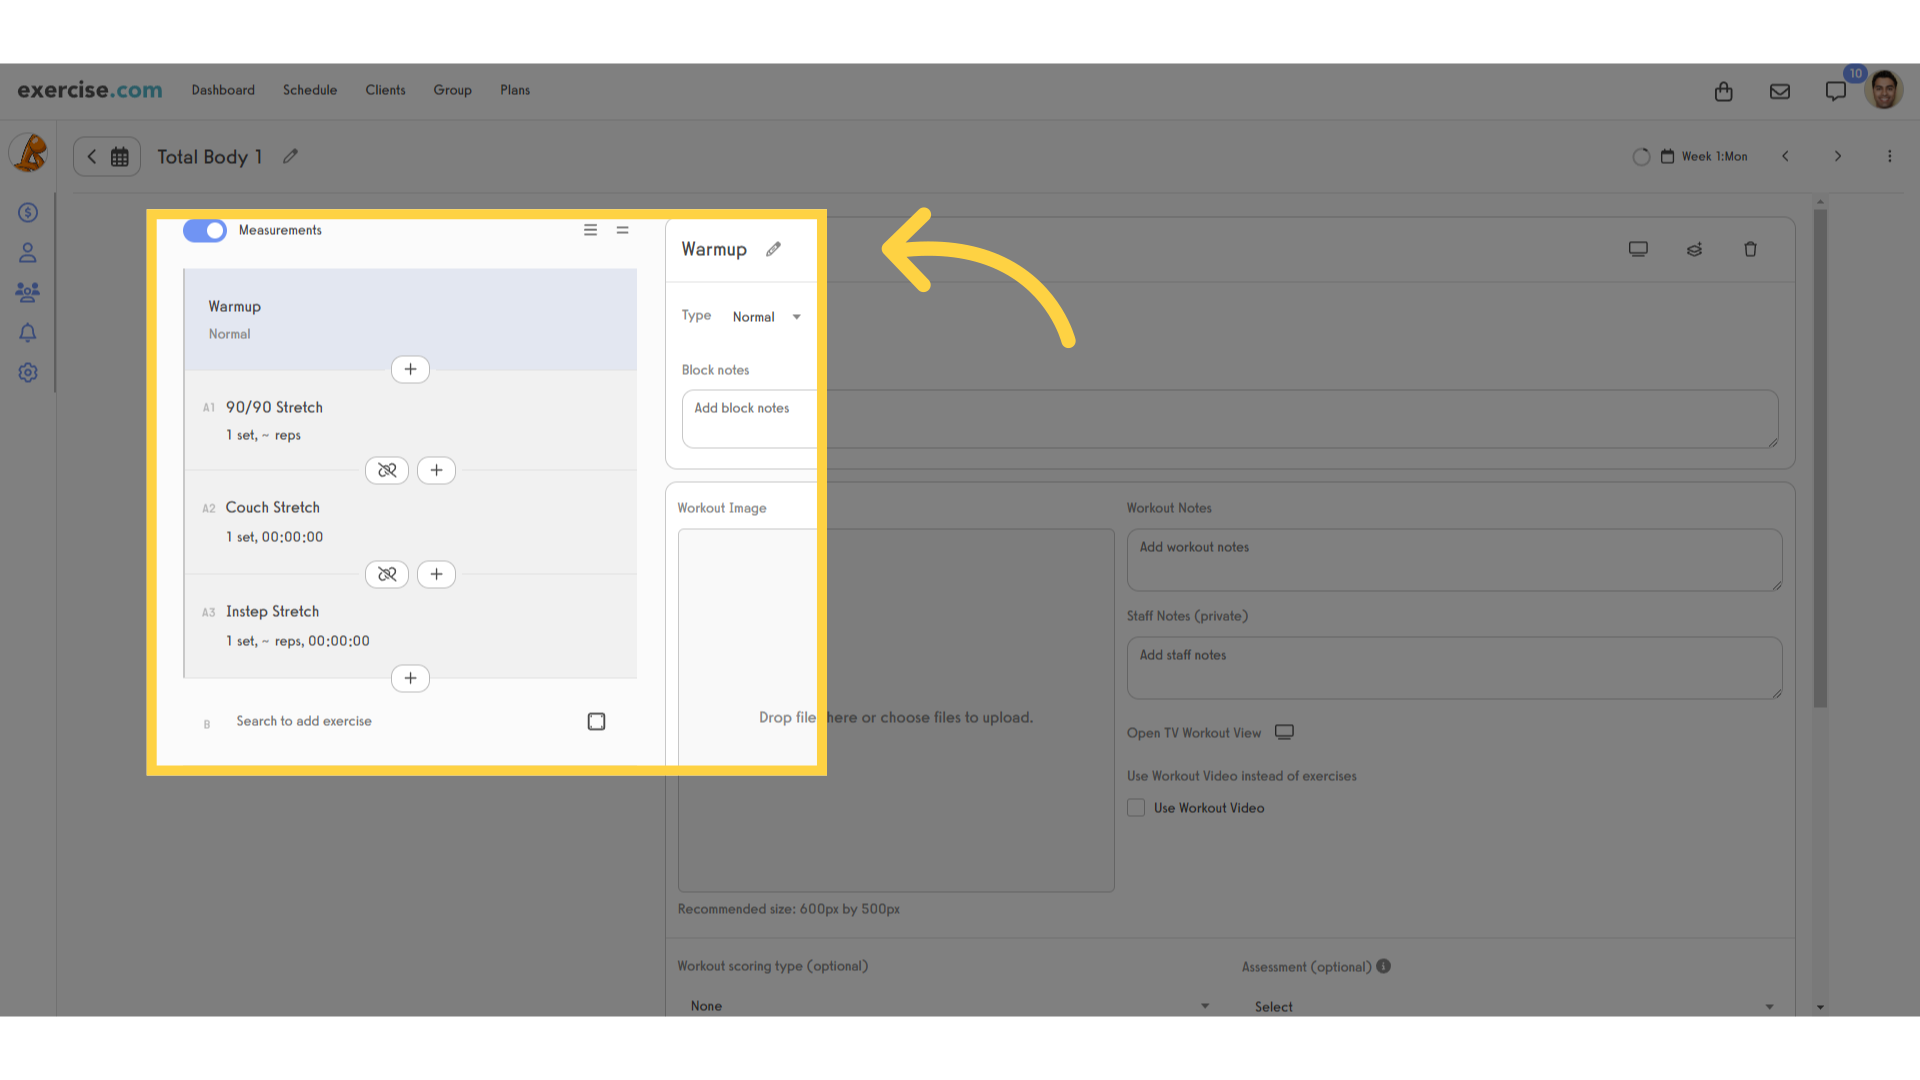
8. You can customize your block titles.
When you’re adding blocks, you can add custom block titles to keep things organized. Your customers will see the block titles in their app workouts. We’ve named our example block, “Warmup” in this example.
9. You can add a Routine to add many exercises at once.
Routines allow you to add many exercises at once.
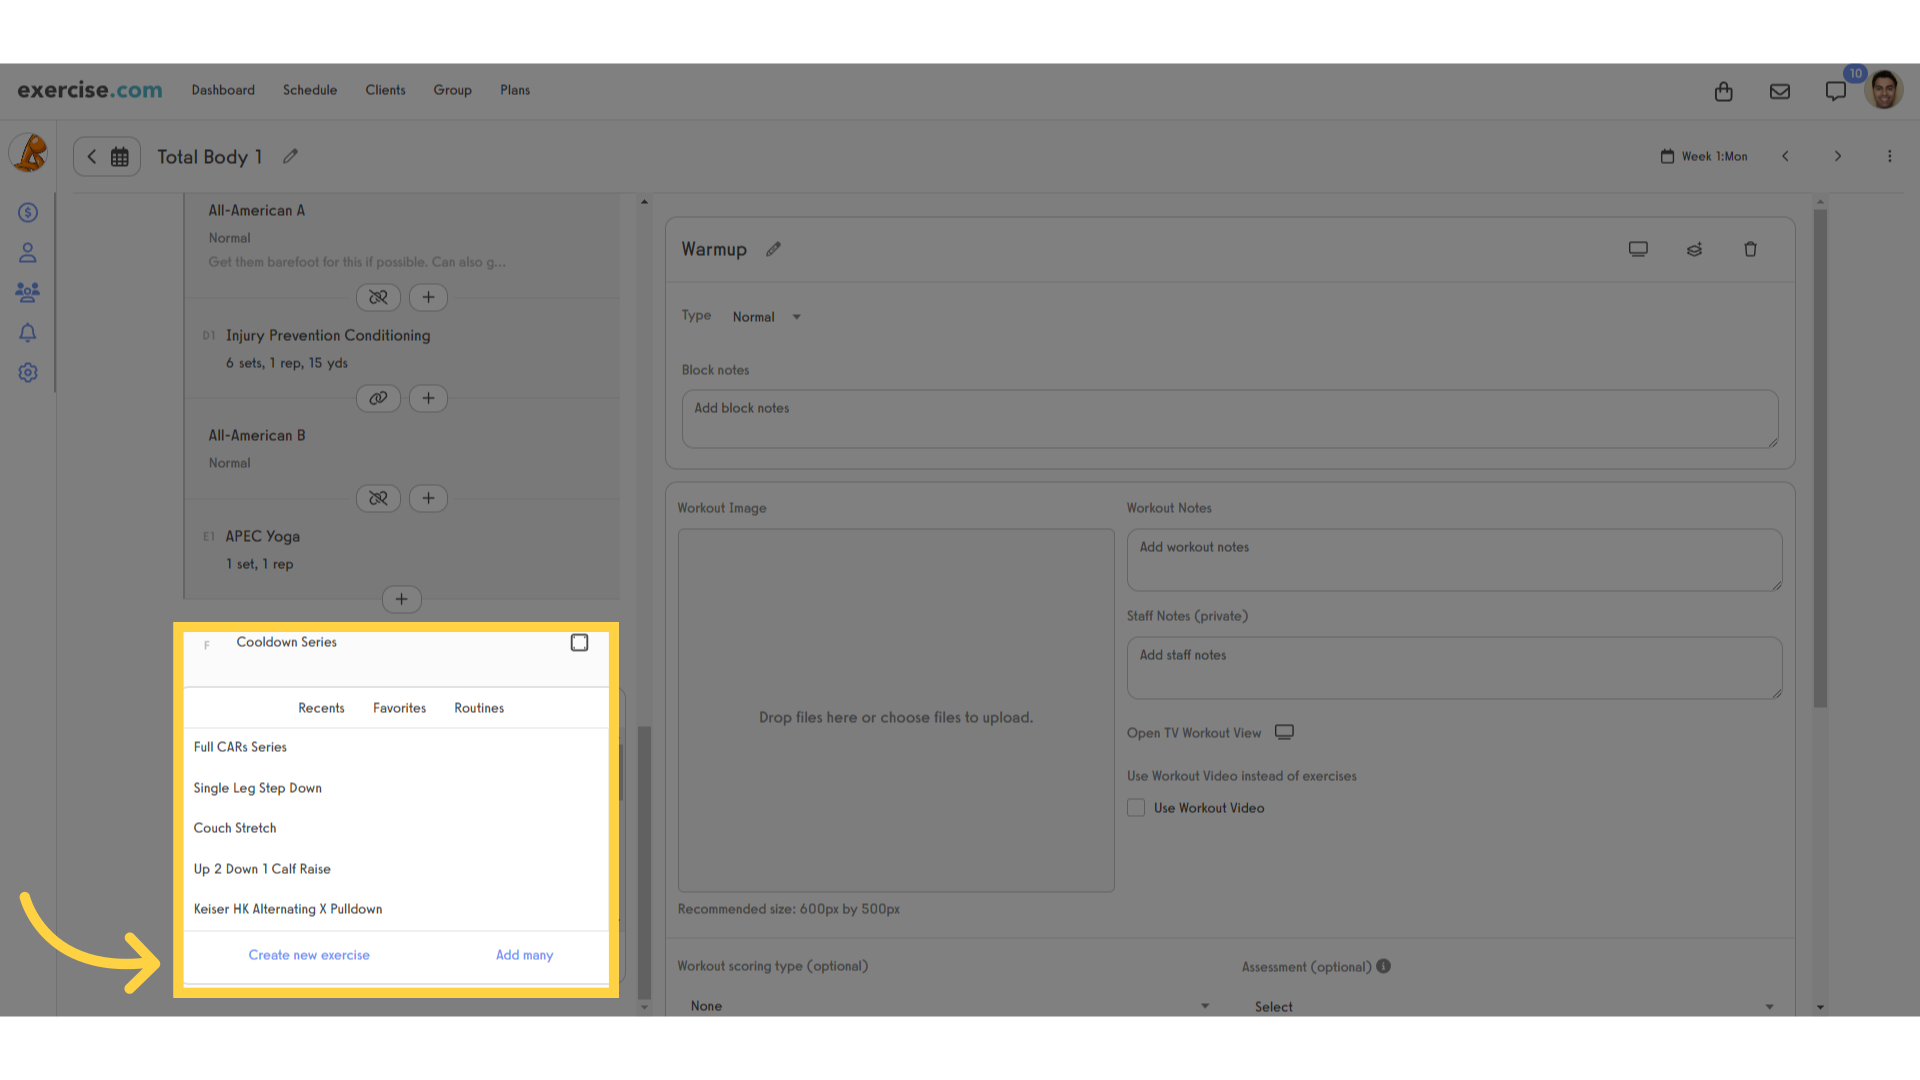
10. You can create new exercises without leaving this workout
If you need an exercise you haven’t added to your library yet, you can click “Create new exercise” in your exercise search results.
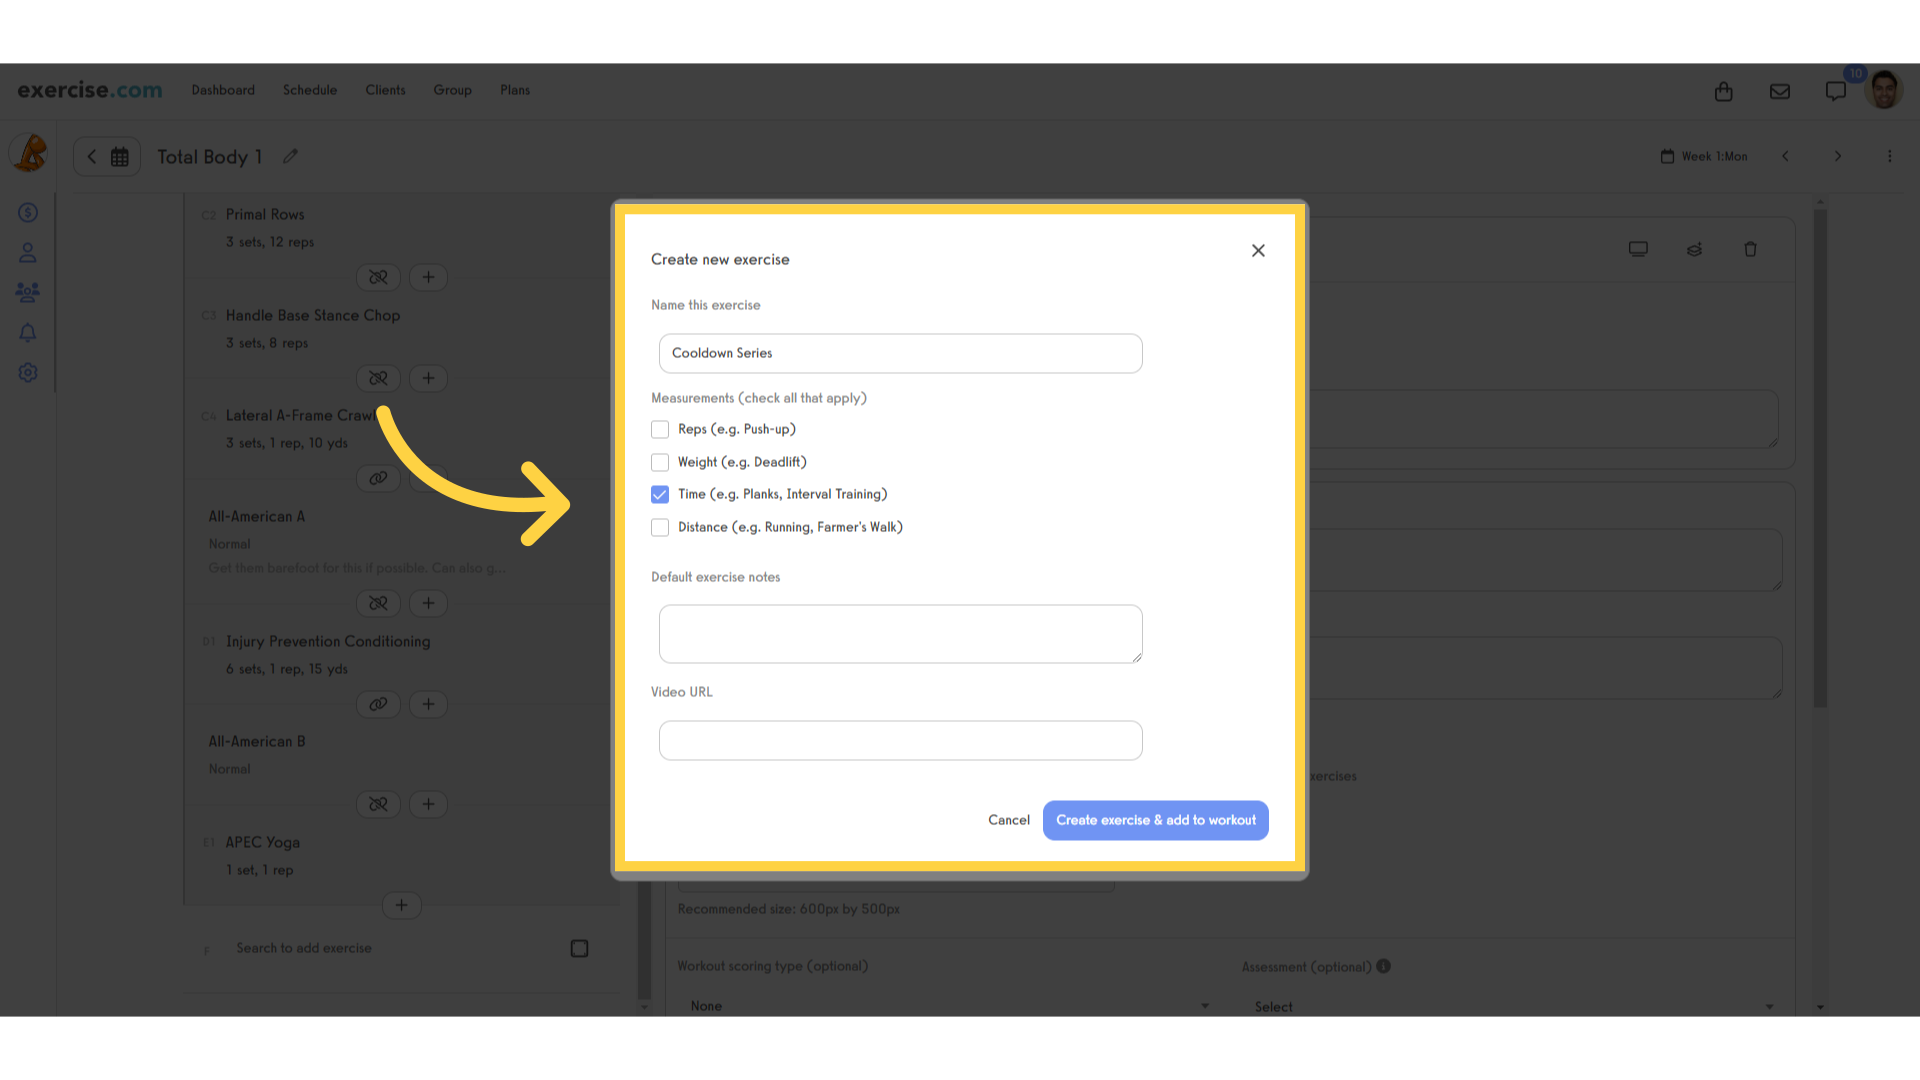
11. Set up the measurements you want to use, then click the button to save this exercise and add it to the workout.
To create a new exercise, select the measurements you want to track, then click the button to save this exercise and add it to the workout.
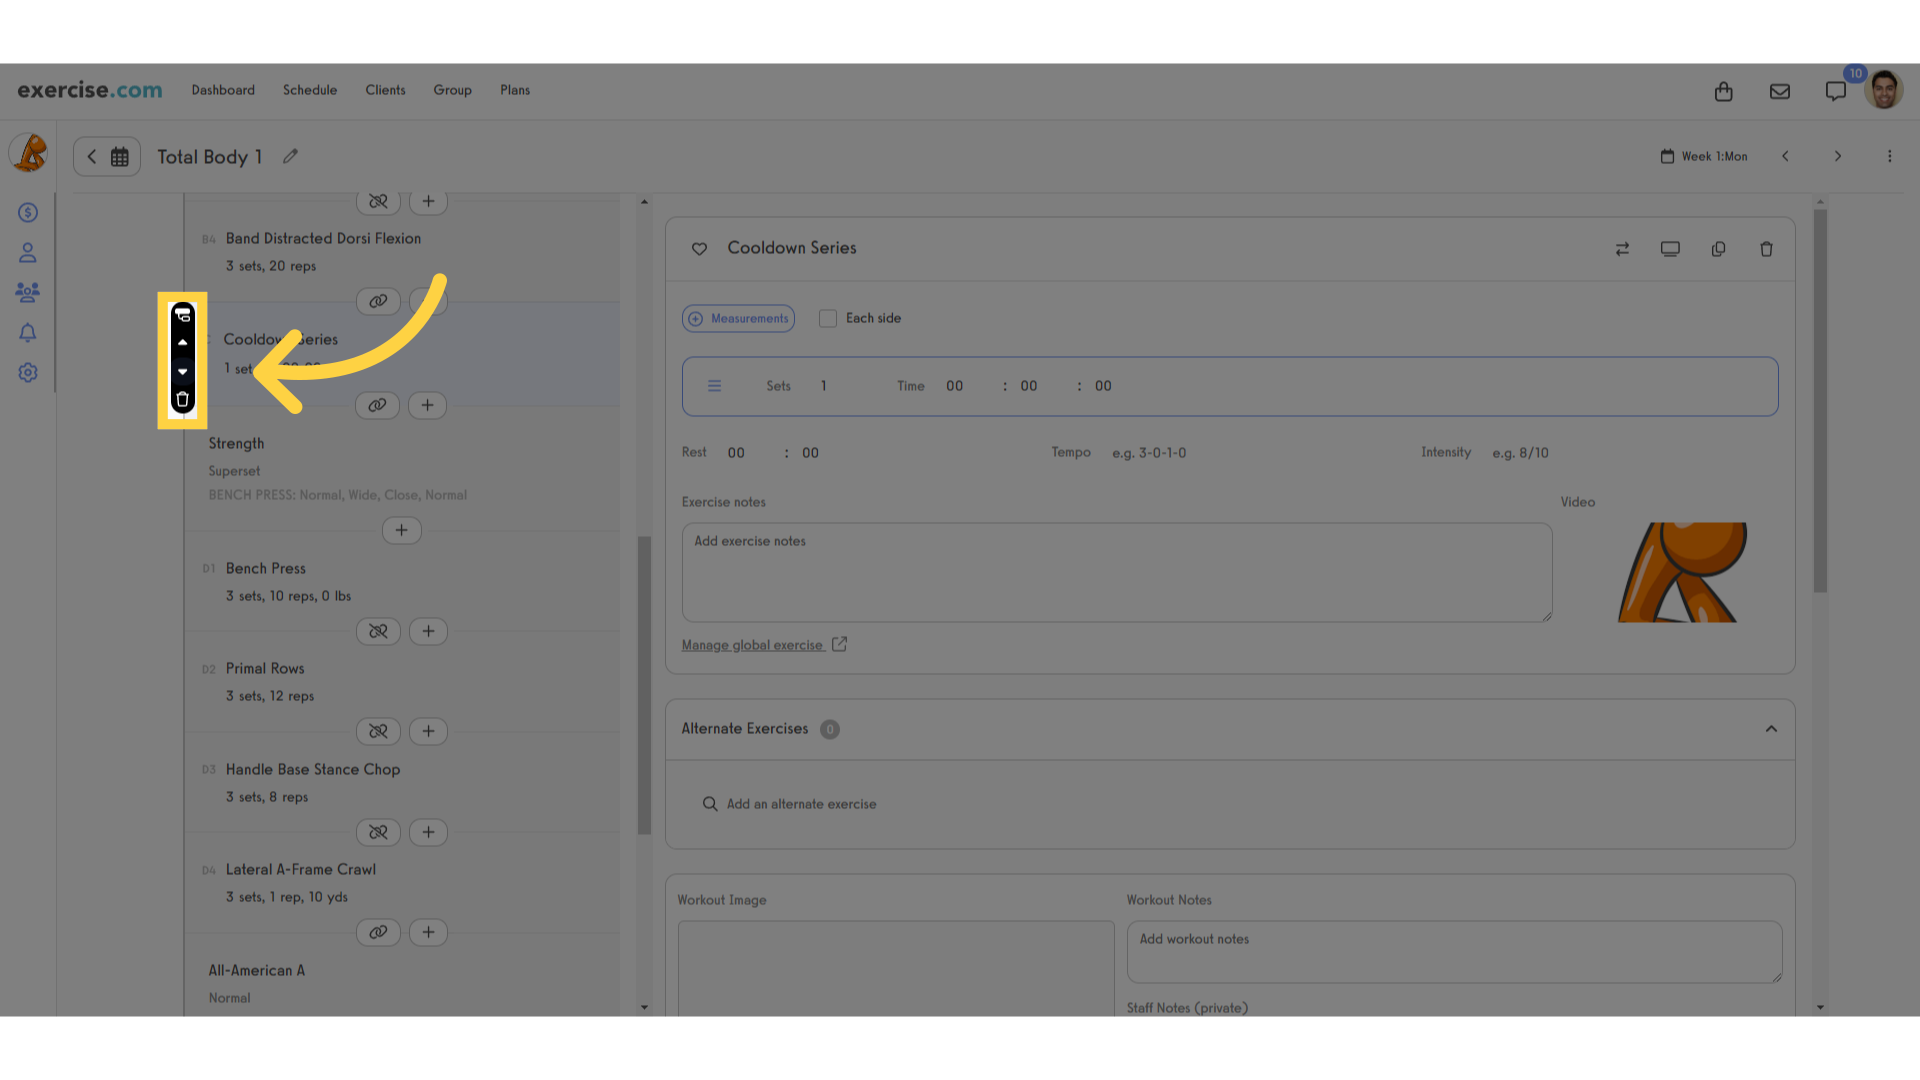
12. Hover over an exercise or block in the workout to see the quick actions.
Hover over an exercise, or block in the workout to see the quick actions that are available. You can convert one exercise into a block, move an exercise up or down within a workout, or delete exercises and blocks as needed.
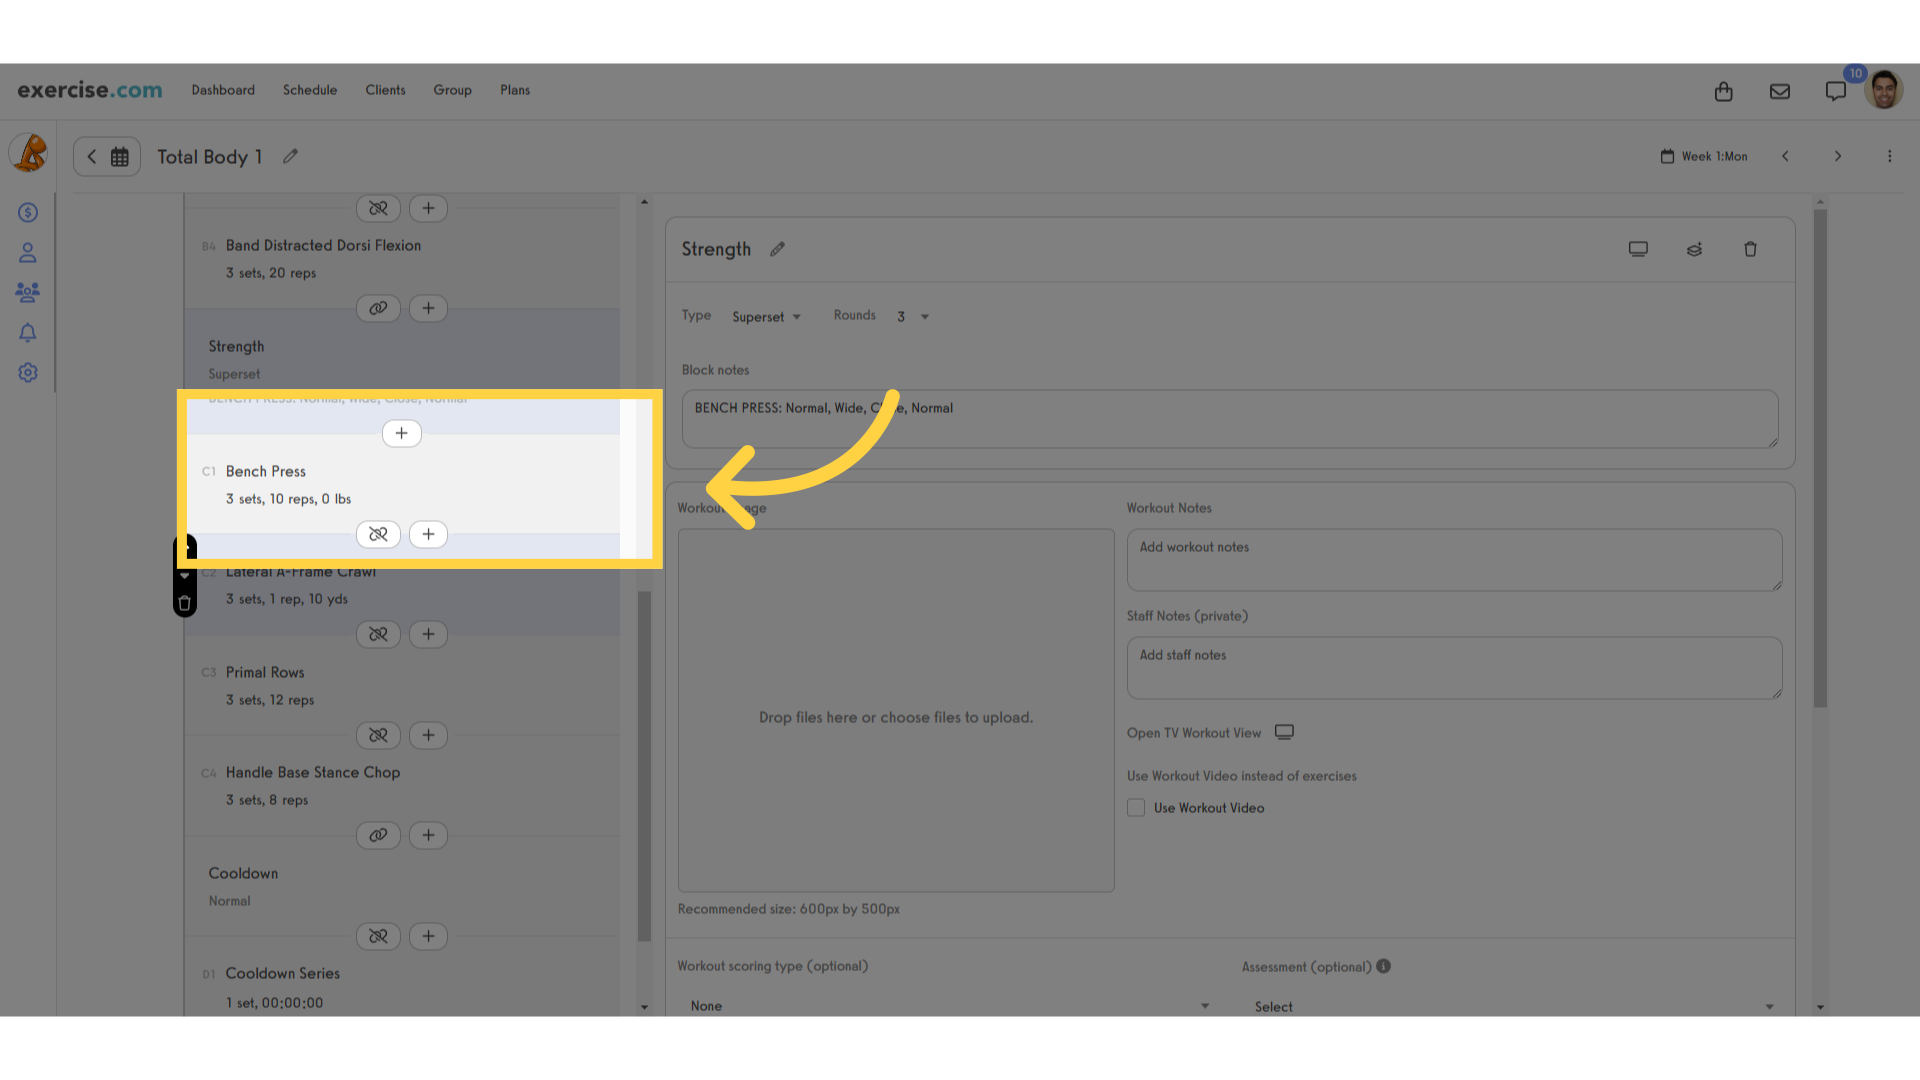
13. Click an exercise in the workout to edit the exercise details.
Click an exercise in the workout to edit the exercise details.
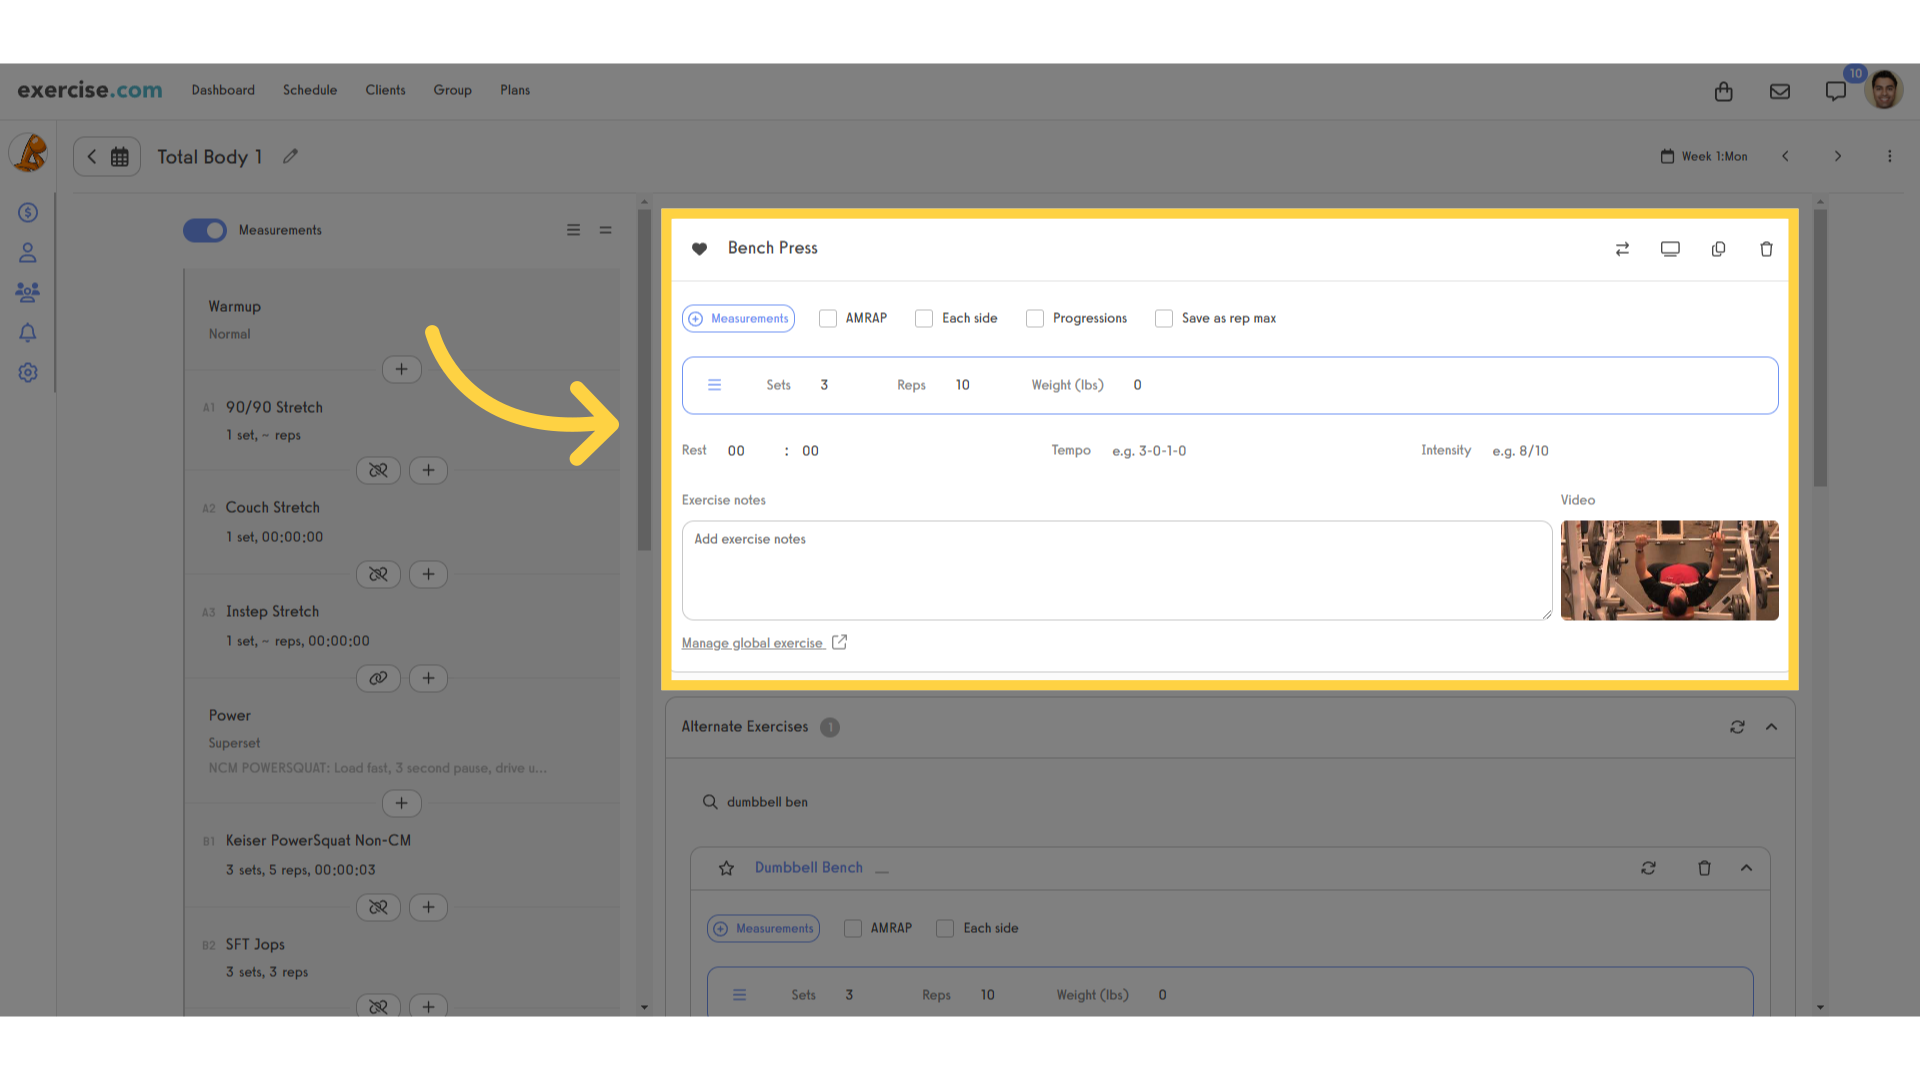
14. Edit your exercise details with sets, reps, weight, or time requirements.
You can adjust the measurements for any exercise including sets, reps, weight, or time requirements. You can also specify rest time, tempo, and intensity. Any exercise notes that you add will be displayed when your client is going to enter their workout data for that exercise.
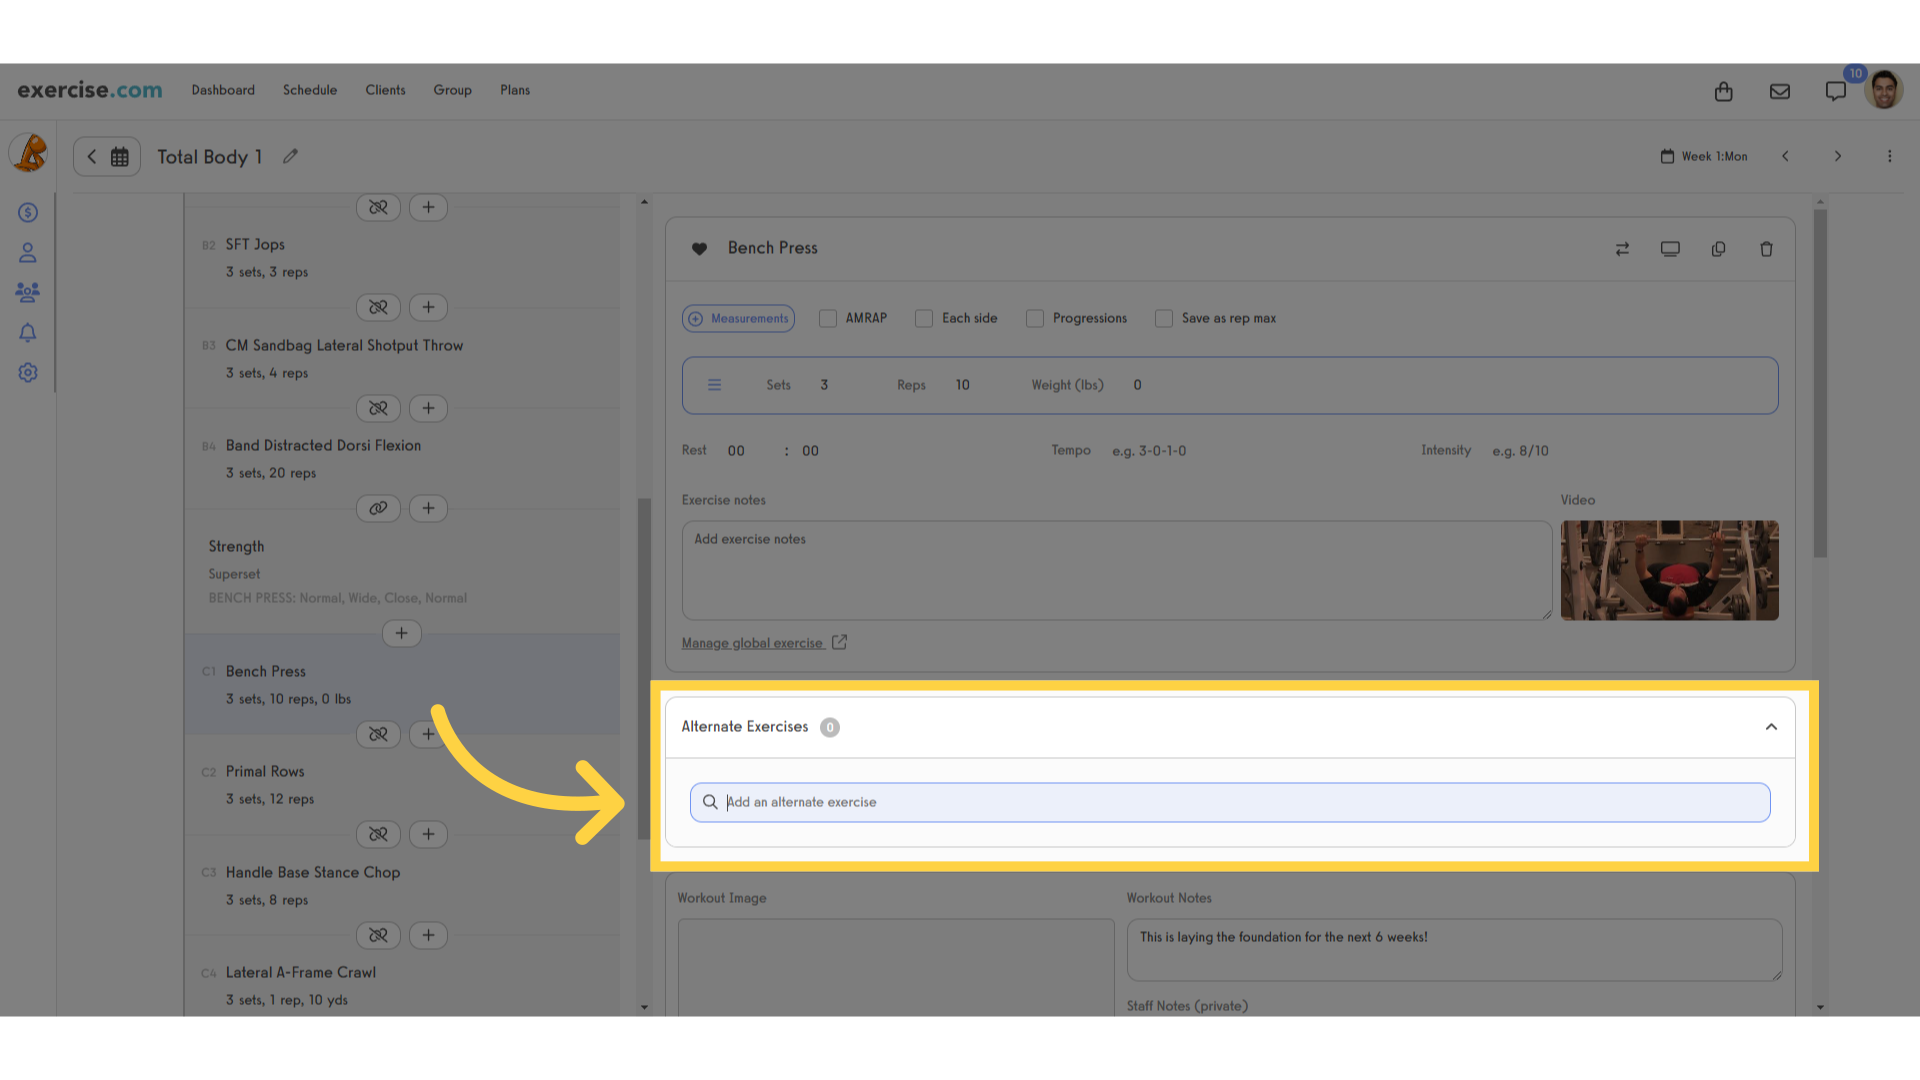
15. Use Alternate Exercises to give your clients different exercises to choose from.
You can even add Alternate Exercises to give your clients different exercises to choose from, such as an easier variation, or one that doesn’t require weights.
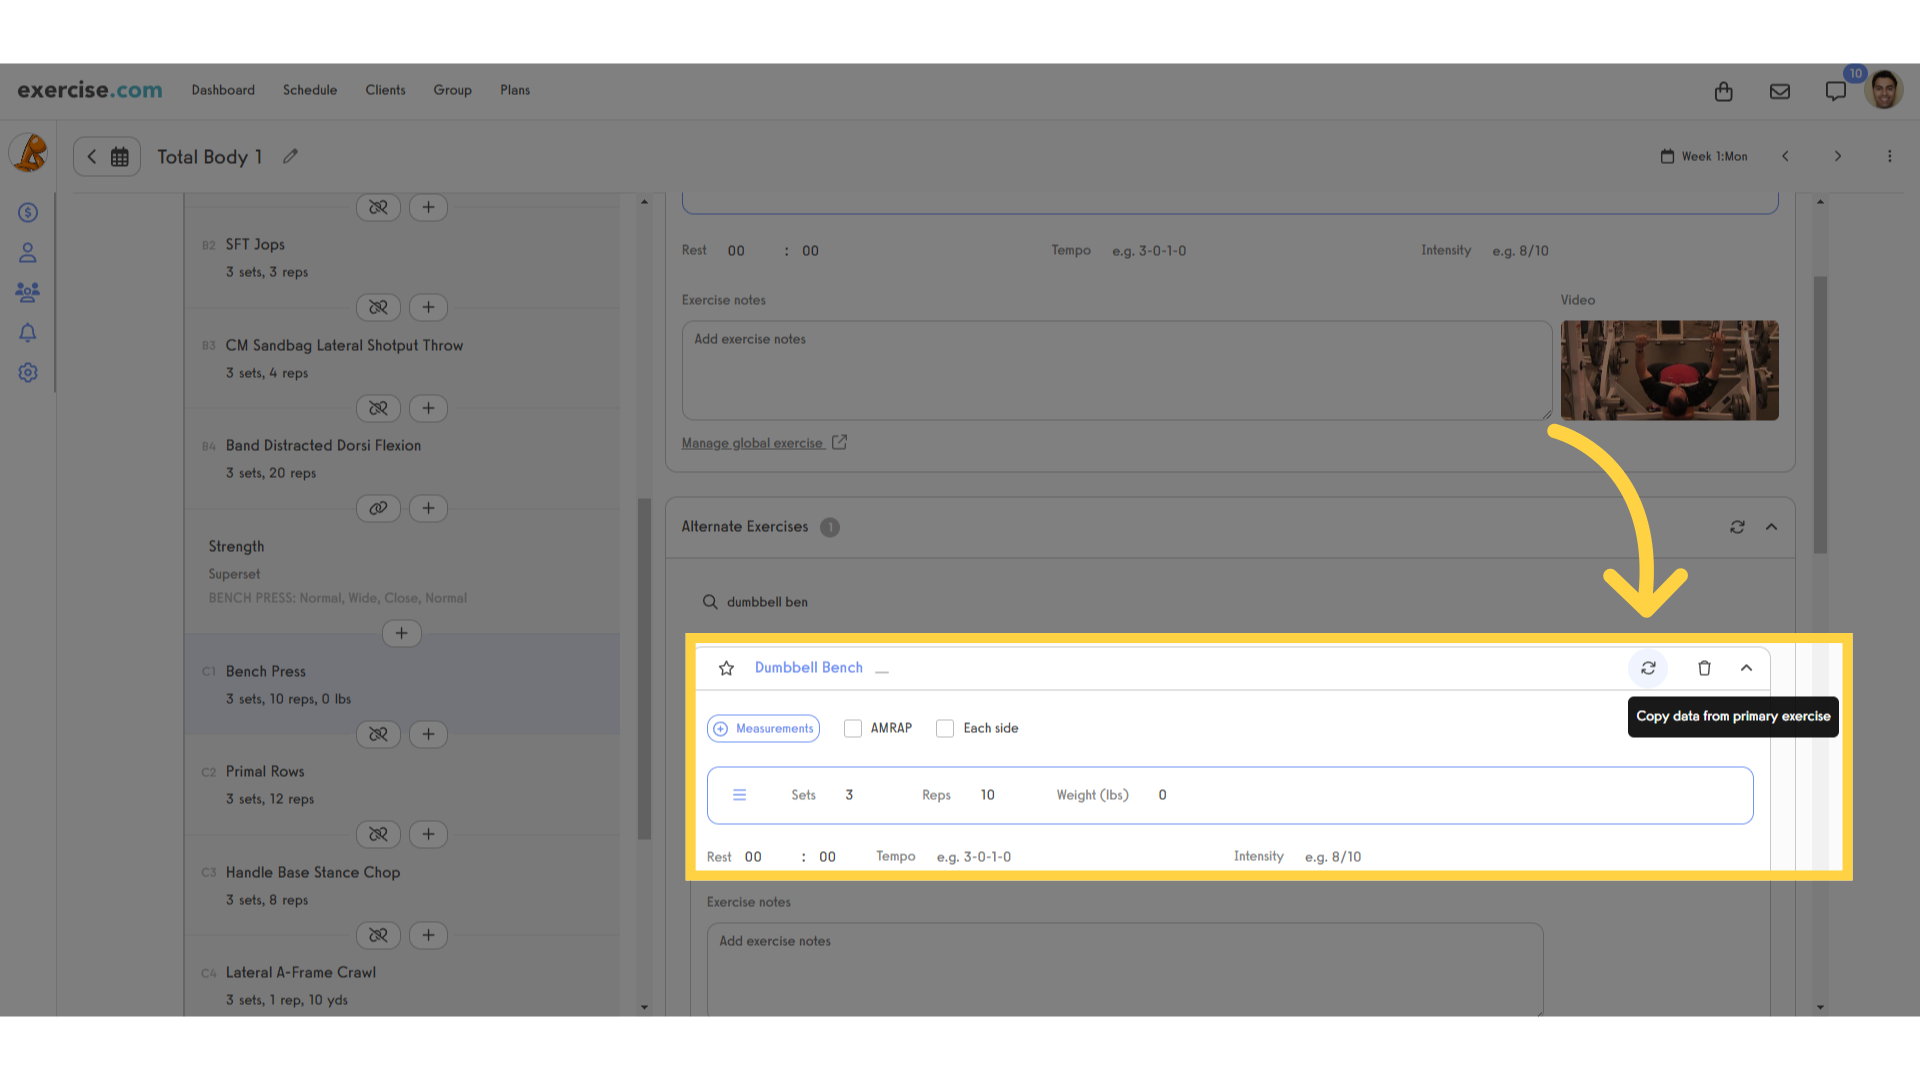
16. Once you choose the alternate, you can copy settings from the original exercise in one click.
Once you choose the alternate exercise that you want, you can copy settings from the original exercise in one click.
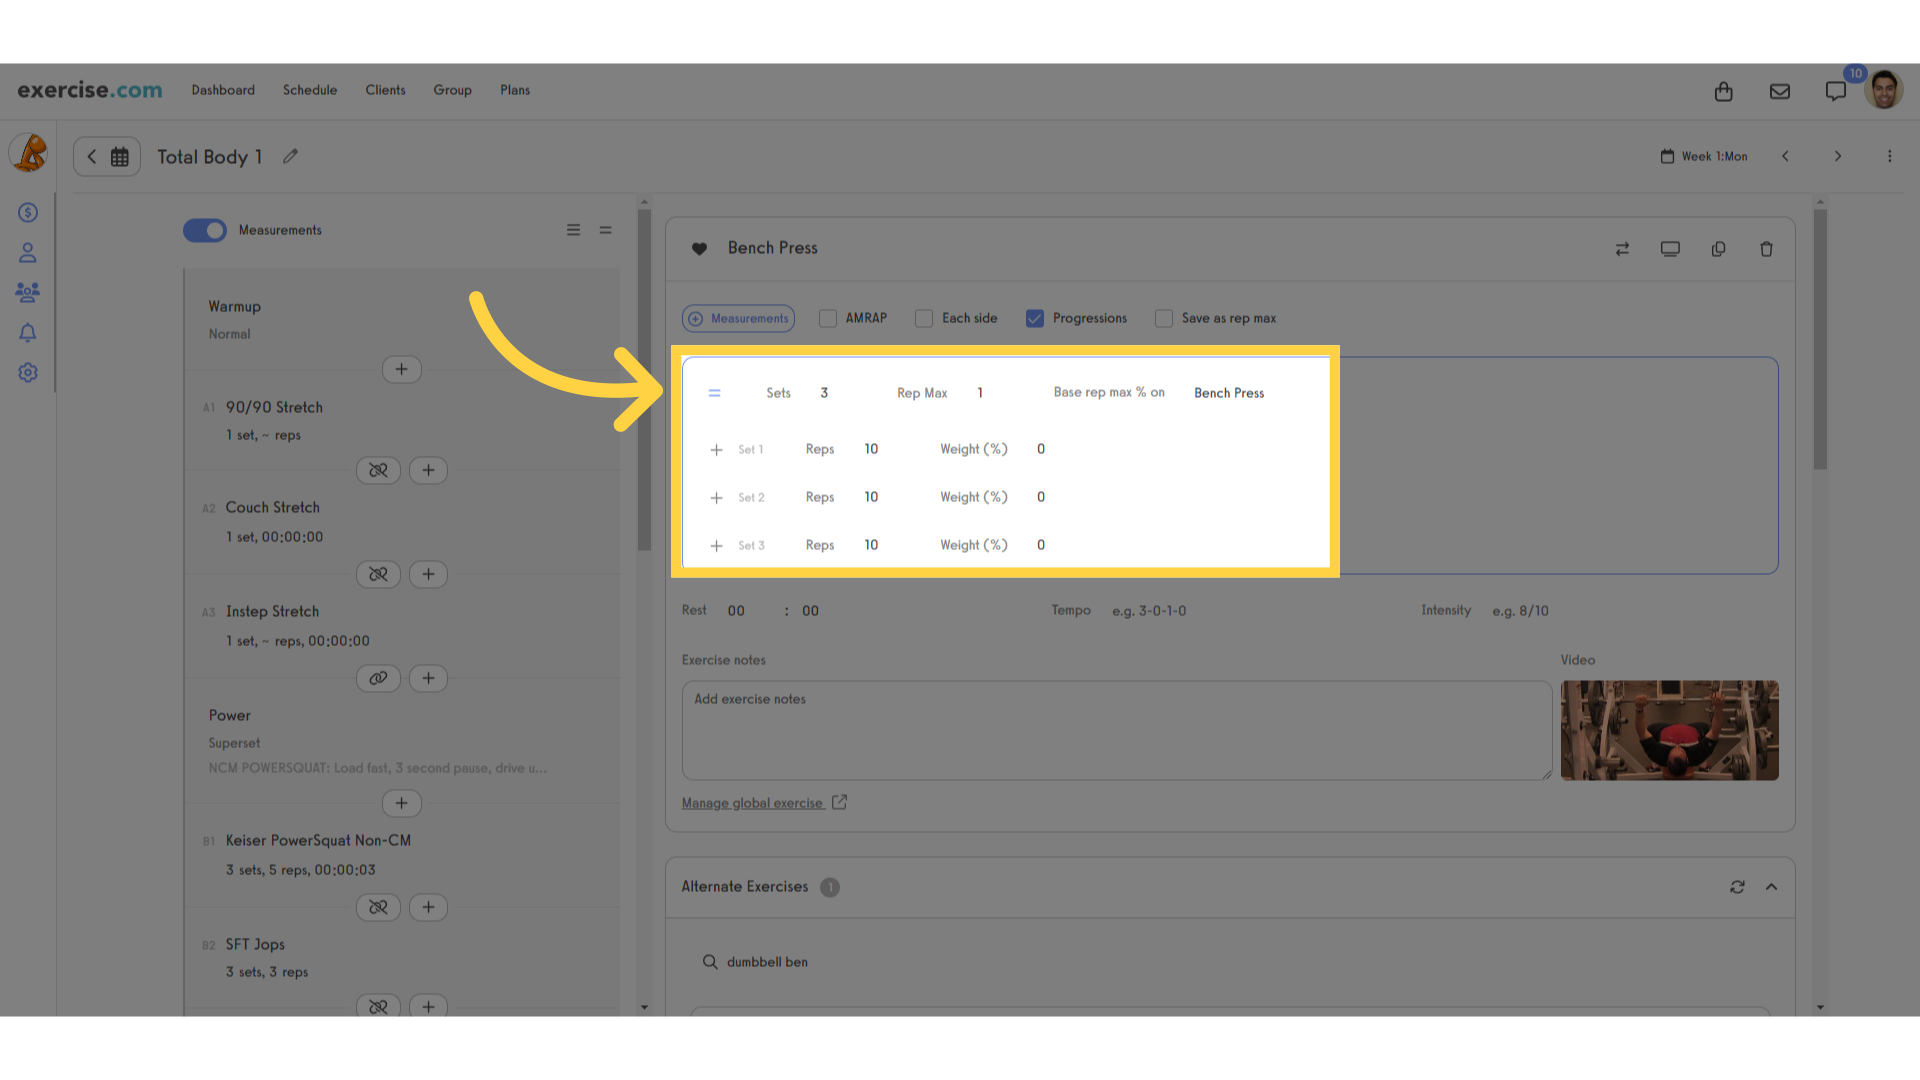
17. Click the expand sets icon to see and edit the reps or other measurements for each individual set.
Click the expand sets icon to see and edit the reps or other measurements for each individual set.
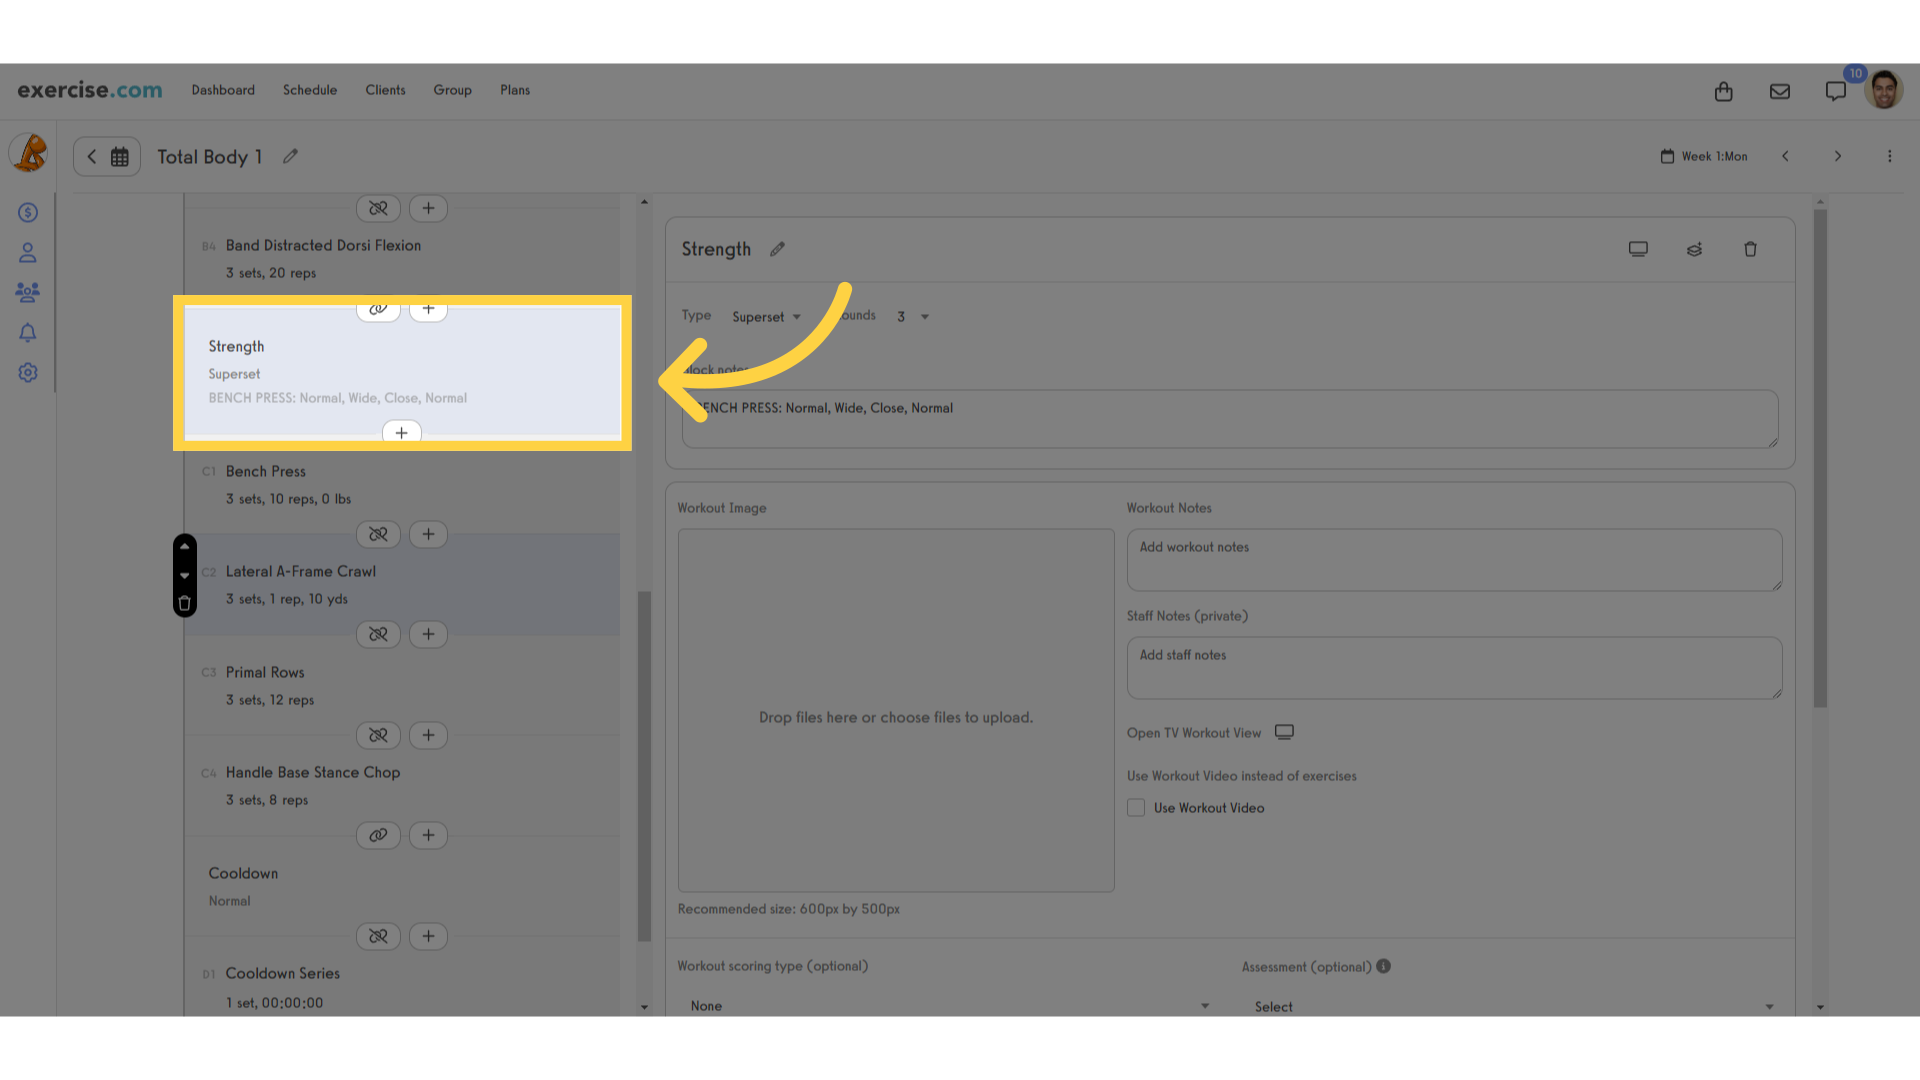
18. Click on a block to open the block settings.
To customize blocks in a workout, click on any block to edit the block settings.
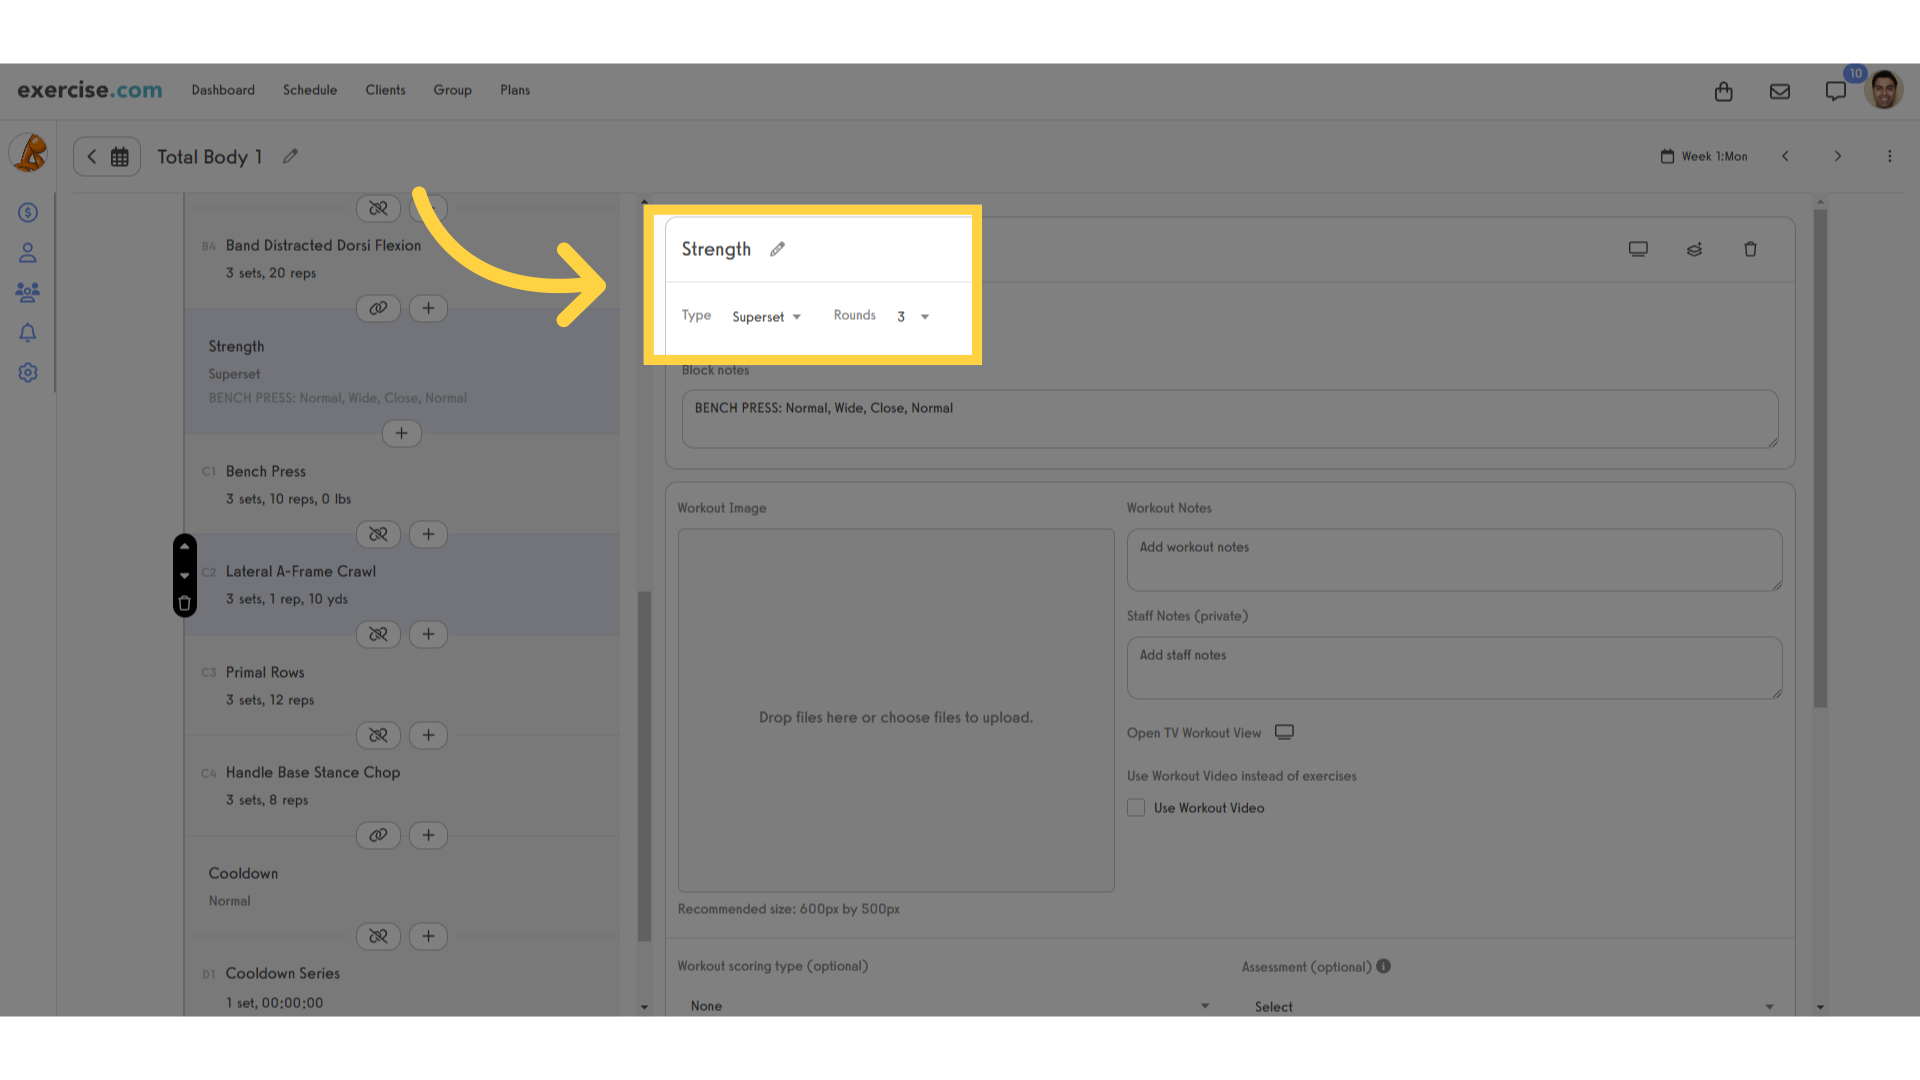
19. You can change block type and adjust the number of rounds and time per round.
Blocks can be normal, supersets, or circuits. In a normal block, every set for an exercise is done before moving to the next exercise. In a superset, one round of all exercises in the block is done before moving to the next round of the superset. A circuit is like a superset, but also allows you to specify time per round.
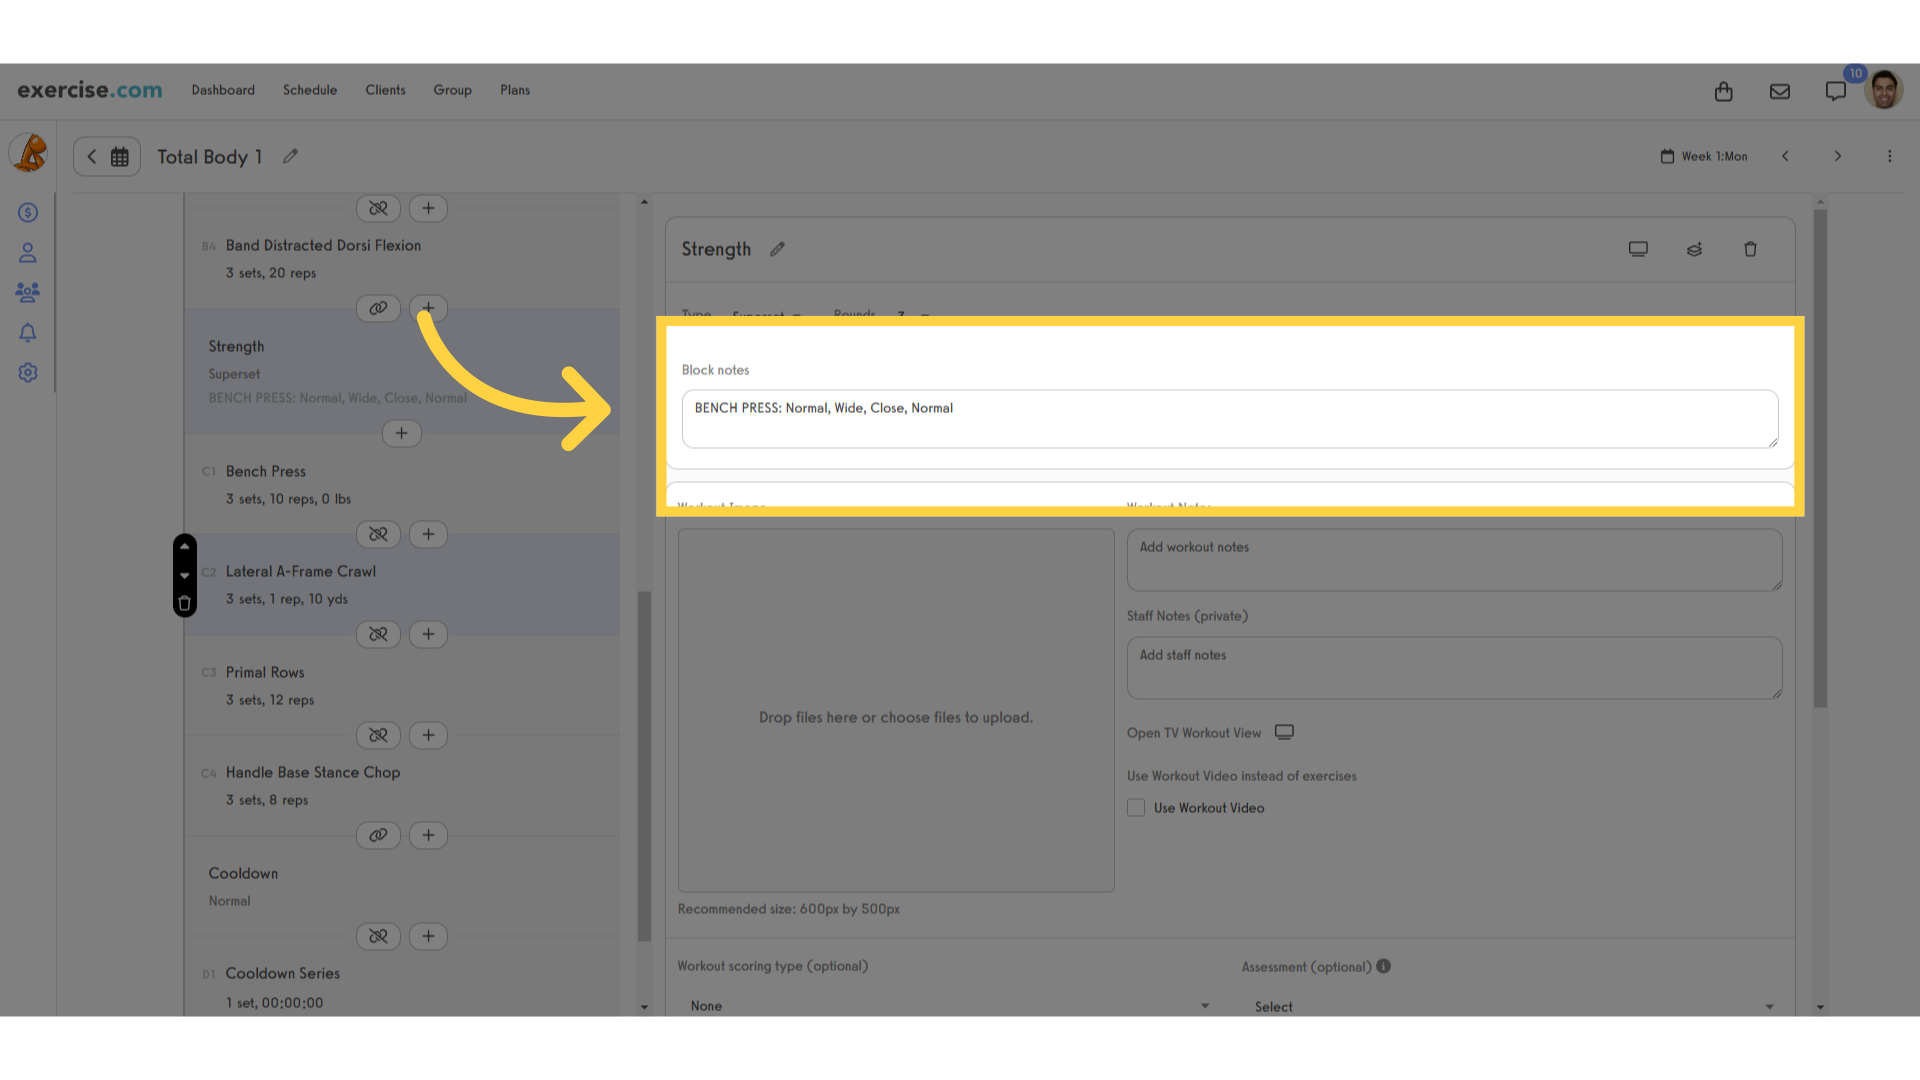
20. Add block notes for your clients to see during their workouts.
Adding block notes is a great way to give extra guidance to your clients during their workouts.
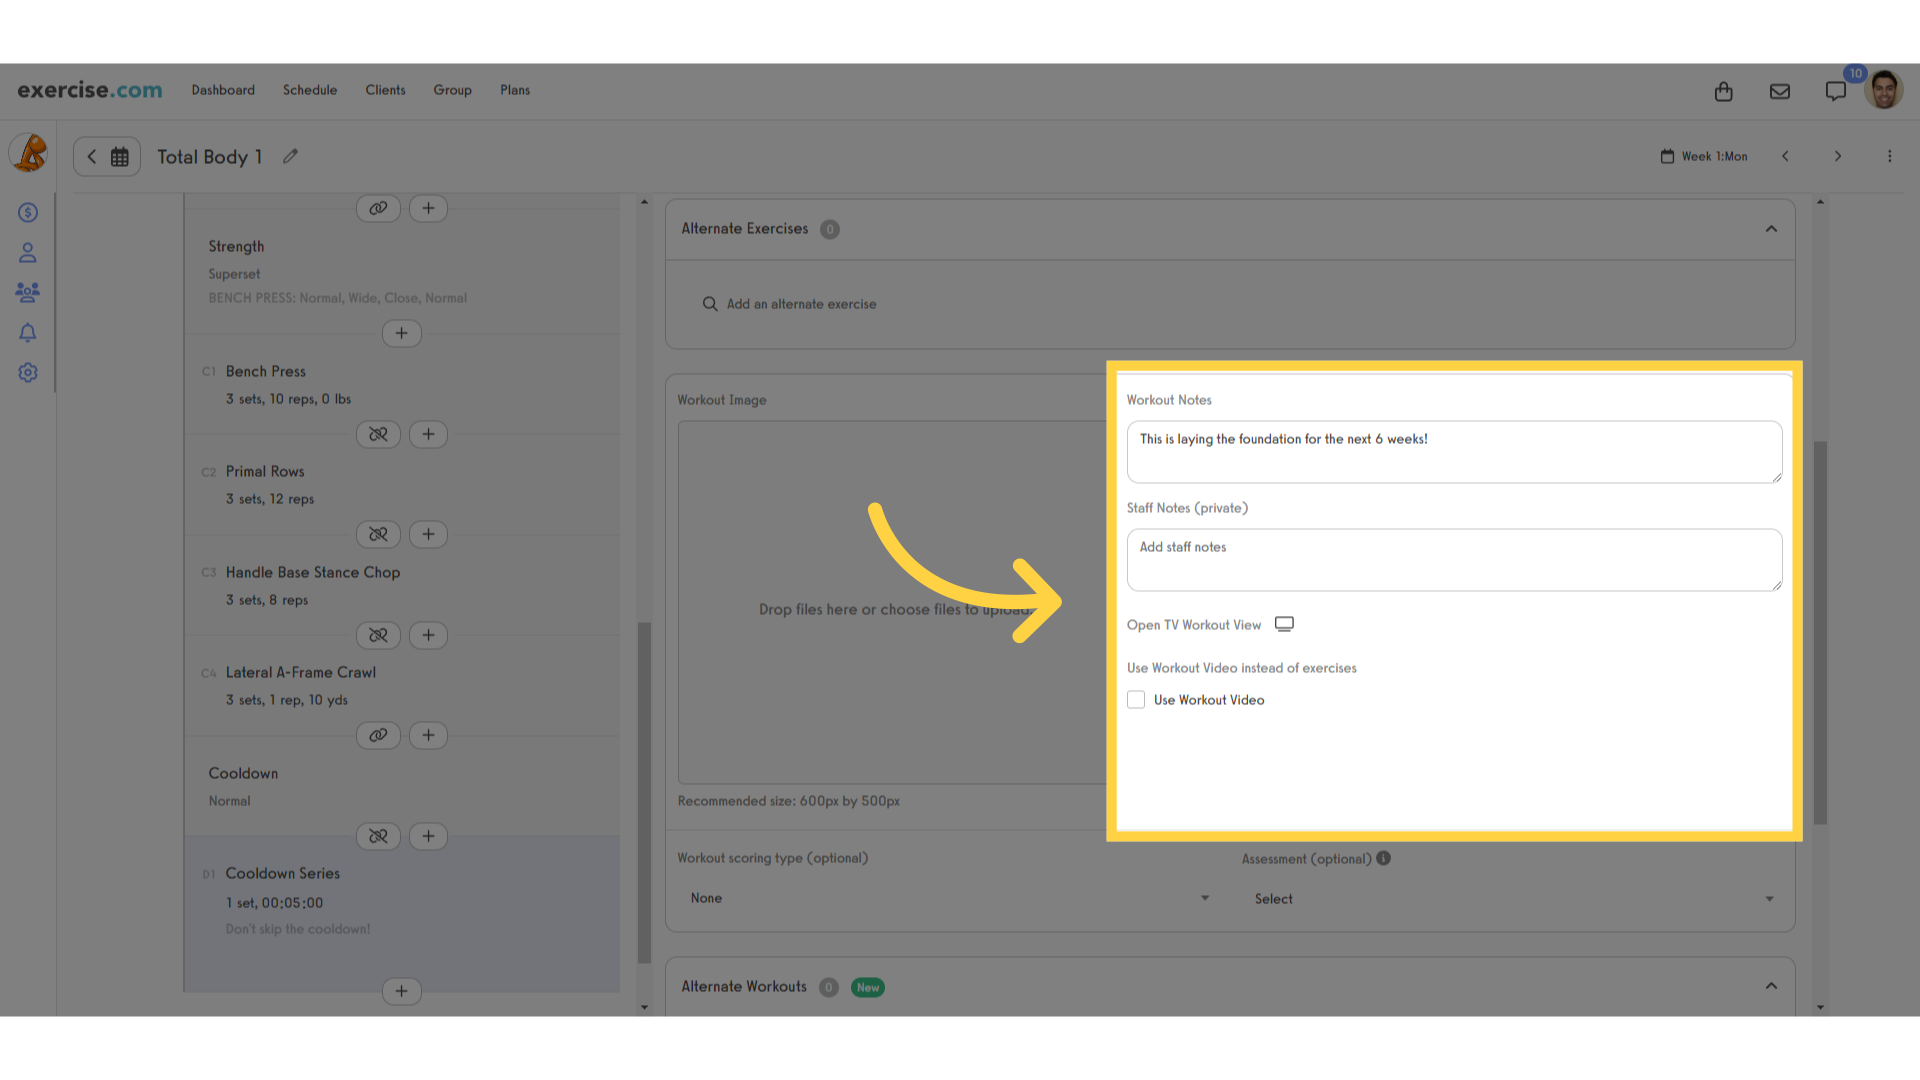
21. Workout notes allow you to give instructions to your clients at the beginning of each workout.
Use the Workout Notes section to give instructions to your clients at the beginning of each workout.
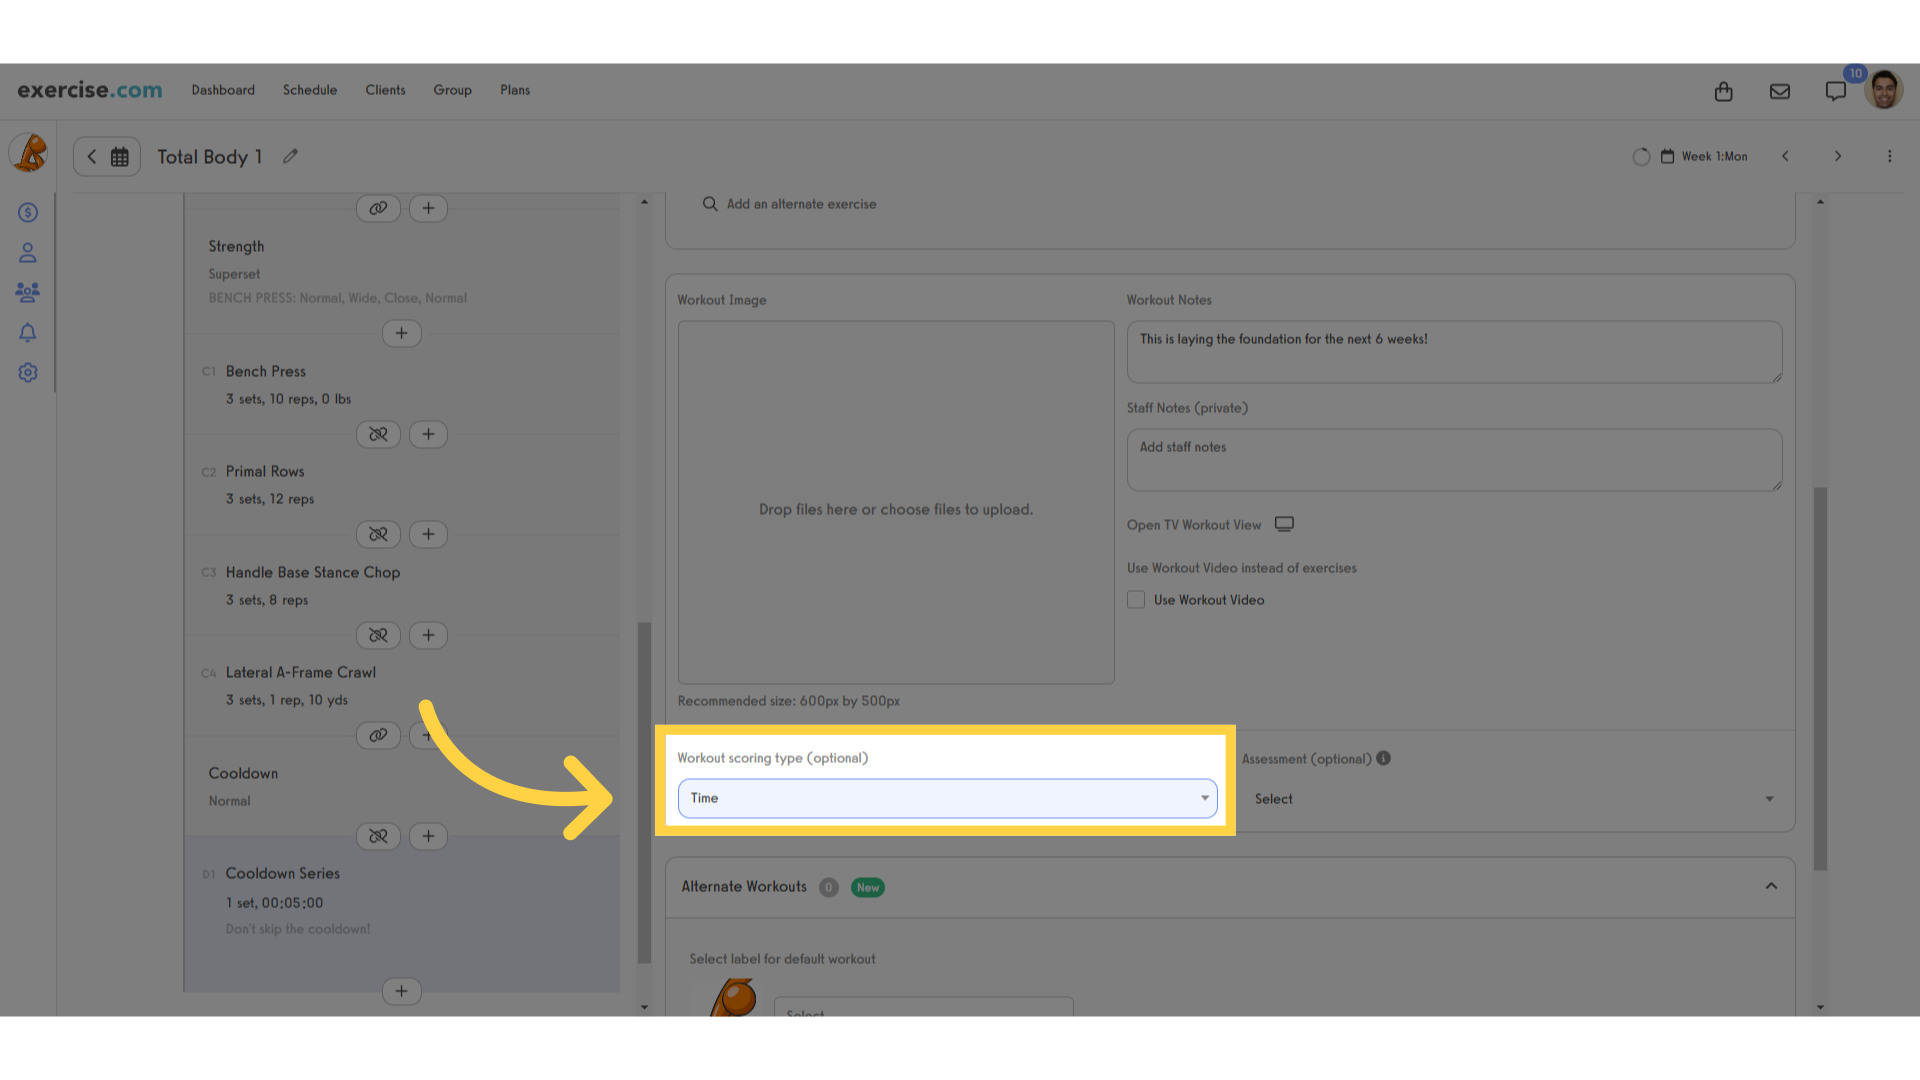
22. Workout scoring allows clients to record their scores on a workout beyond sets and reps.
If you like friendly competition, you can set up scoring on your workouts. This is an additional field that will record a score for each client’s workout, depending on what kind of scoring you select.
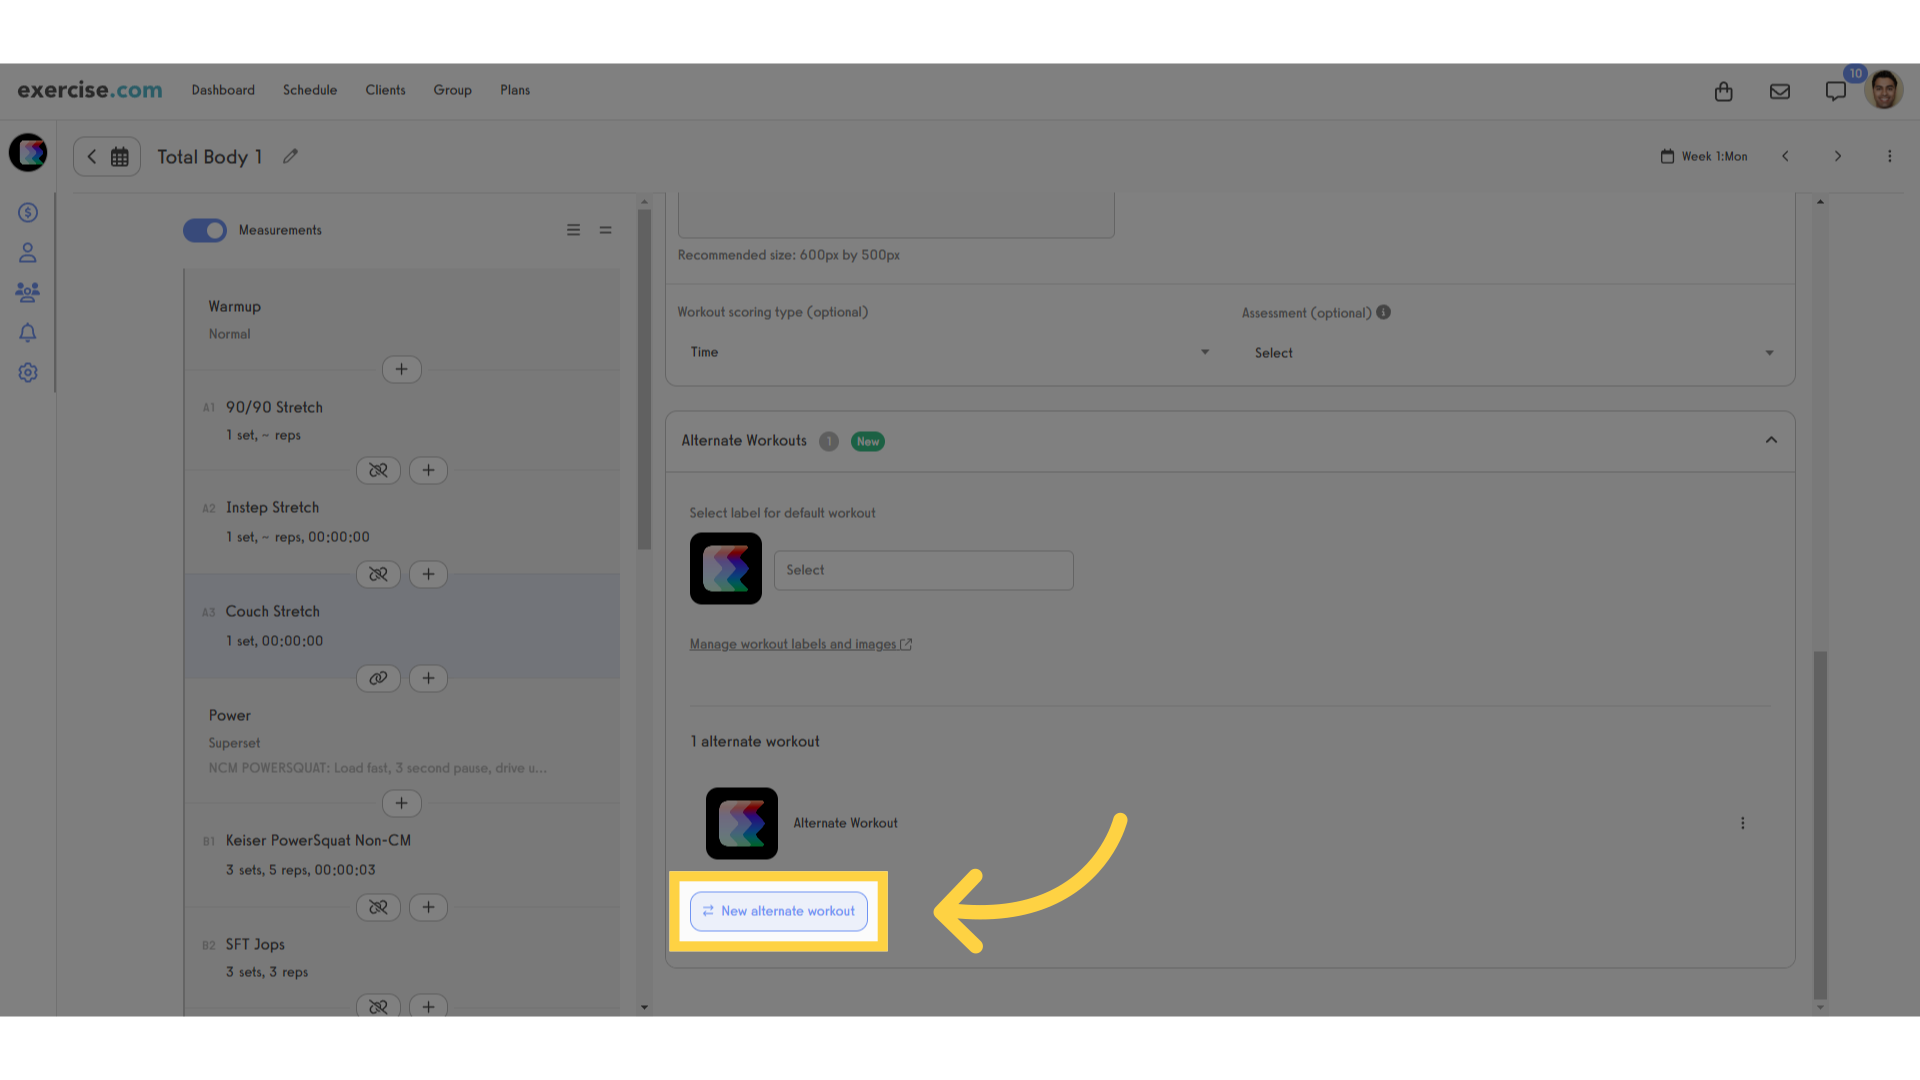
23. Alternate Workouts allow you to give clients a choice of which workout to complete on a given day.
To give your clients a choice of which workout to complete on a given day, you can set up alternate workouts. When a client is going to start this workout, they’ll be given the chance to choose which variation of the workout they want to do.
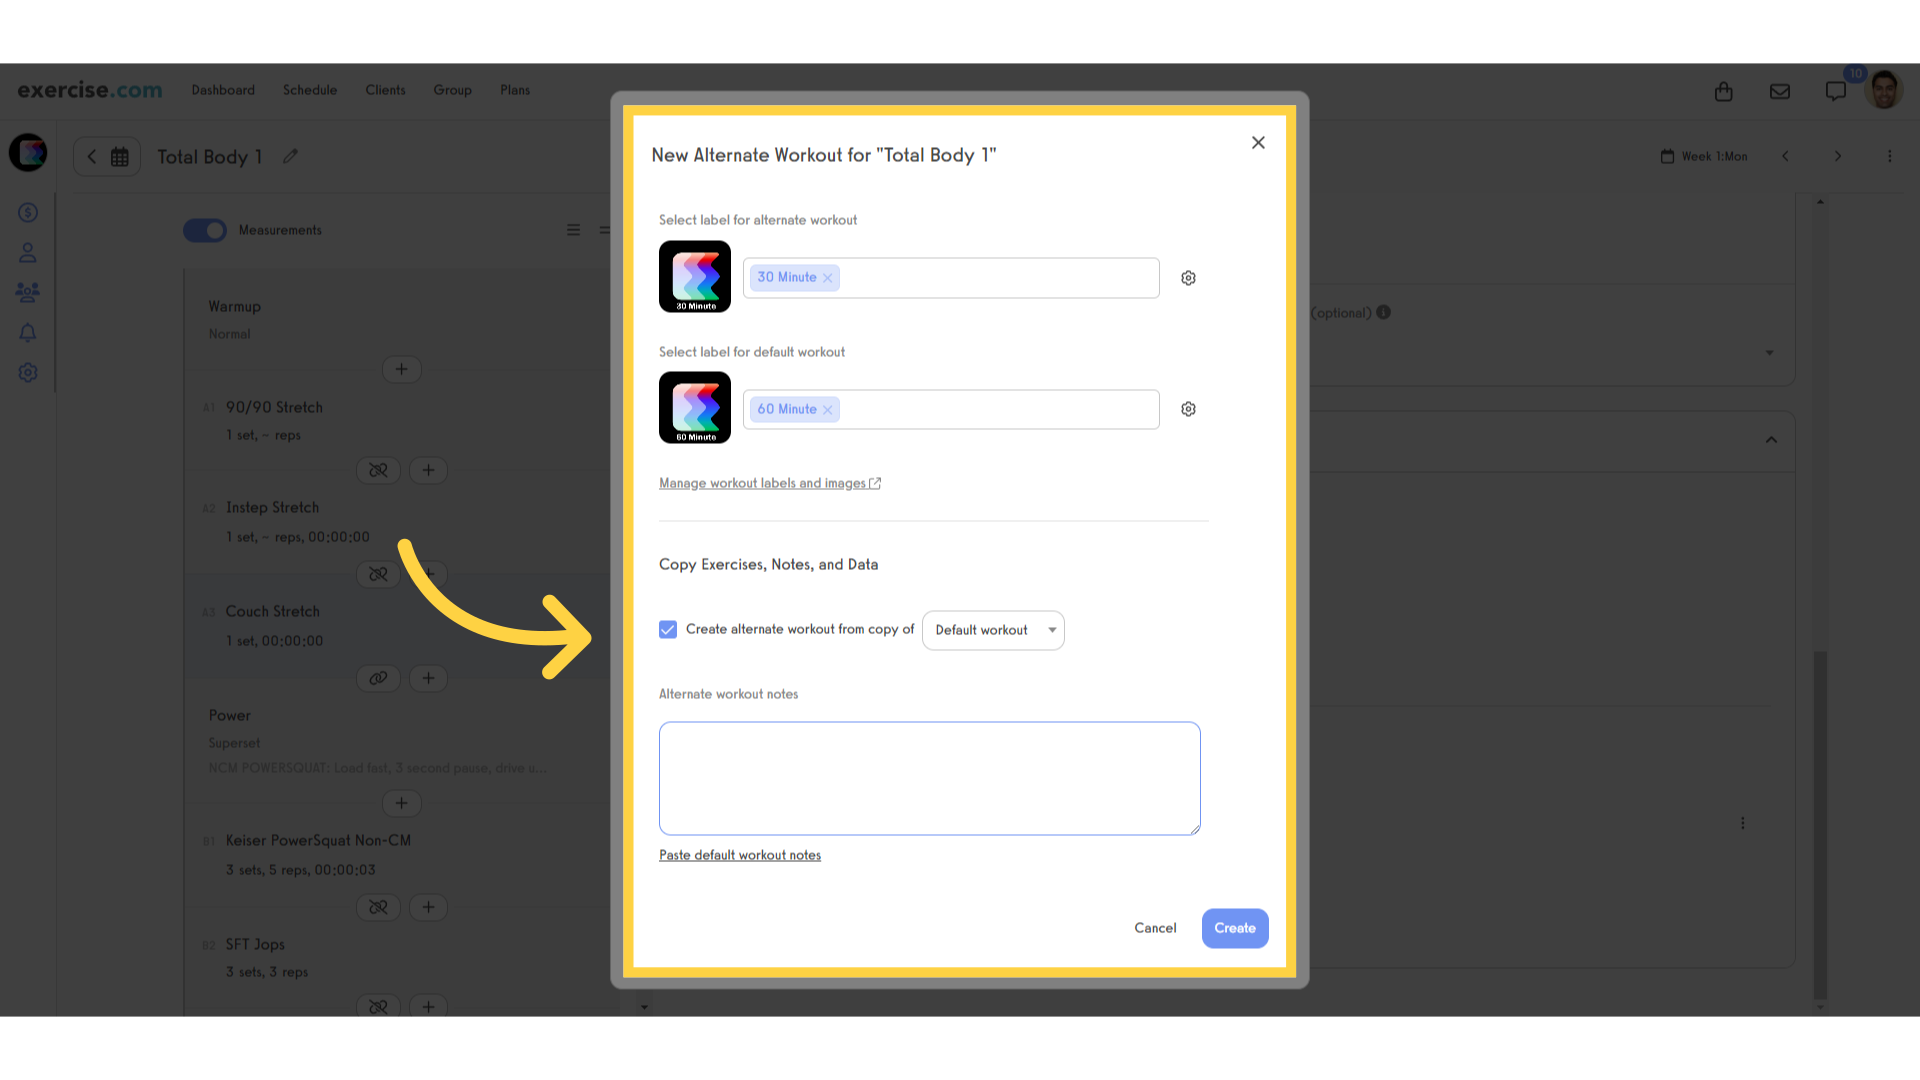
24. Use workout labels to organize your alternates.
You can set up custom labels for your alternate workouts, and start by copying the workout you just created, so you’re not building each alternate from scratch.
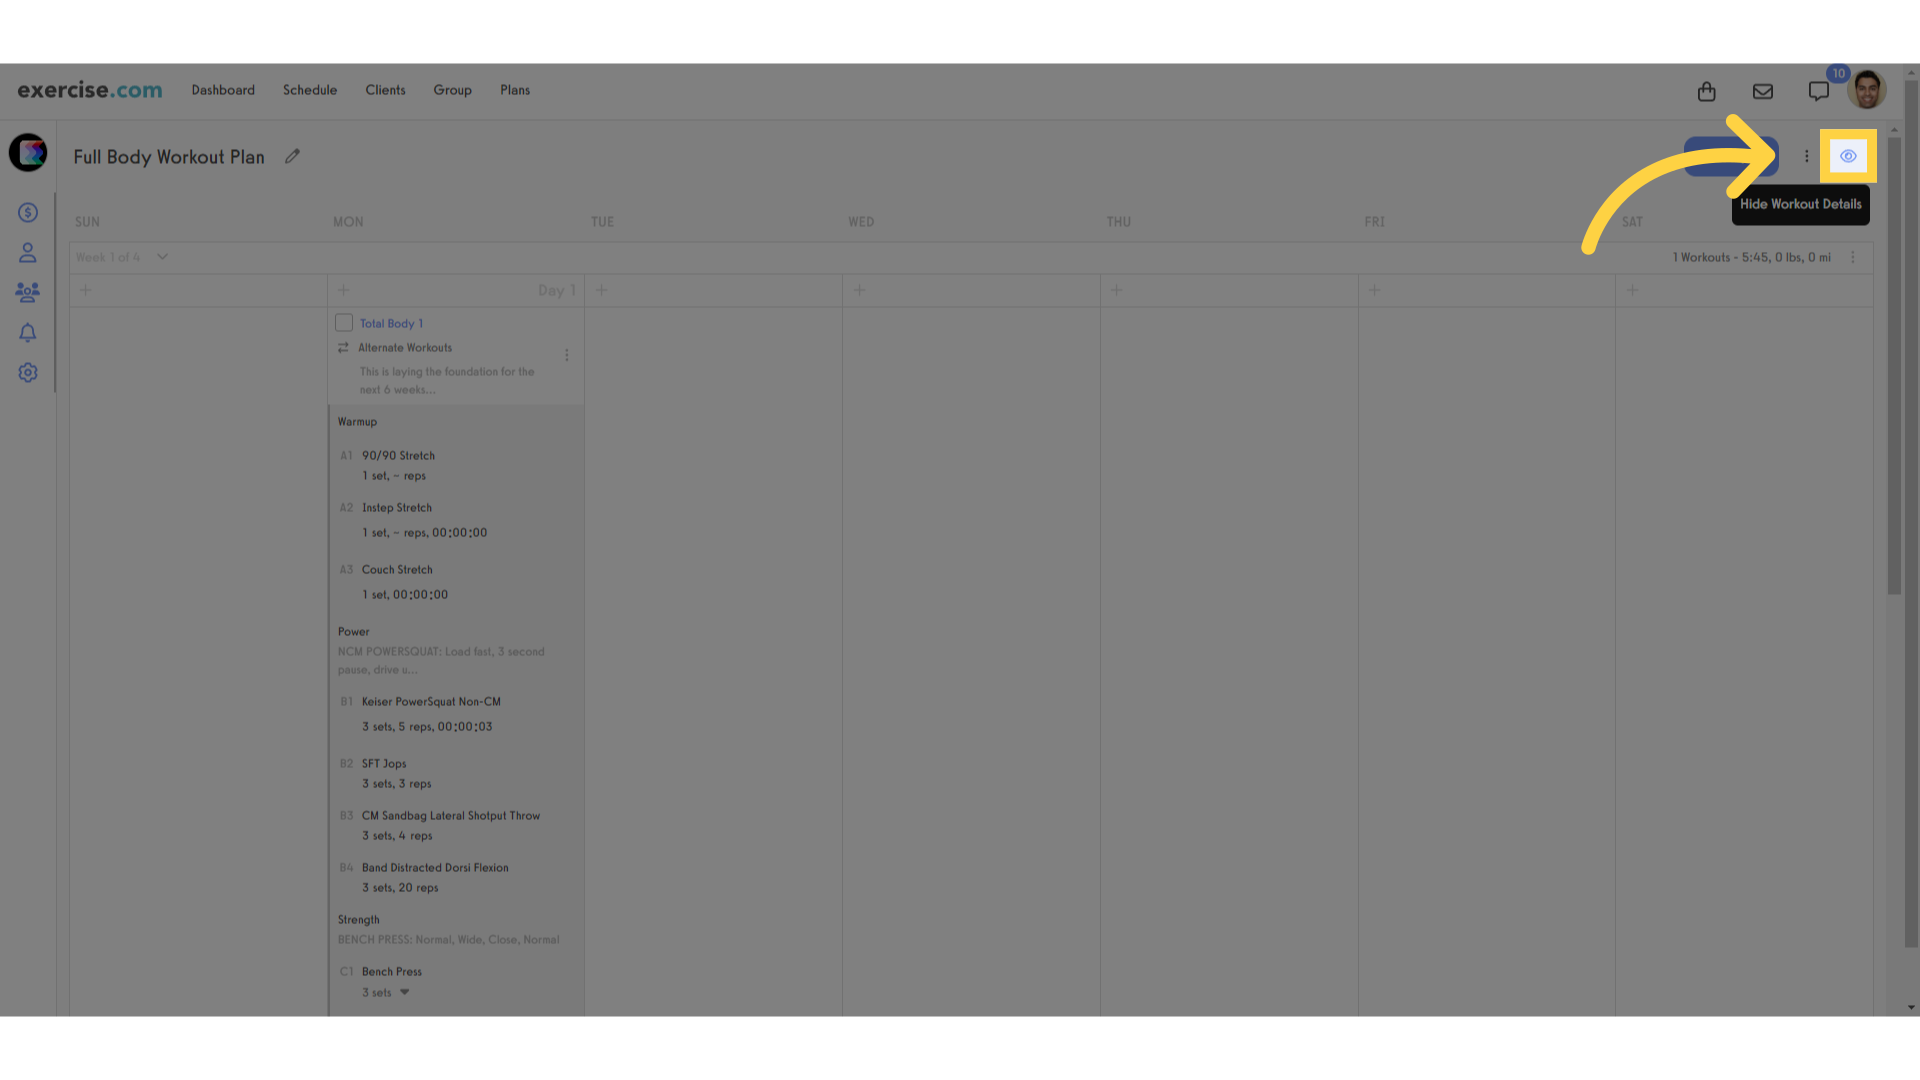
25. Click the eye icon to collapse or expand the details of each workout.
Now let’s go back to the week view to look at a few key settings. Click the eye icon to collapse or expand the details of each workout.
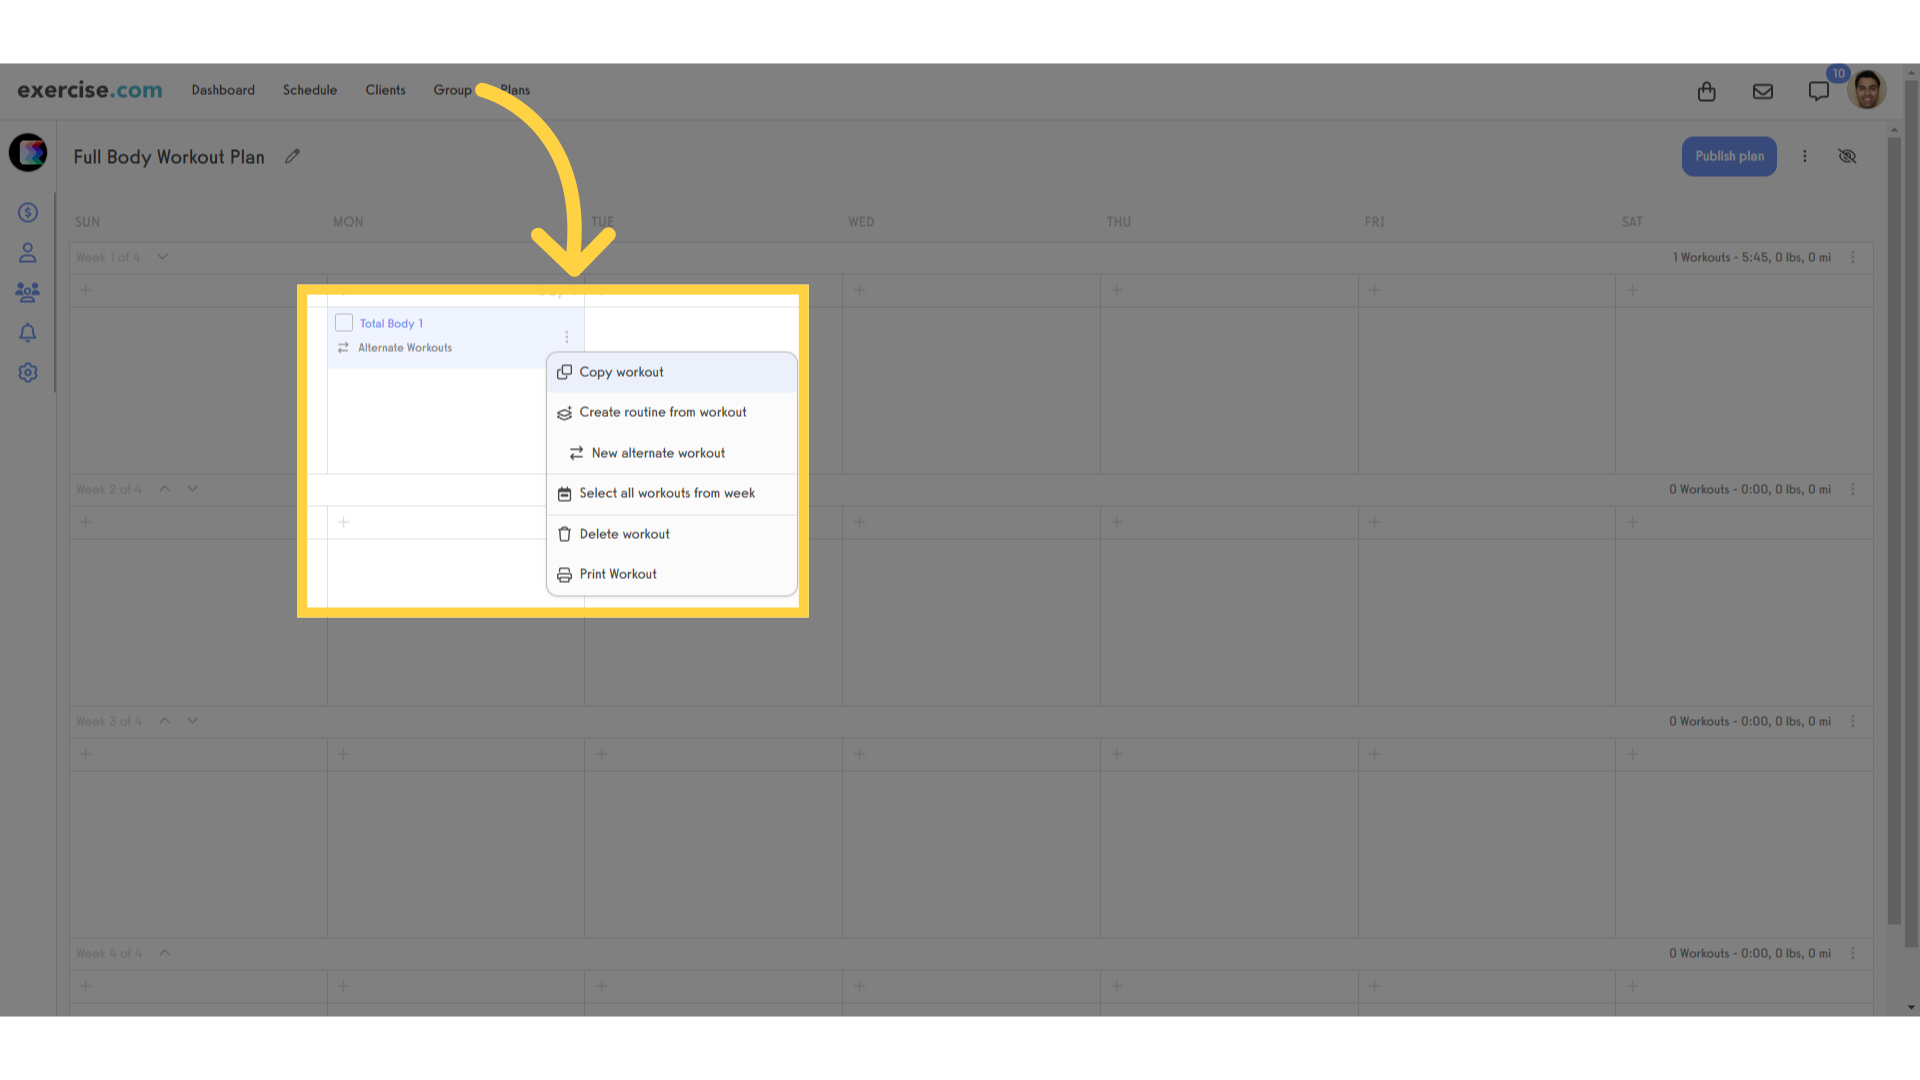
26. Click the 3-dot menu to see the actions available for each workout.
Click the 3-dot menu on a given workout to see the actions available, like copying the workout.
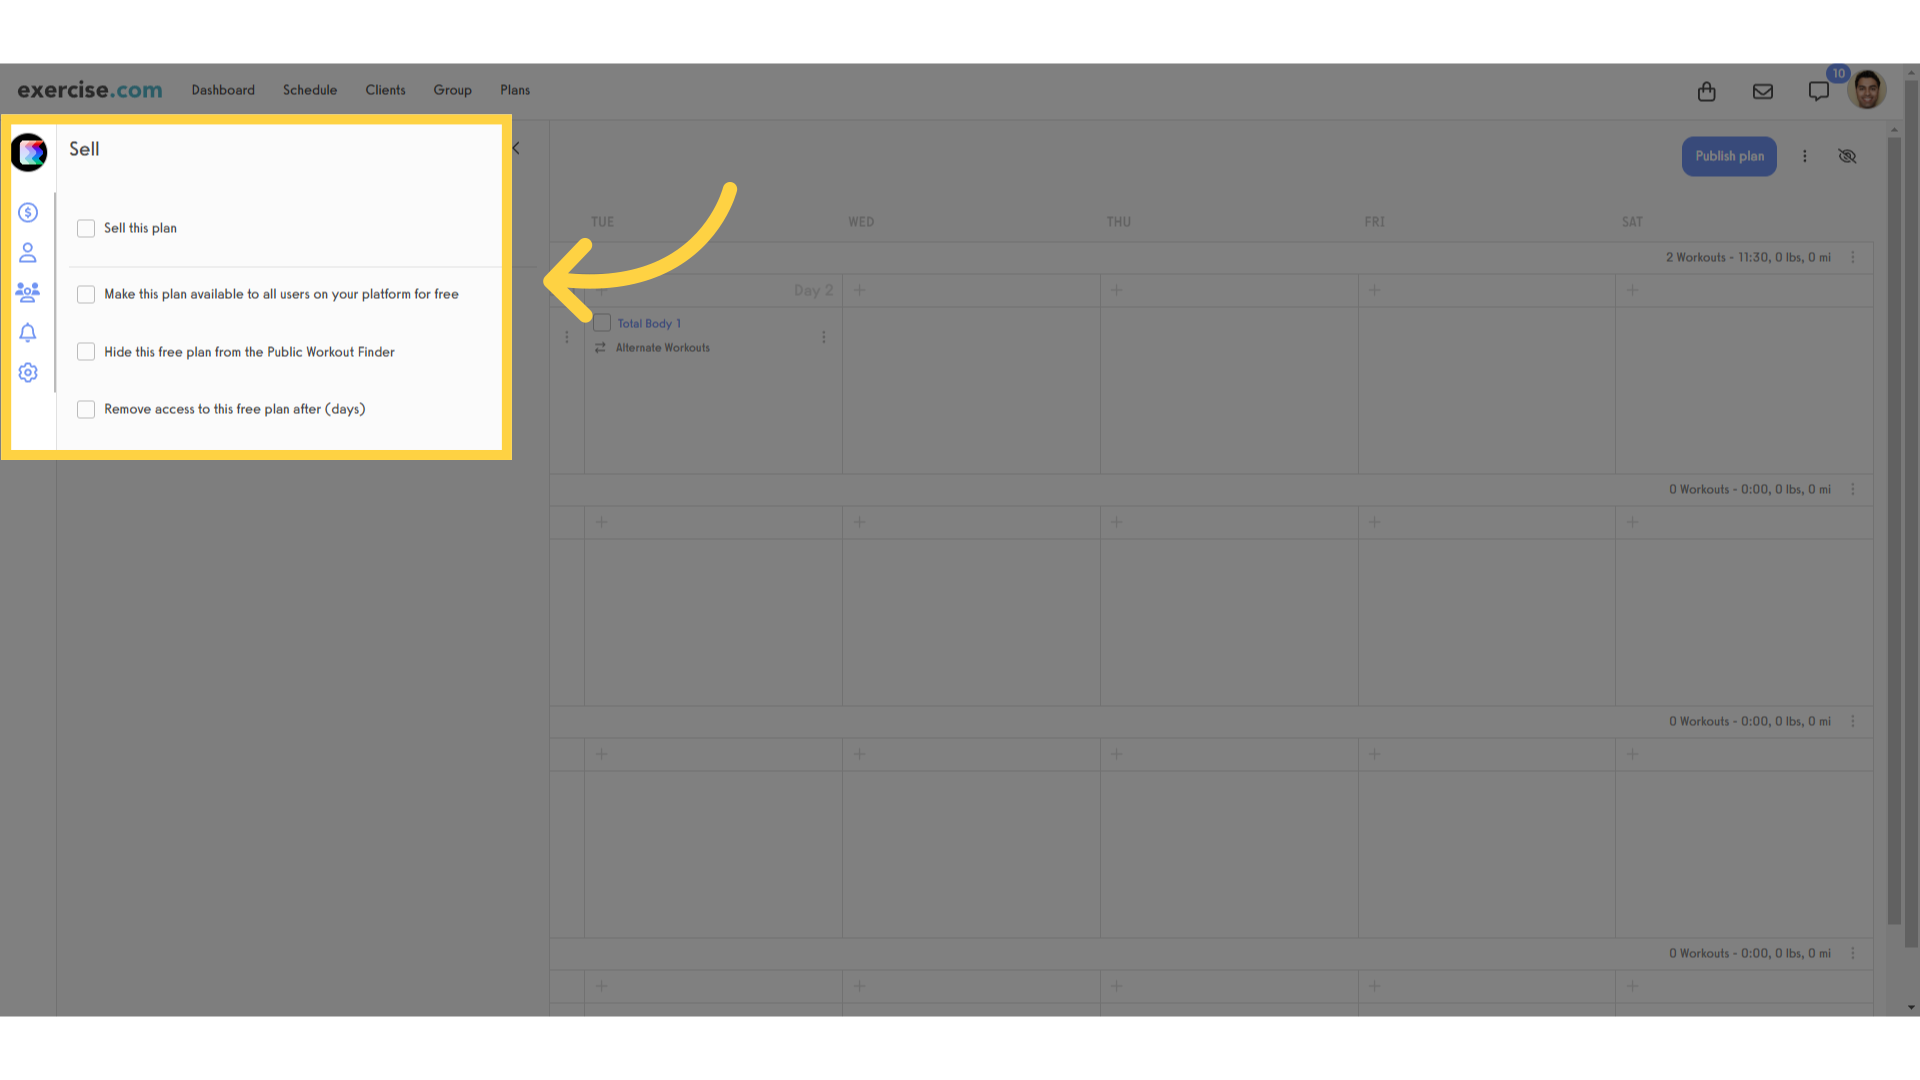
27. Click the dollar sign icon to see the sales options for this plan.
On the left side menu, click the dollar sign to see the sales options for this plan.
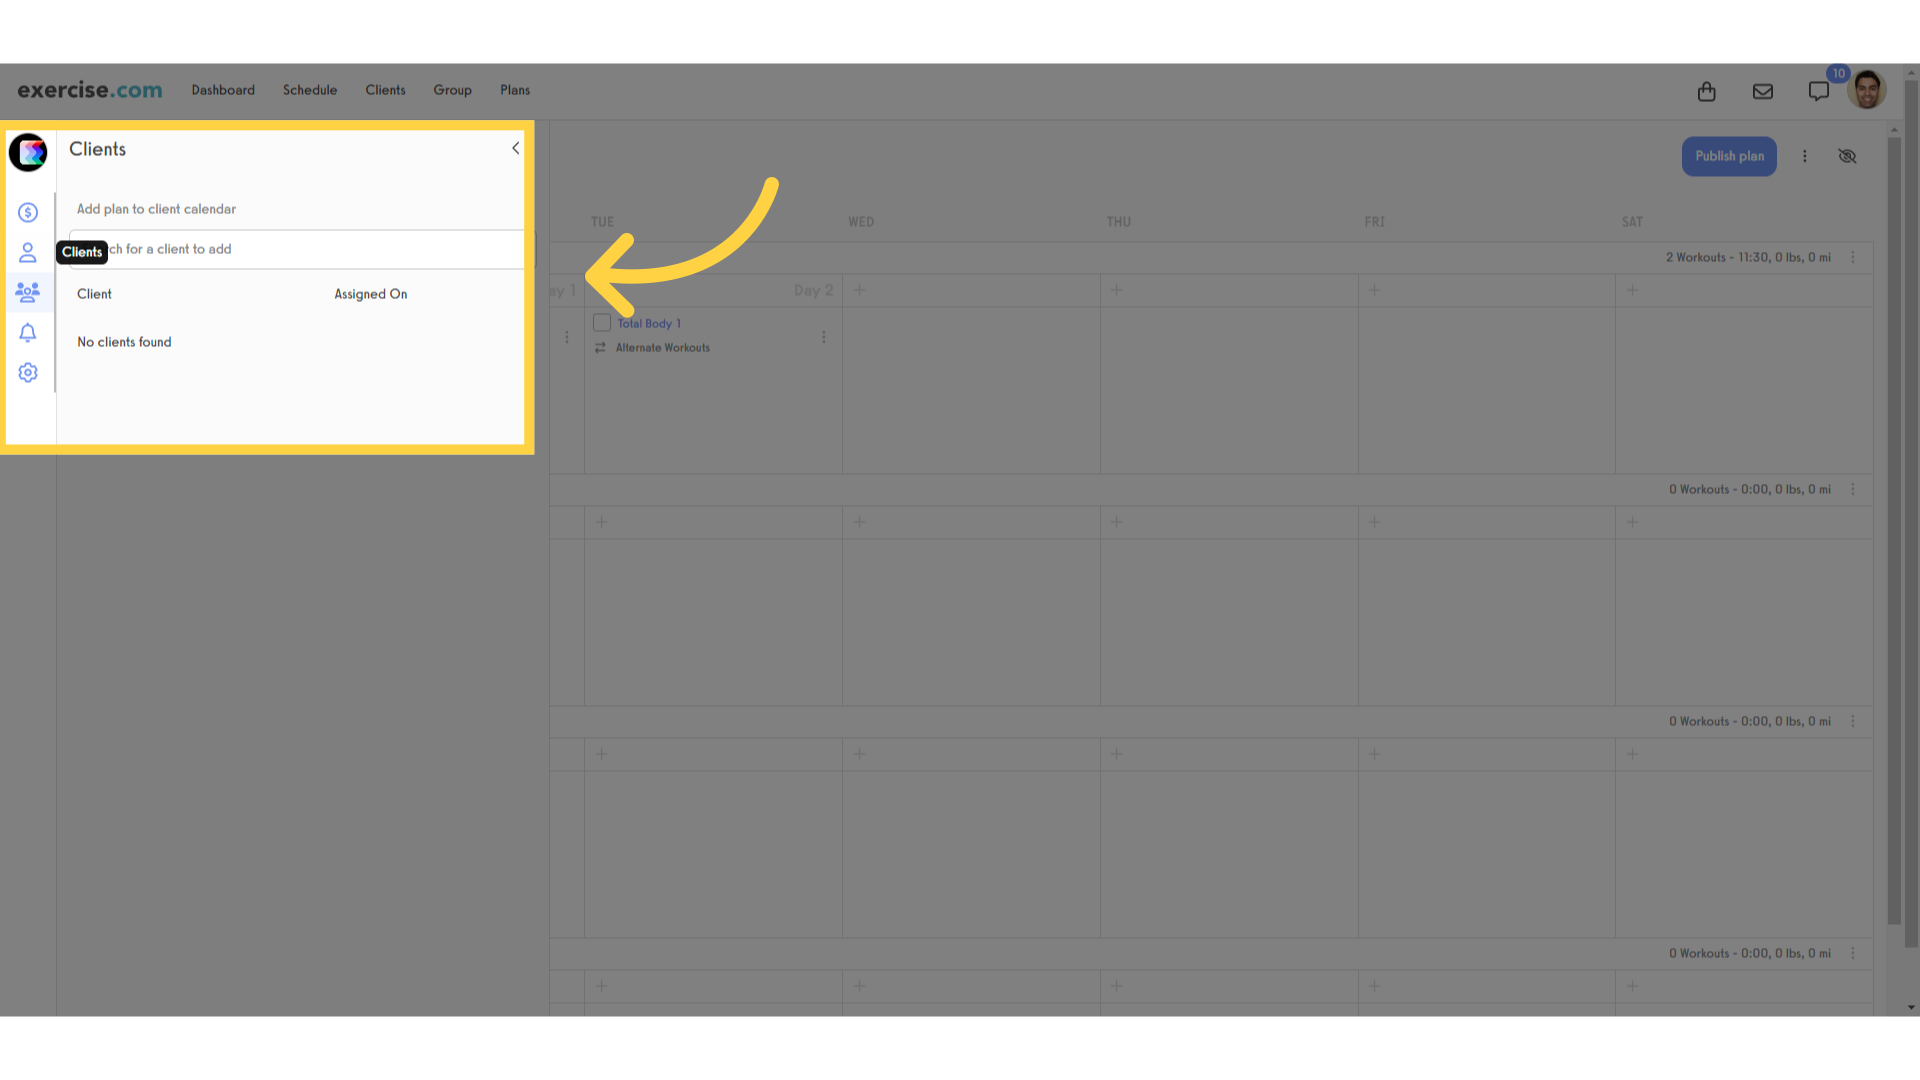
28. Click the client icon to import this plan directly to a client’s calendar.
Click the client icon to be able to import this plan directly to any client’s calendar.
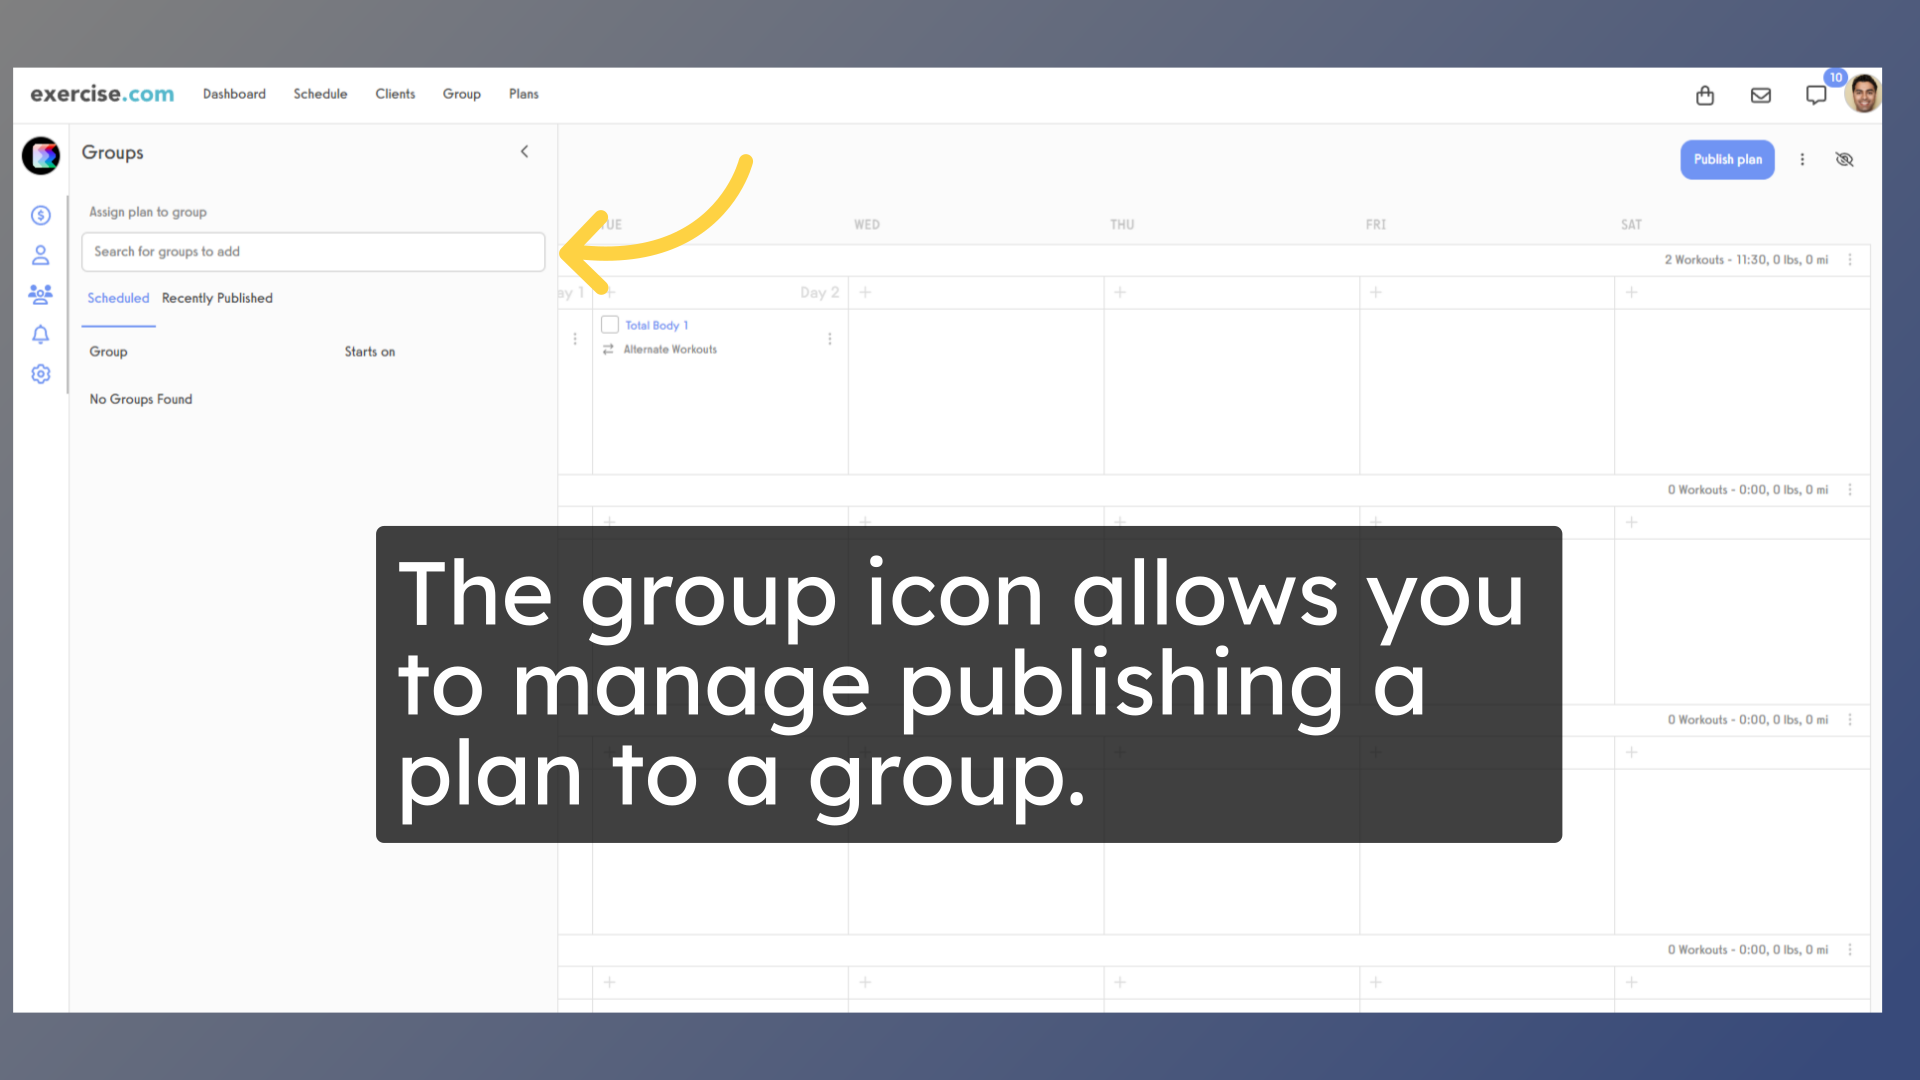
29. The group icon allows you to manage publishing a plan to a group.
Click the group icon to manage publishing a plan to a group.
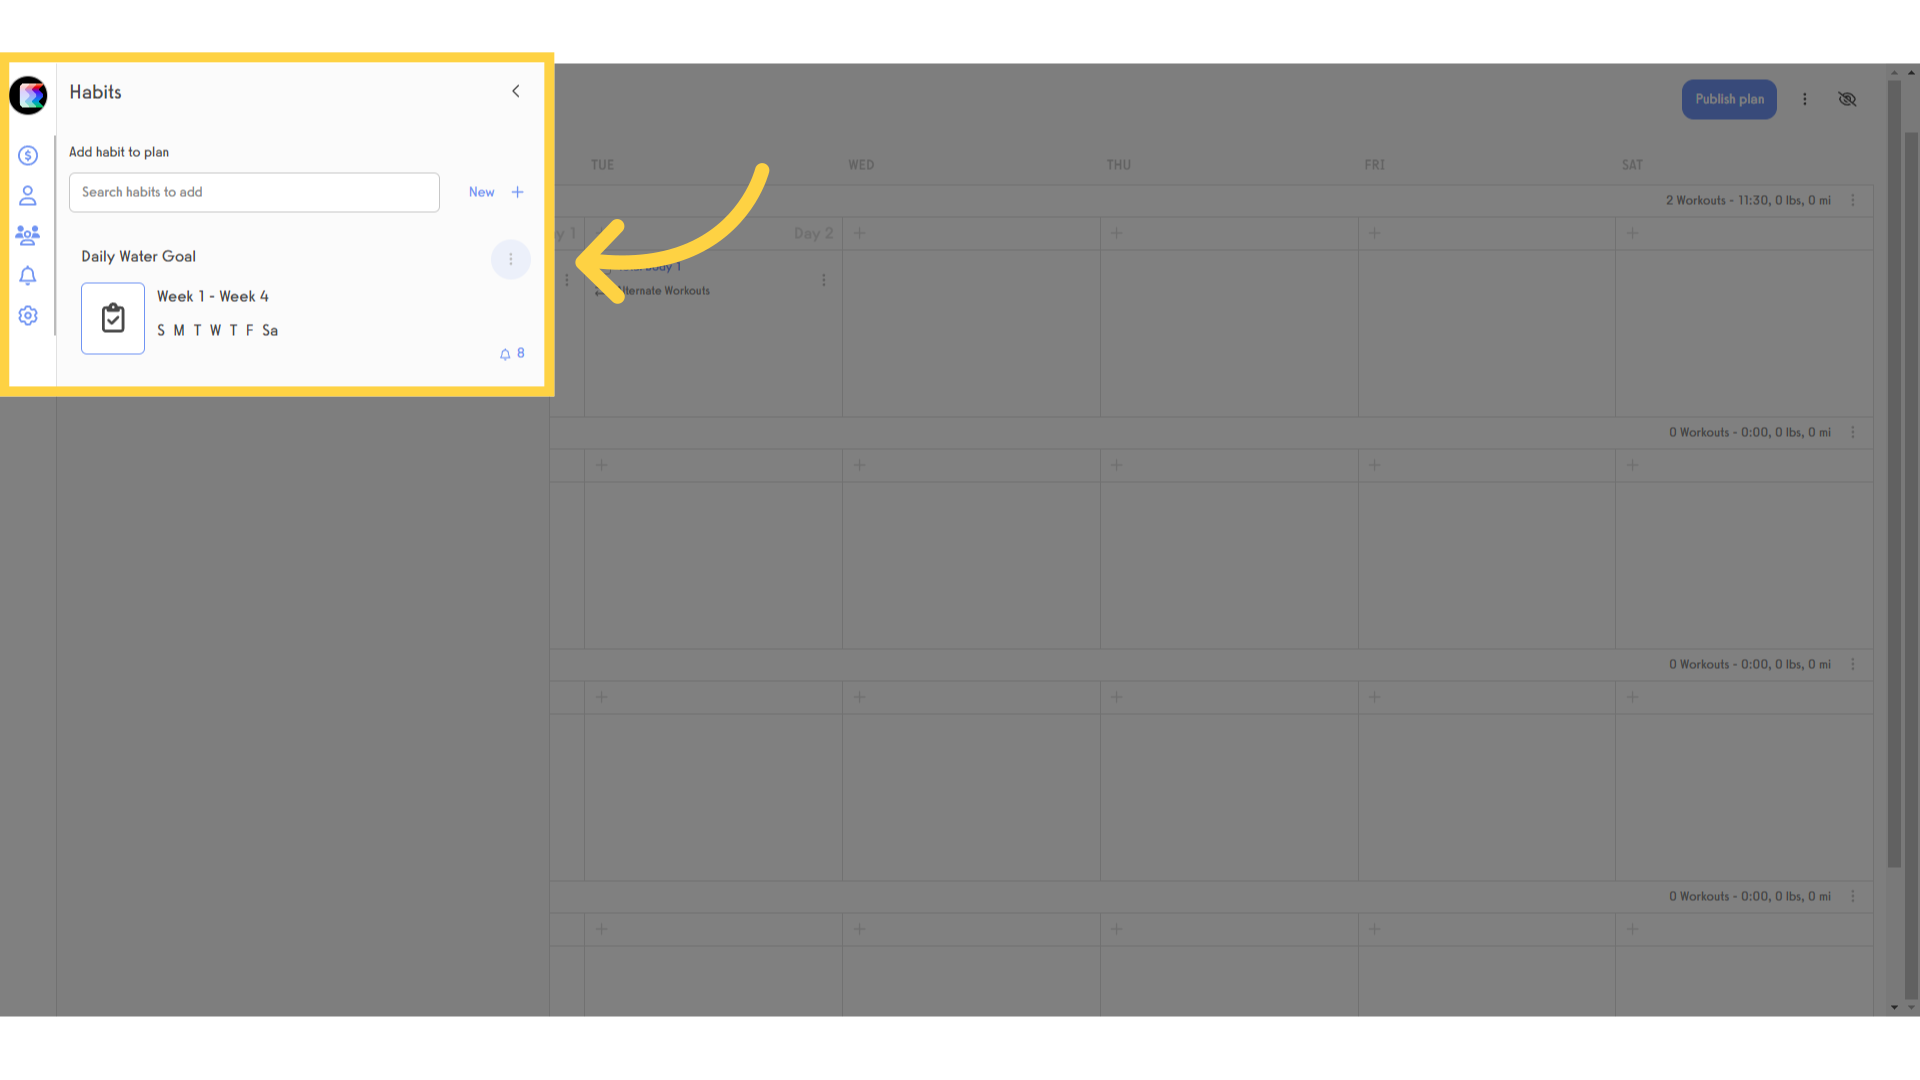
30. The bell icon will allow you to set up habit tracking to go along with the workouts on this plan.
Click the bell icon to set up habit tracking to go along with the workouts on this plan.
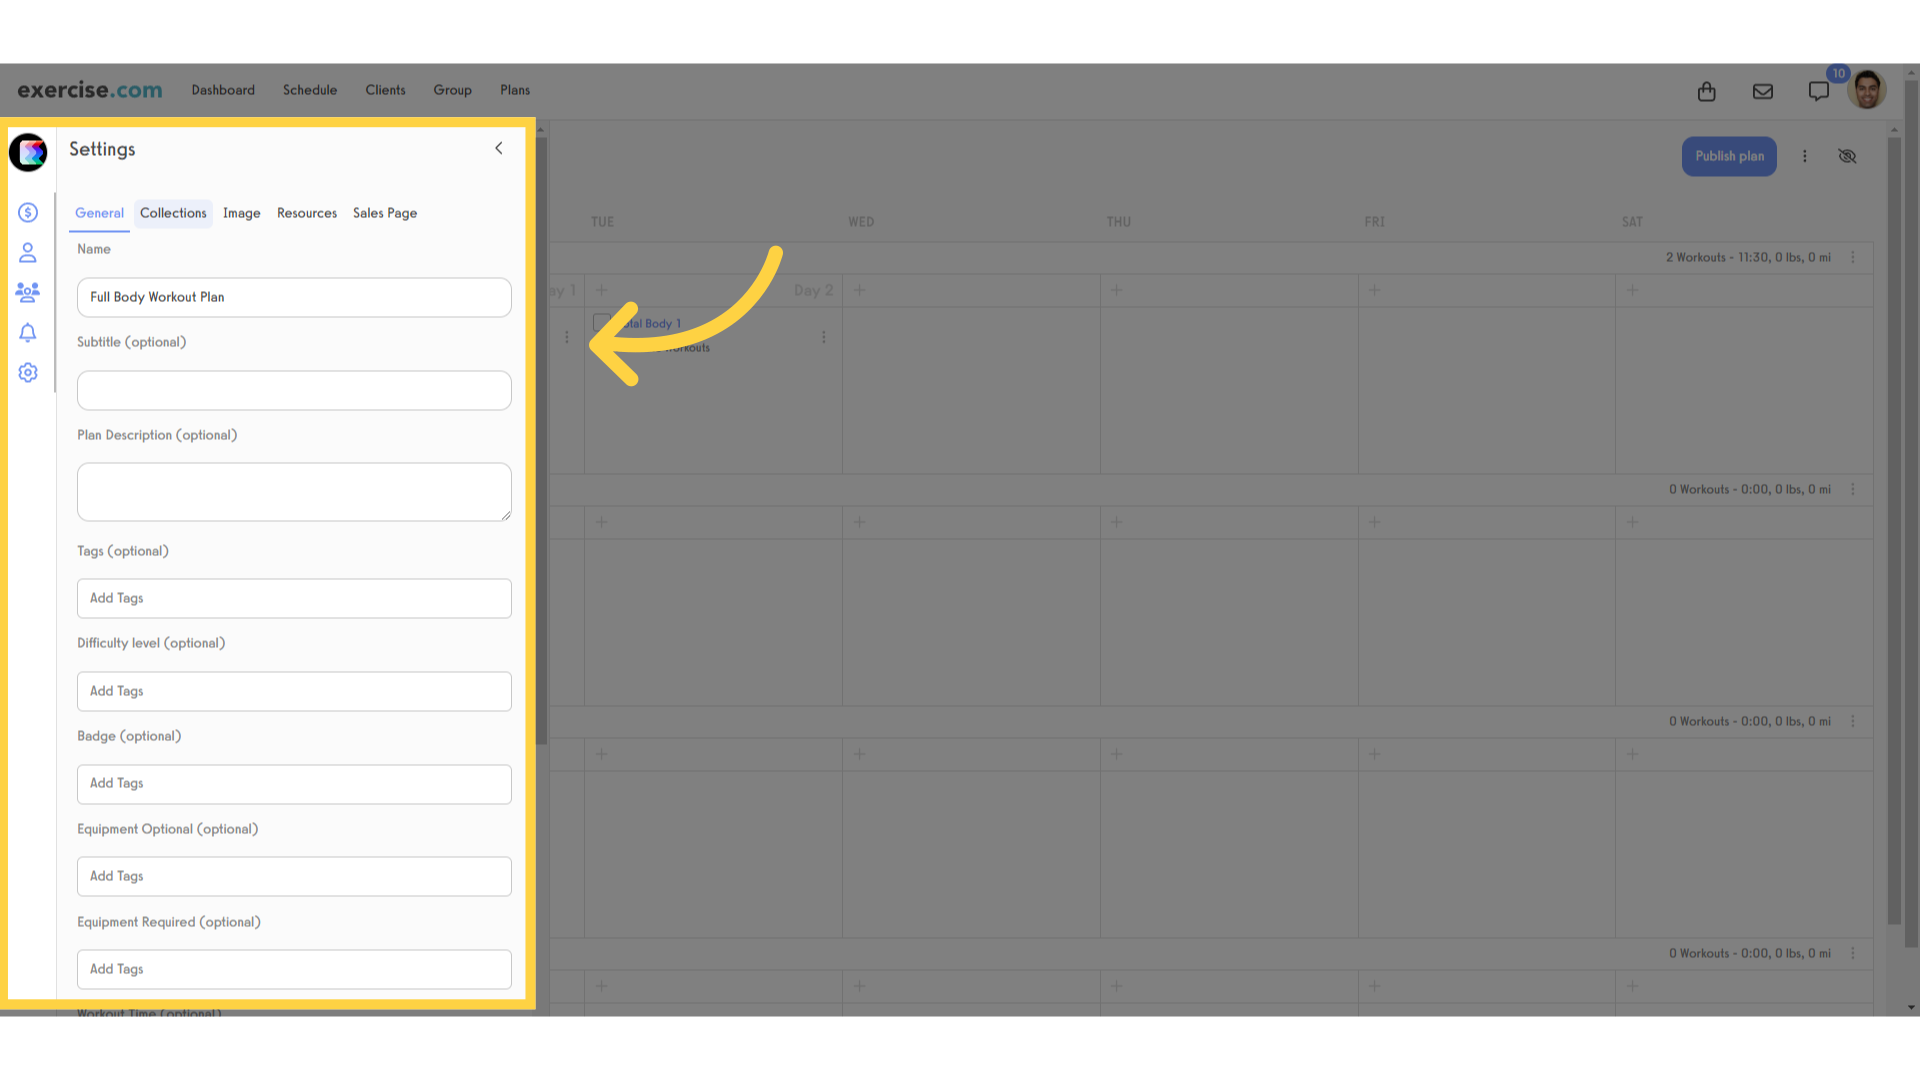
31. The gear icon allows you to control metadata to show in the workout plan descriptions that are available in app views.
Click the gear icon to see options for editing what will show in the workout plan descriptions that are available in app views.
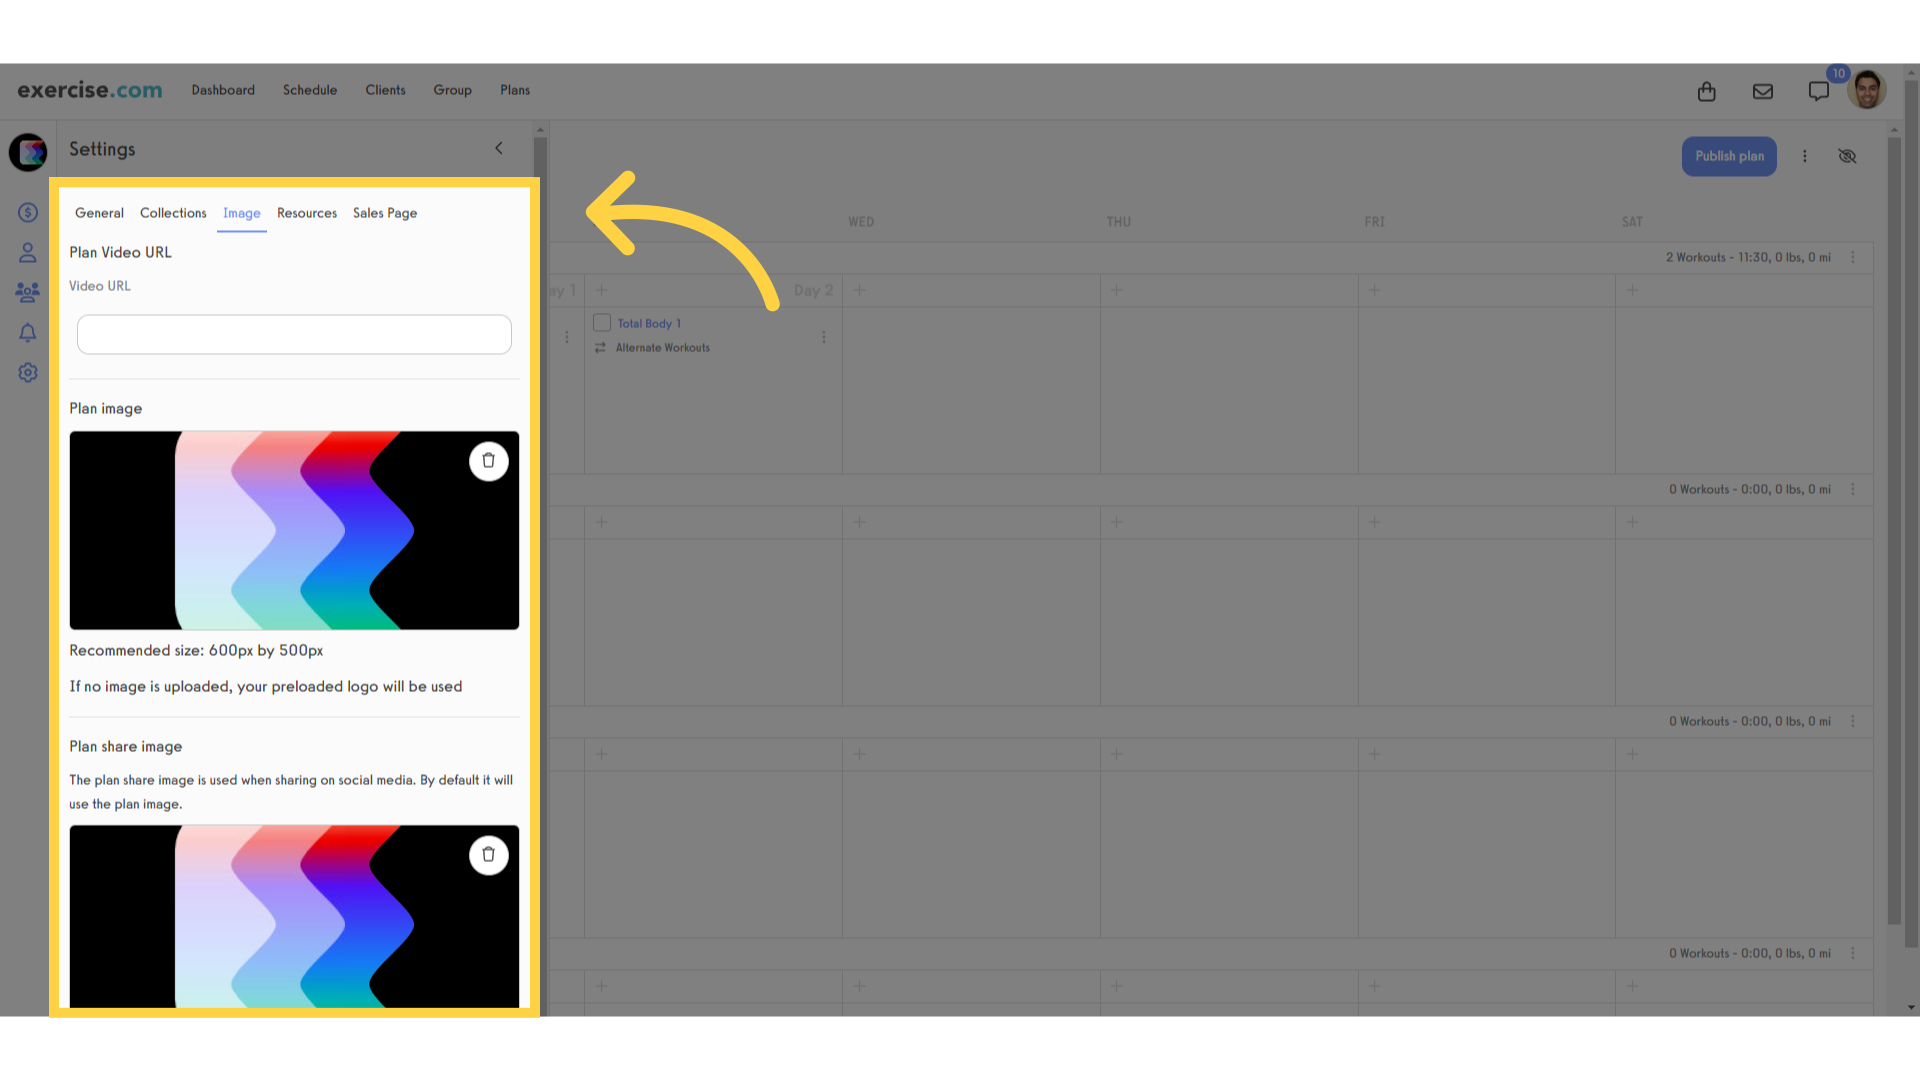
32. Customize Plan Image settings.
You can customize the workout plan thumbnail, and the share image on the Image tab. The share image is what clients will see in the background of their Workout Summary immediately after logging a workout from this plan.
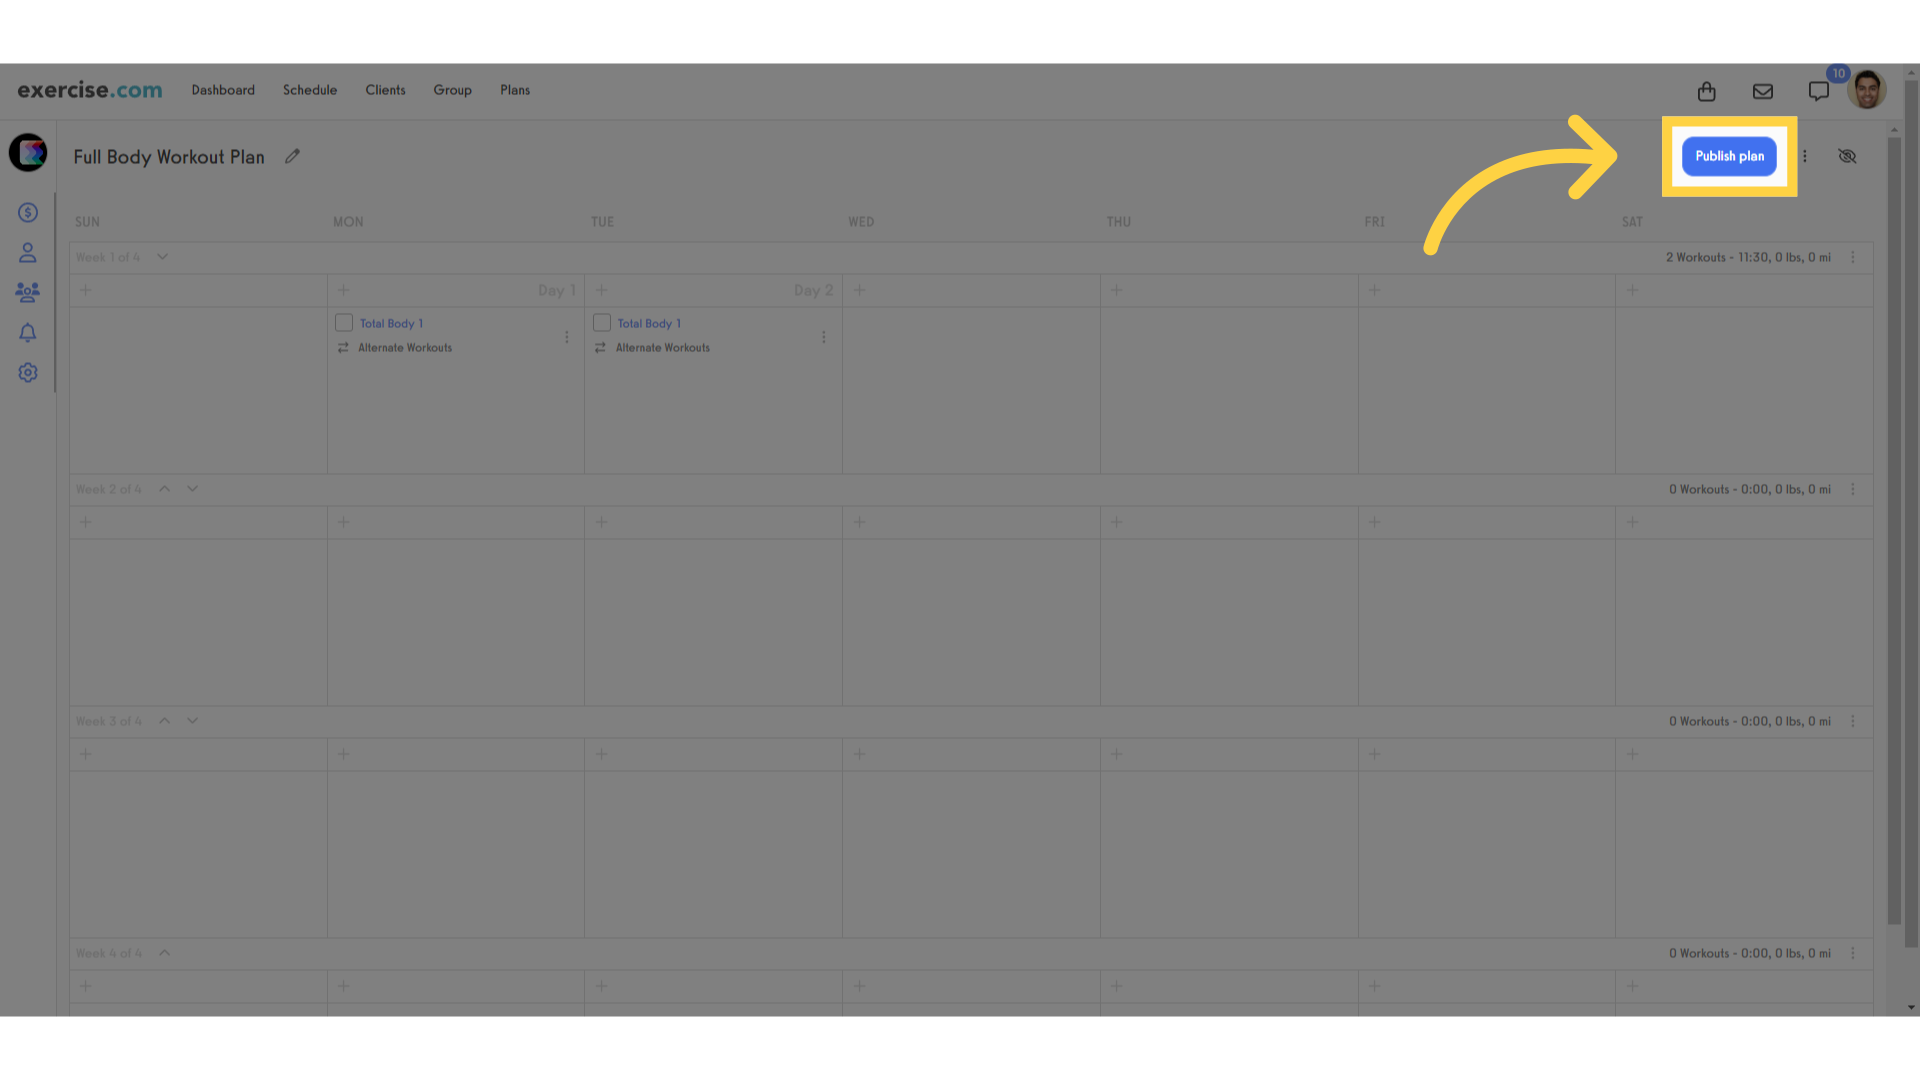
33. Once all of your workouts are ready, click Publish plan to finalize it and check for potential issues.
Once all of your workouts are ready, click Publish plan to finalize the plan and check for potential issues. You will still be able to edit or un-publish the plan later.
This guide walked you through the full process of creating a plan in Exercise.com’s workout plan creator. Now you are ready to create your next plan on your own.


