How to Create Assets and Sub-Assets
With Asset Management on Exercise.com’s fitness business management software, you’ll be able to manage clients reserving things like equipment or facility space with ease. This guide will walk through the process of creating assets and sub-assets on your platform.
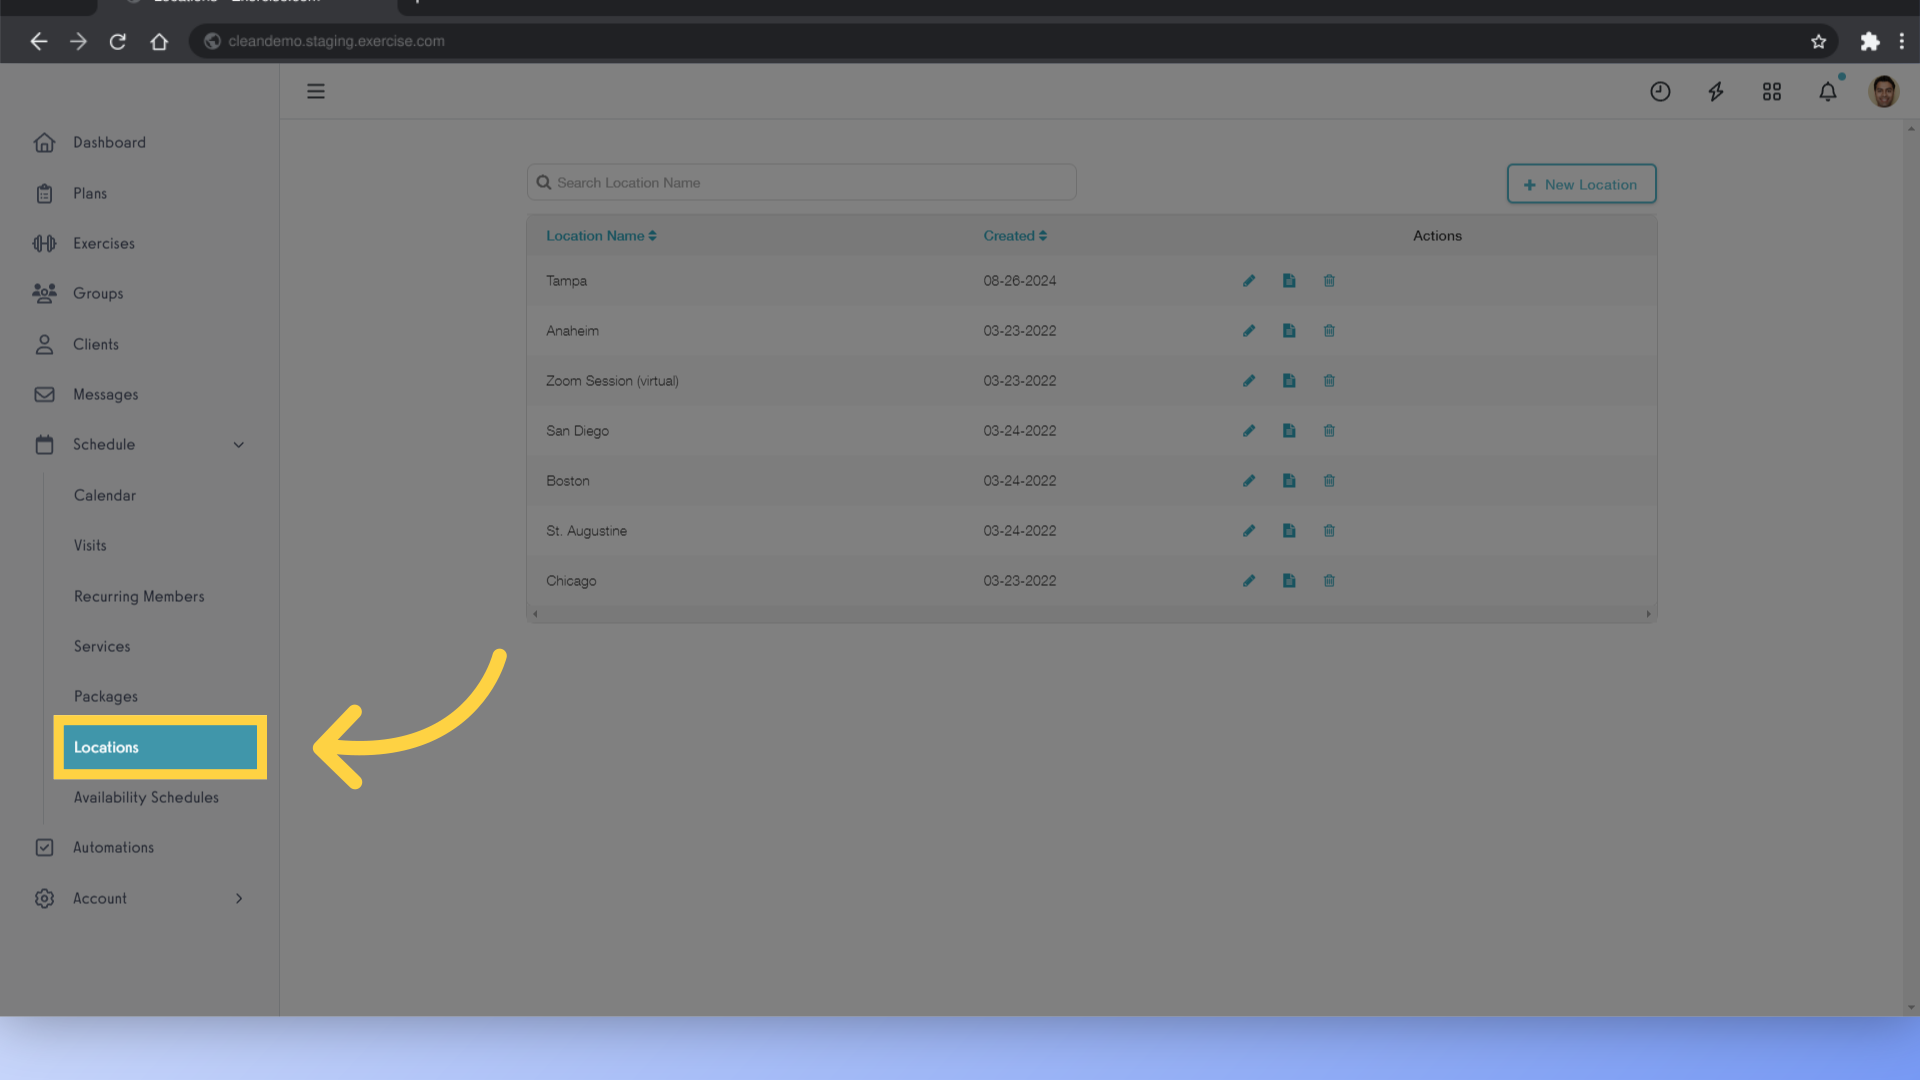
1. Click the “Locations” tab to manage your Locations.
You can create and edit your Assets under each Location. Click the “Locations” tab to manage your Locations.
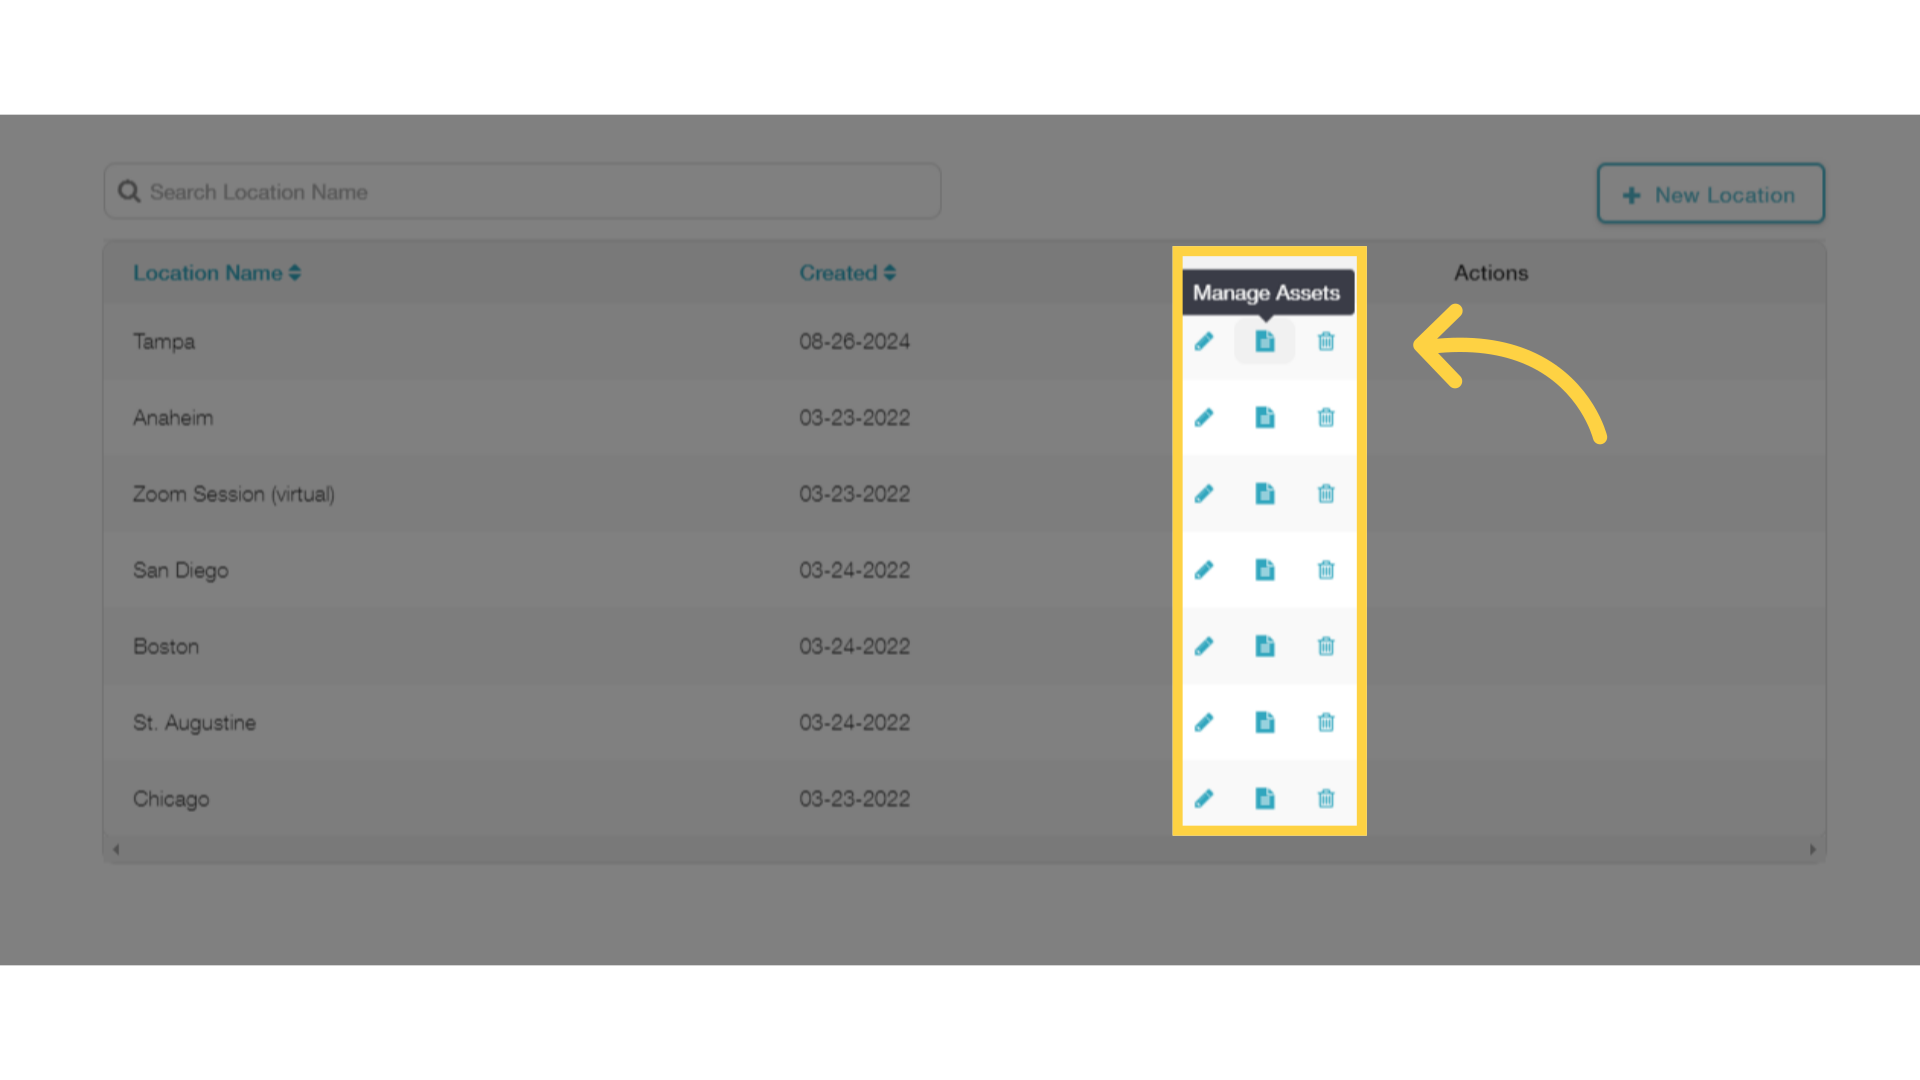
2. Click the “Manage Assets” icon for the Location you want to update.
Click the “Manage Assets” icon for the Location you want to update.
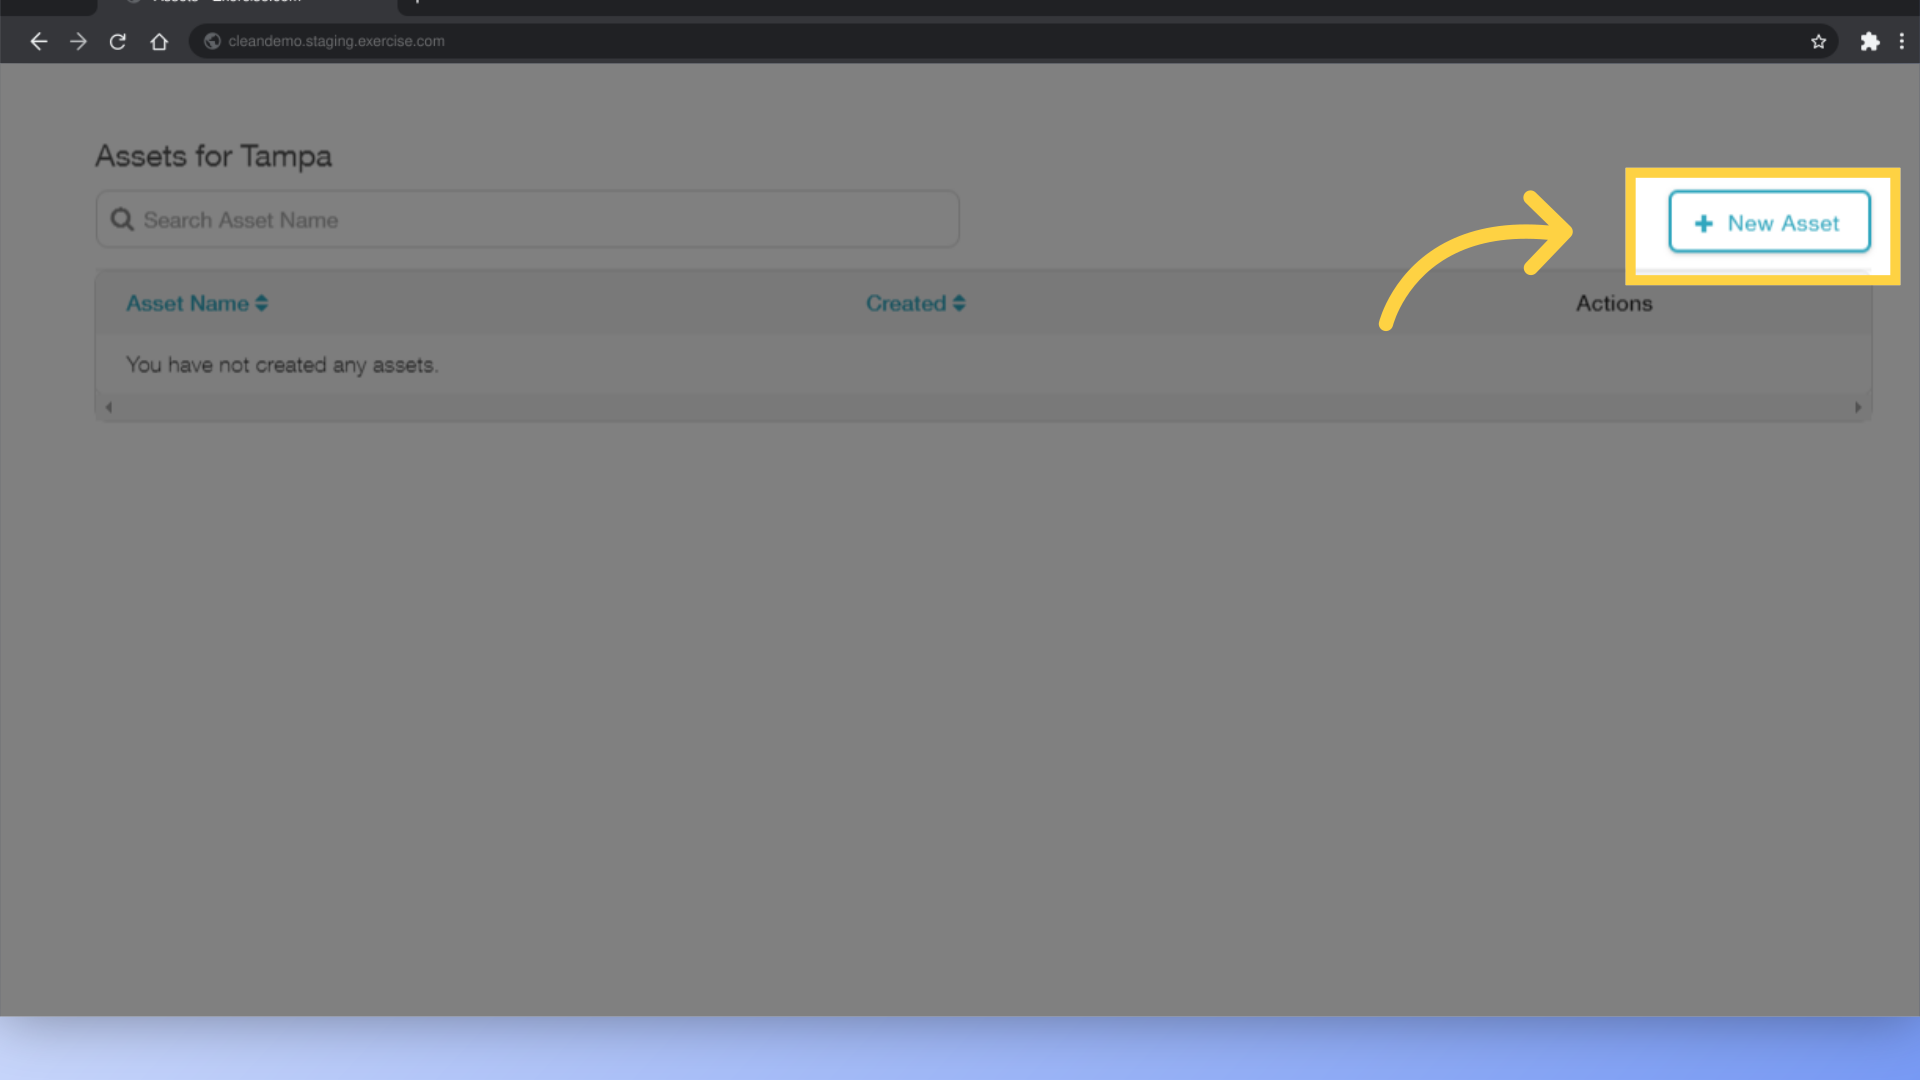
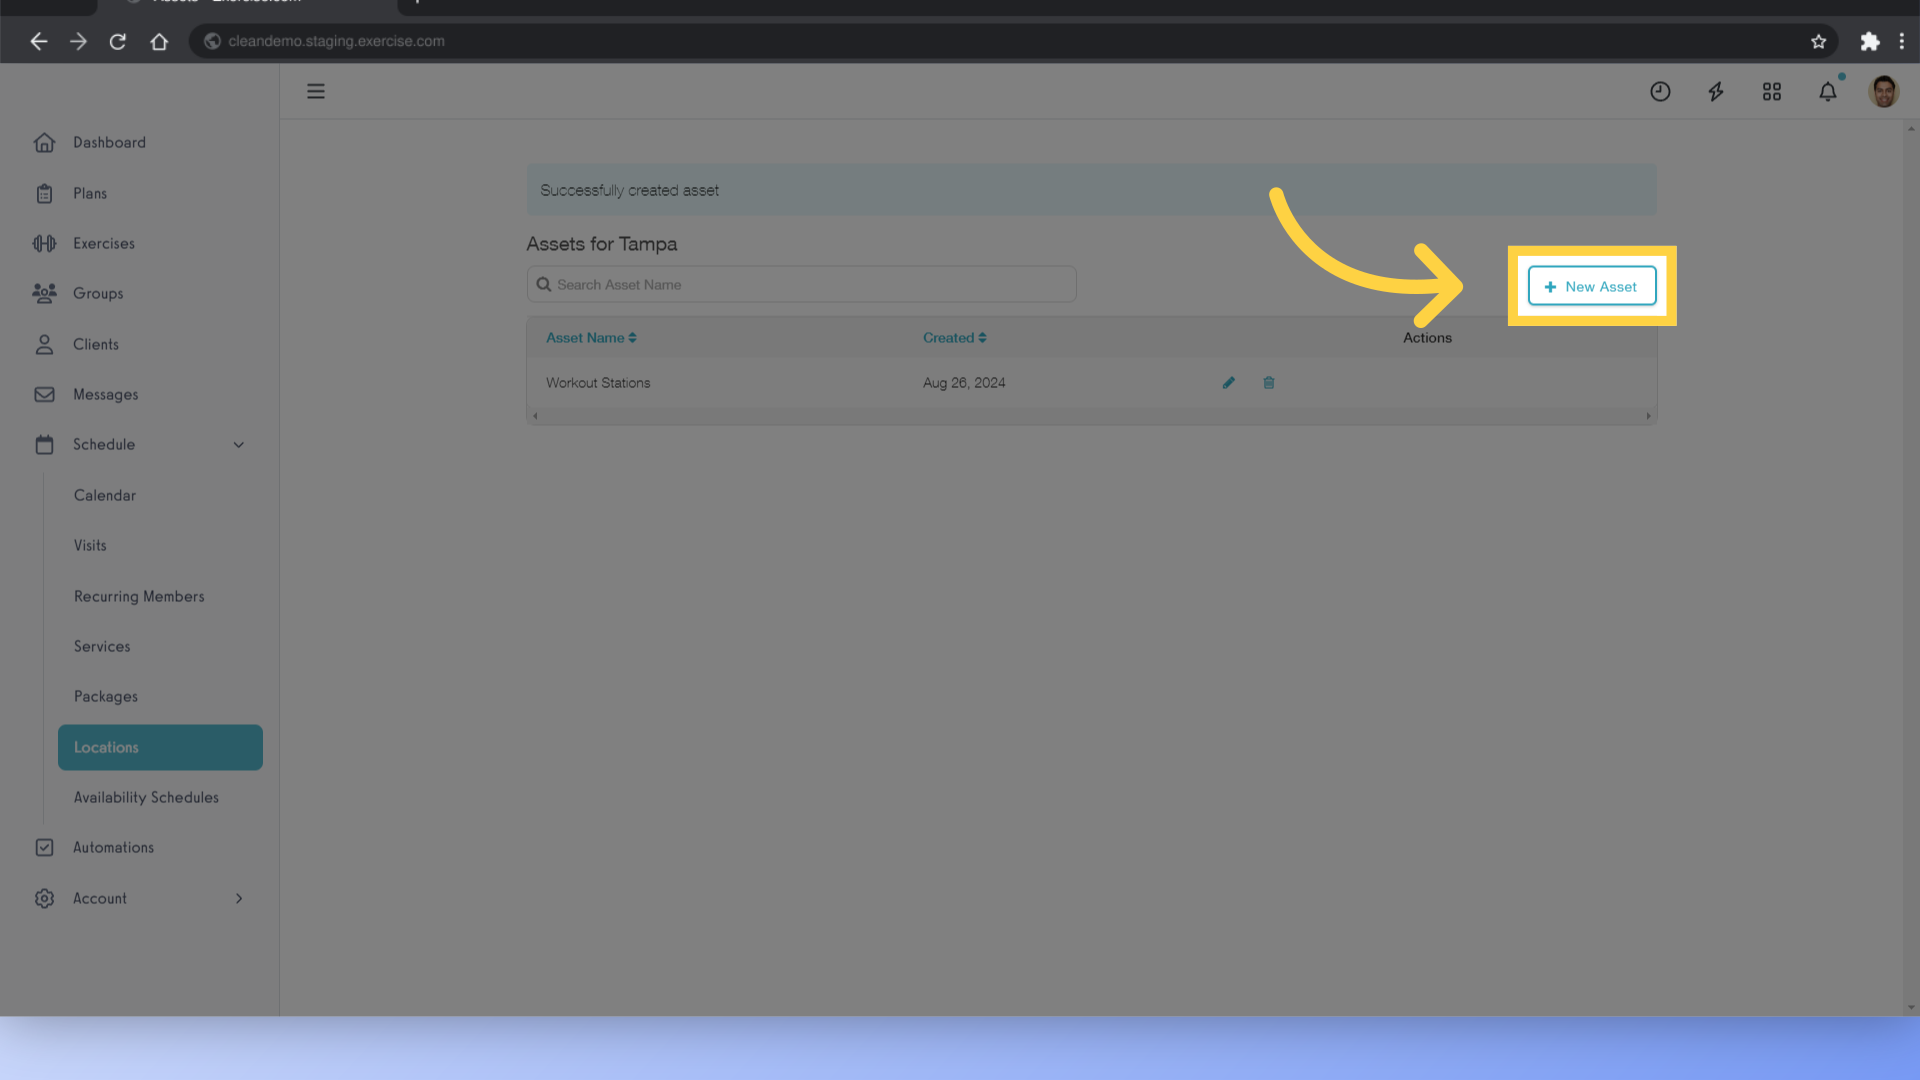
3. Click the “New Asset” button.
Click the “New Asset” button.
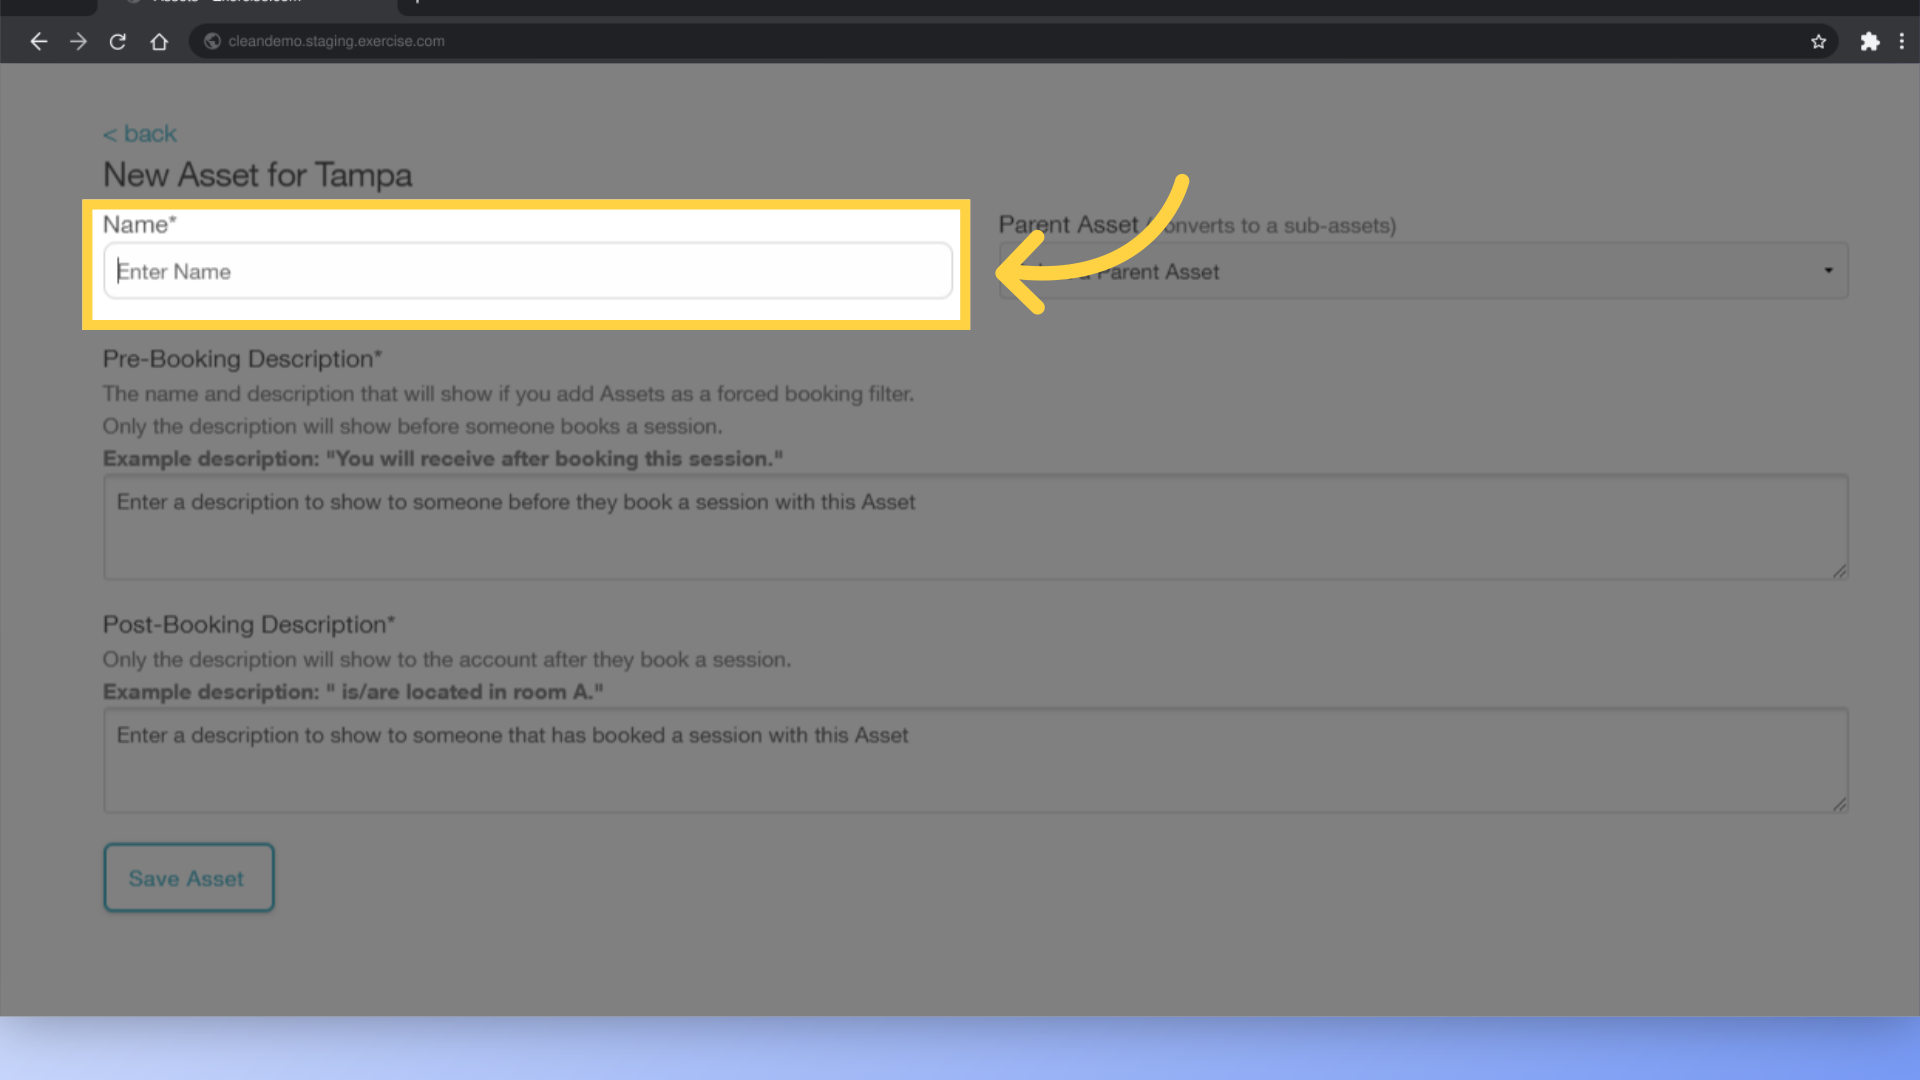
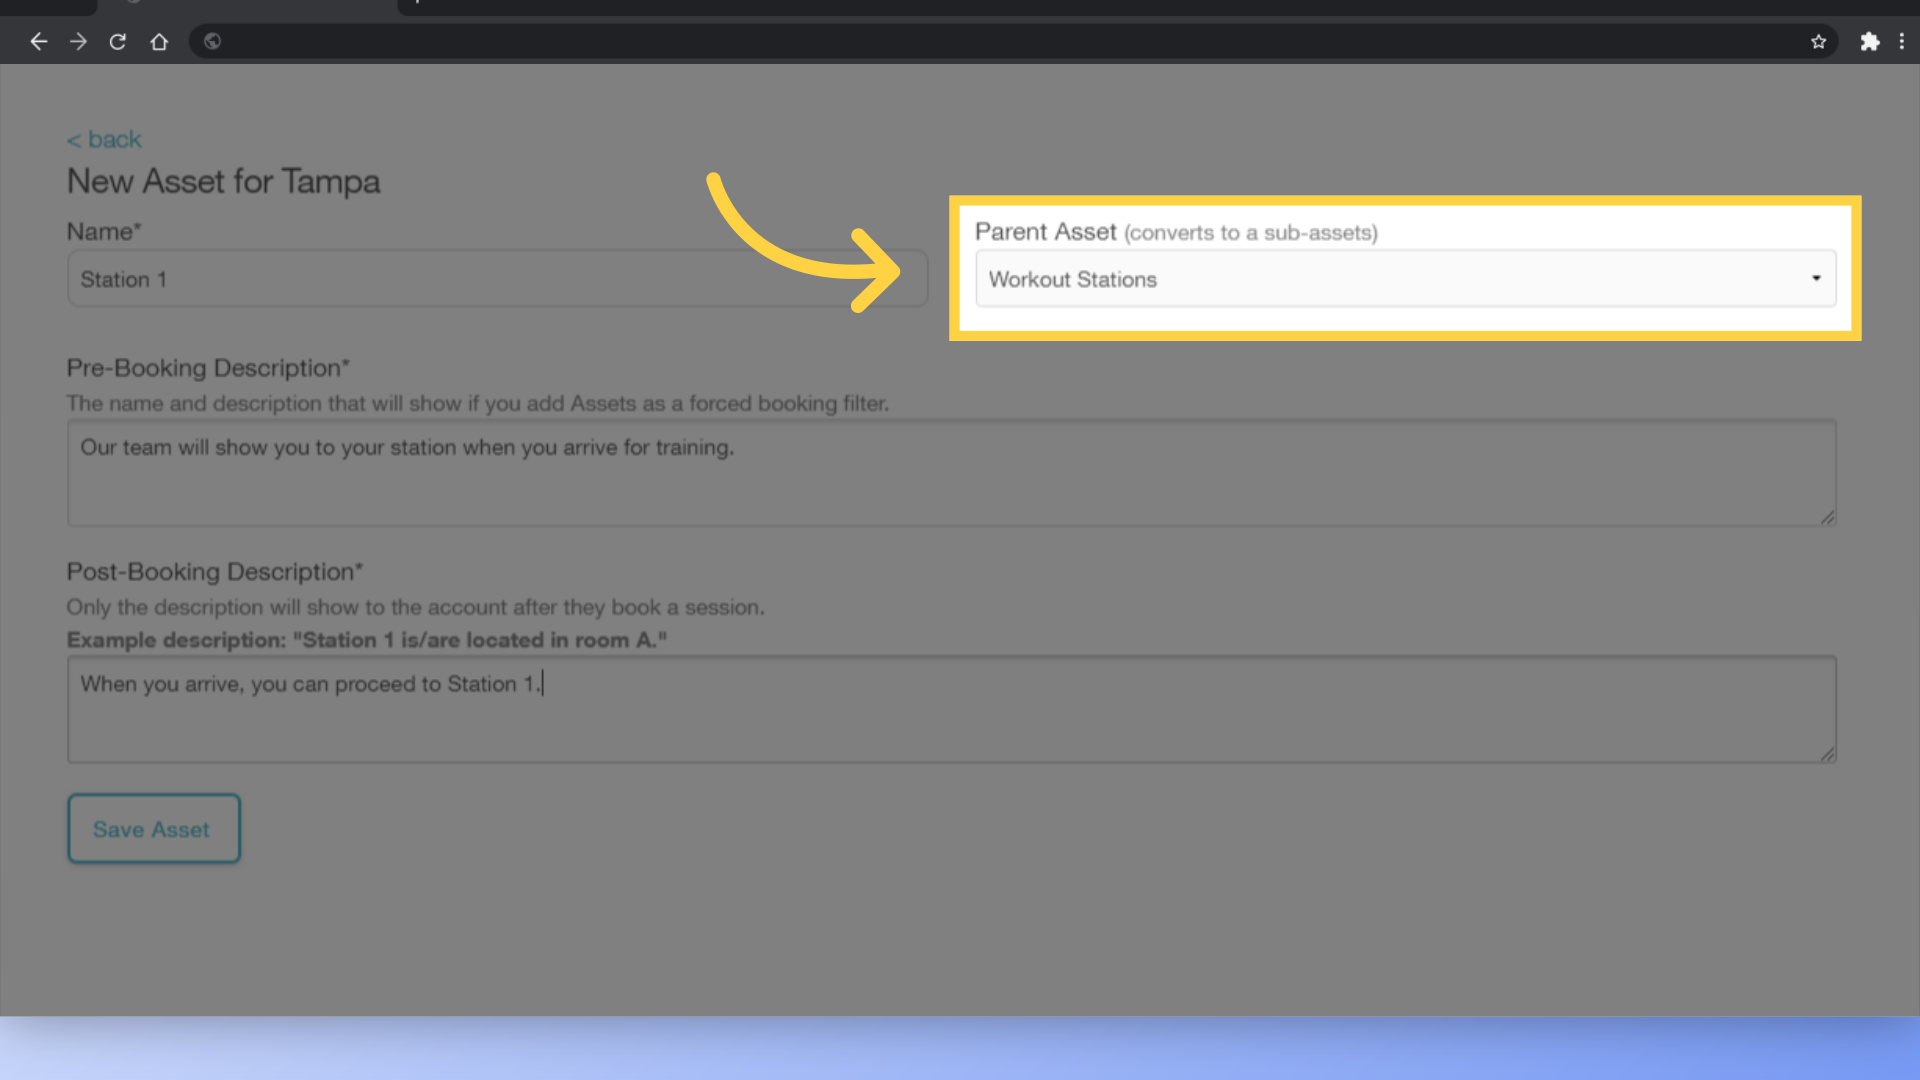
4. Enter the name for your Asset.
Enter the name for your Asset. For this example, we’re going to add a Parent Asset here as “Workout Stations”. That way we can add sub-assets underneath this one as Workout Station 1, Workout Station 2, and so on.
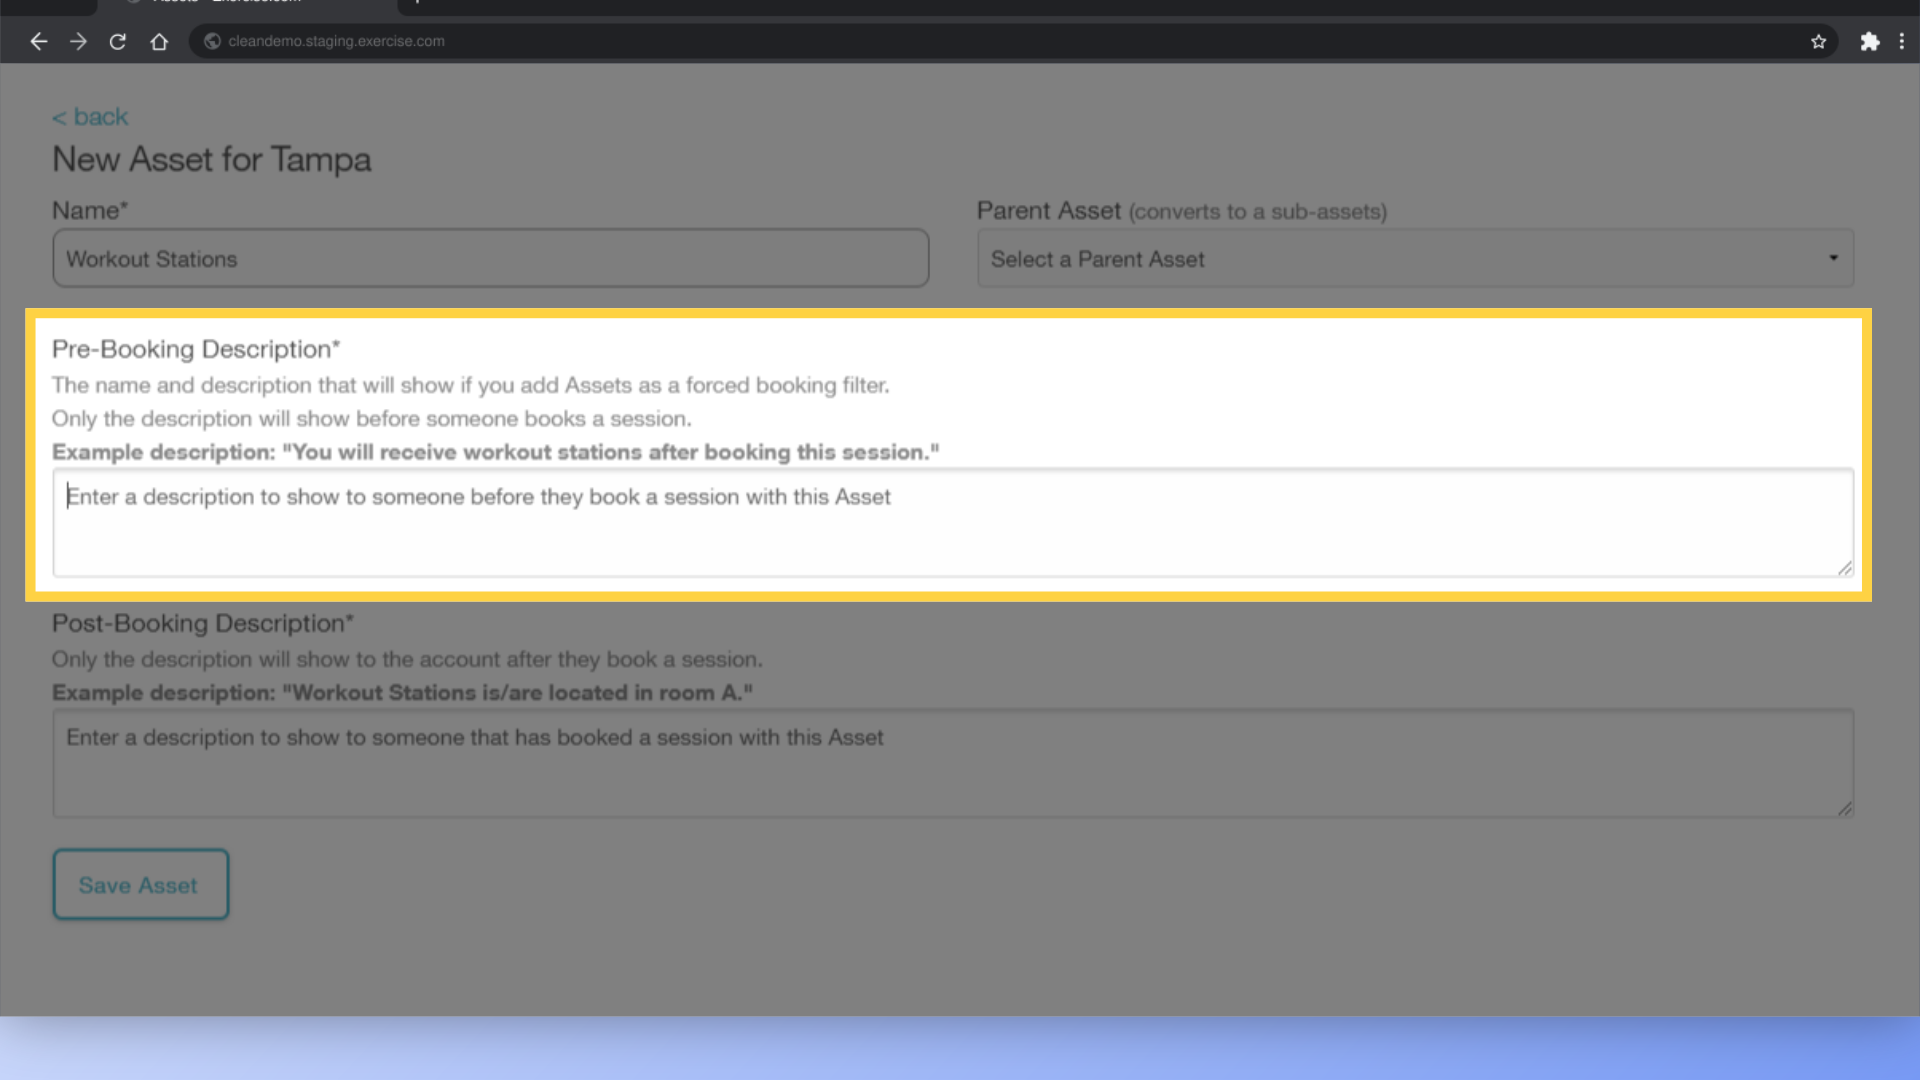
5. Fill out the Pre-Booking Description.
Fill out the Pre-Booking Description. This will give some guidance to your clients if you allow them to filter by Assets when they are booking sessions.
6. Here’s how the description looks before someone books a session.
Here is what the pre-booking description will look like when a client is preparing to book a session.

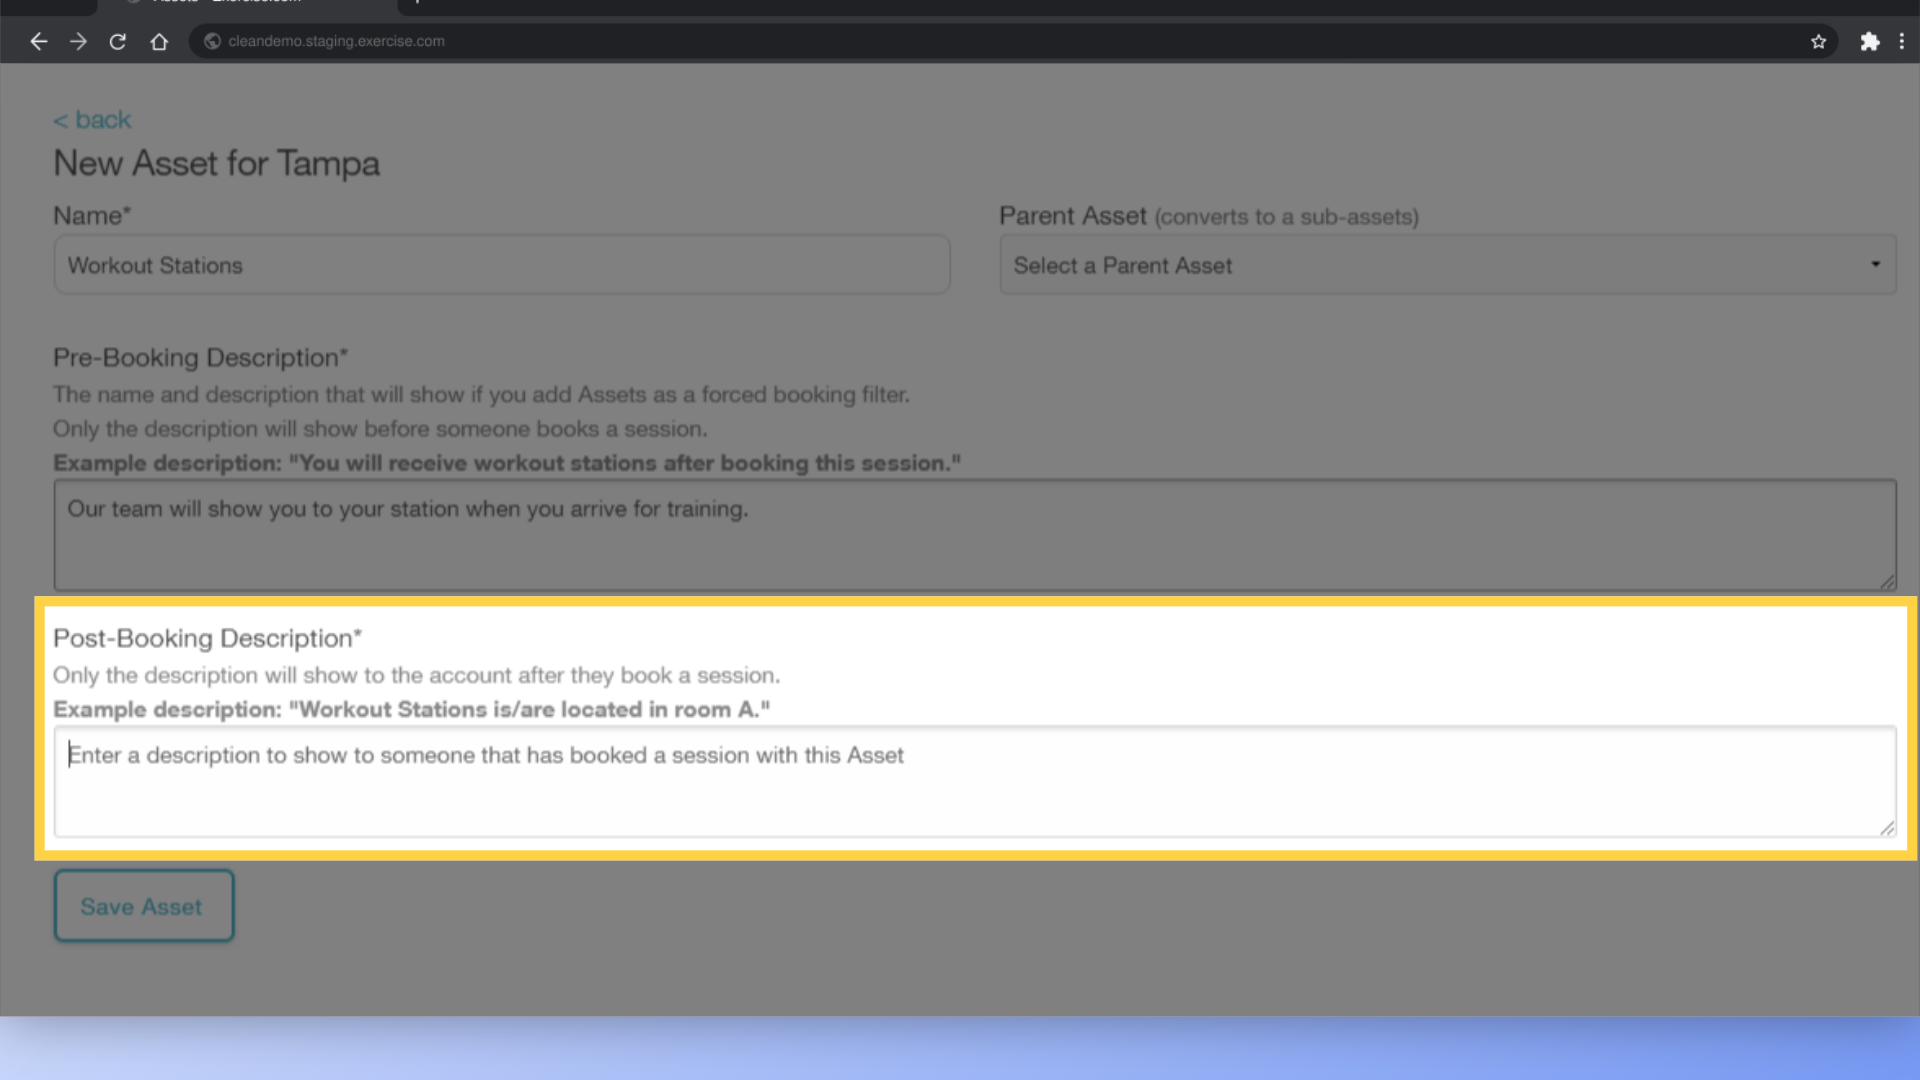
7. Fill out the Post-Booking Description.
Fill out the Post-Booking Description. This is a good way to give instructions for clients to see AFTER they have booked a session that will use a specific asset.
8. Here is how the description is displayed after someone books a session.
Here is what the post-booking description will look like after a client has successfully booked a session.

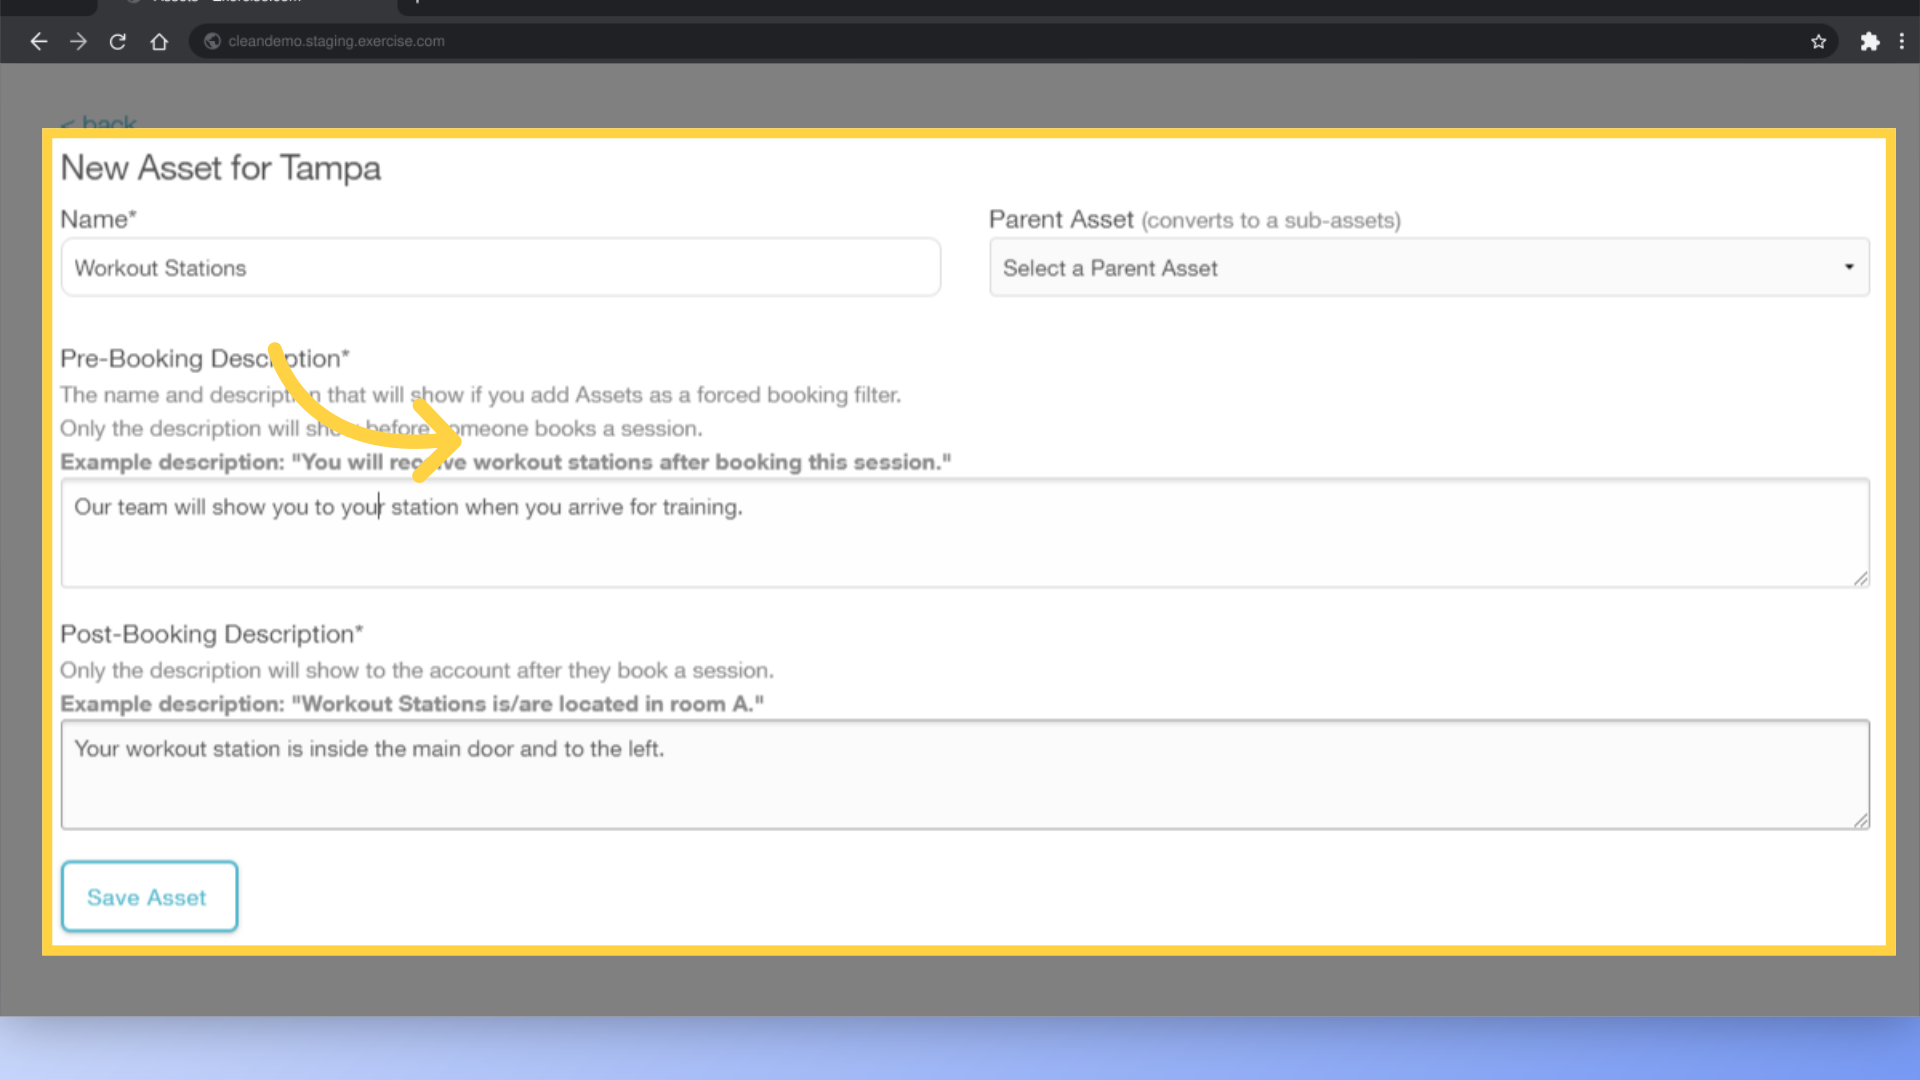
9. Review and Confirm your settings for the Parent Asset.
Review and Confirm your settings for the Parent Asset. In our example, we give more generic instructions pre-booking, and more specific guidance post-booking.
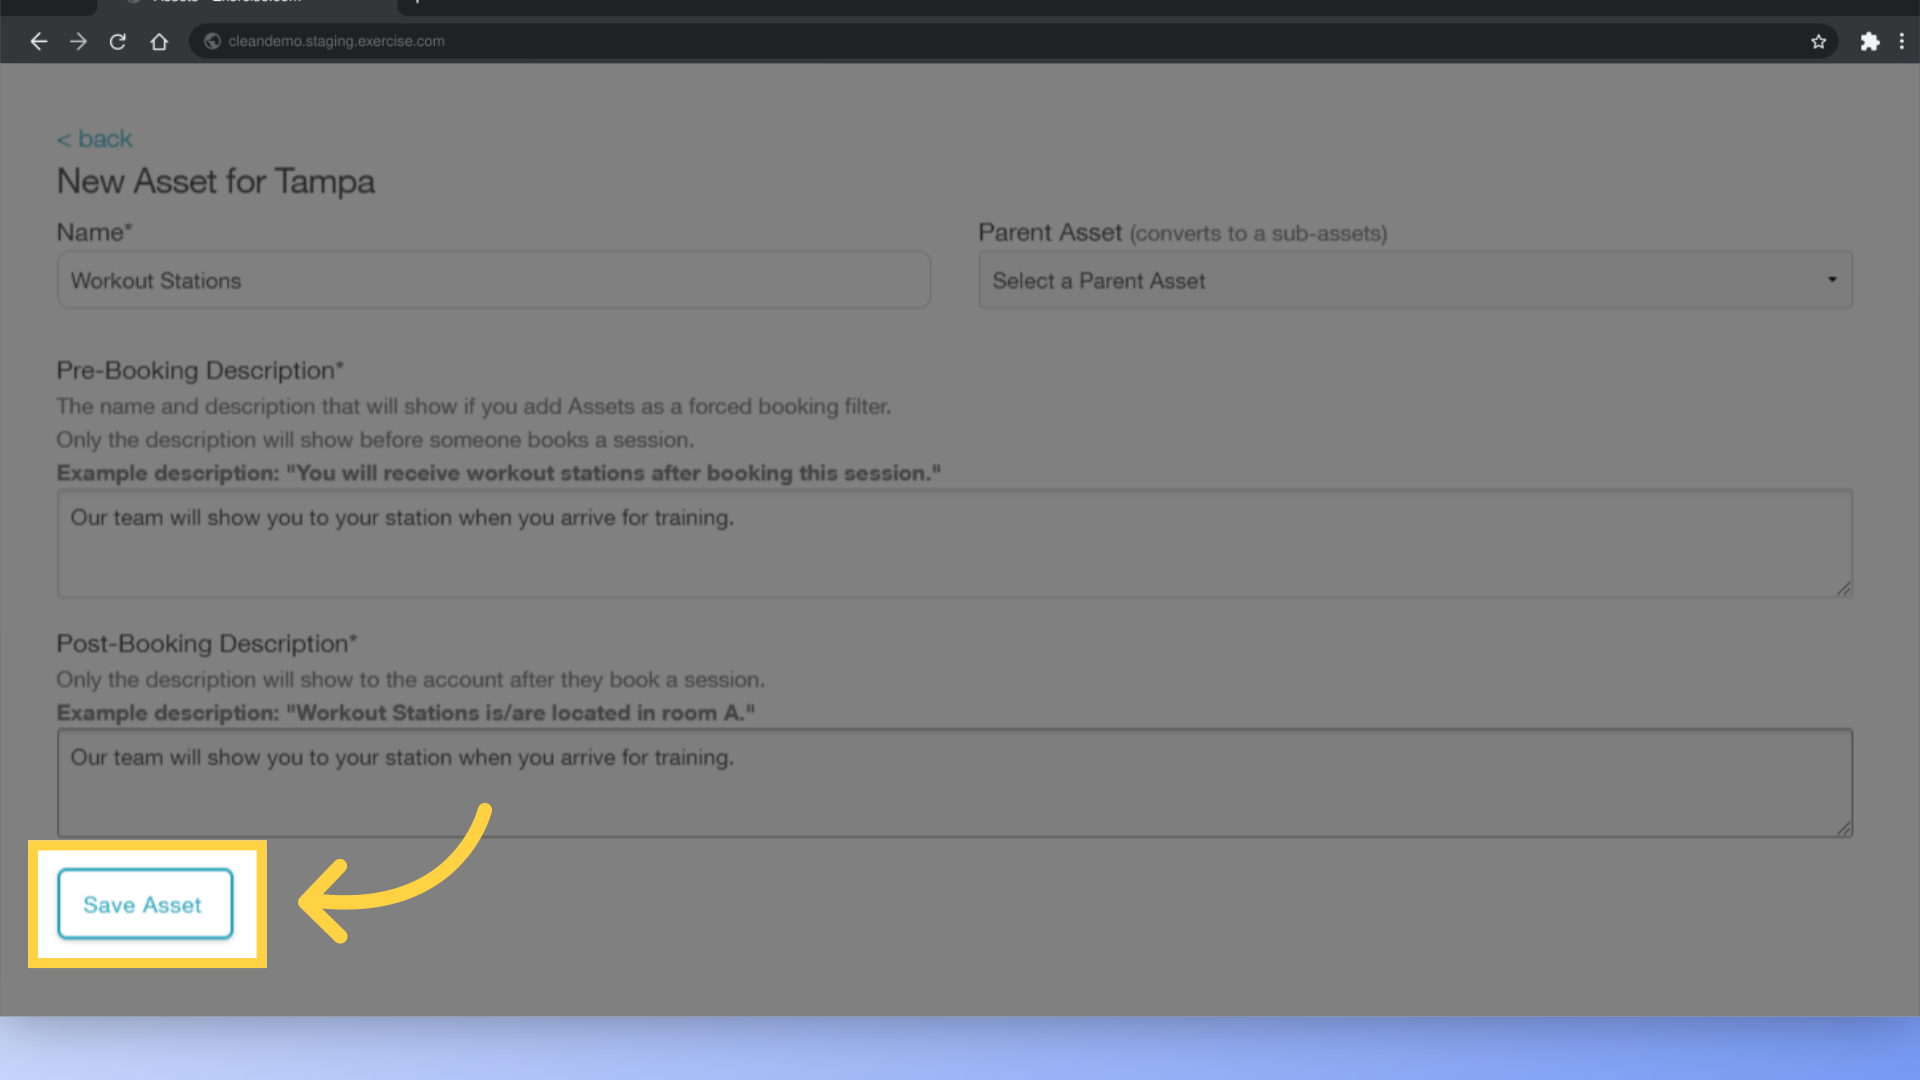
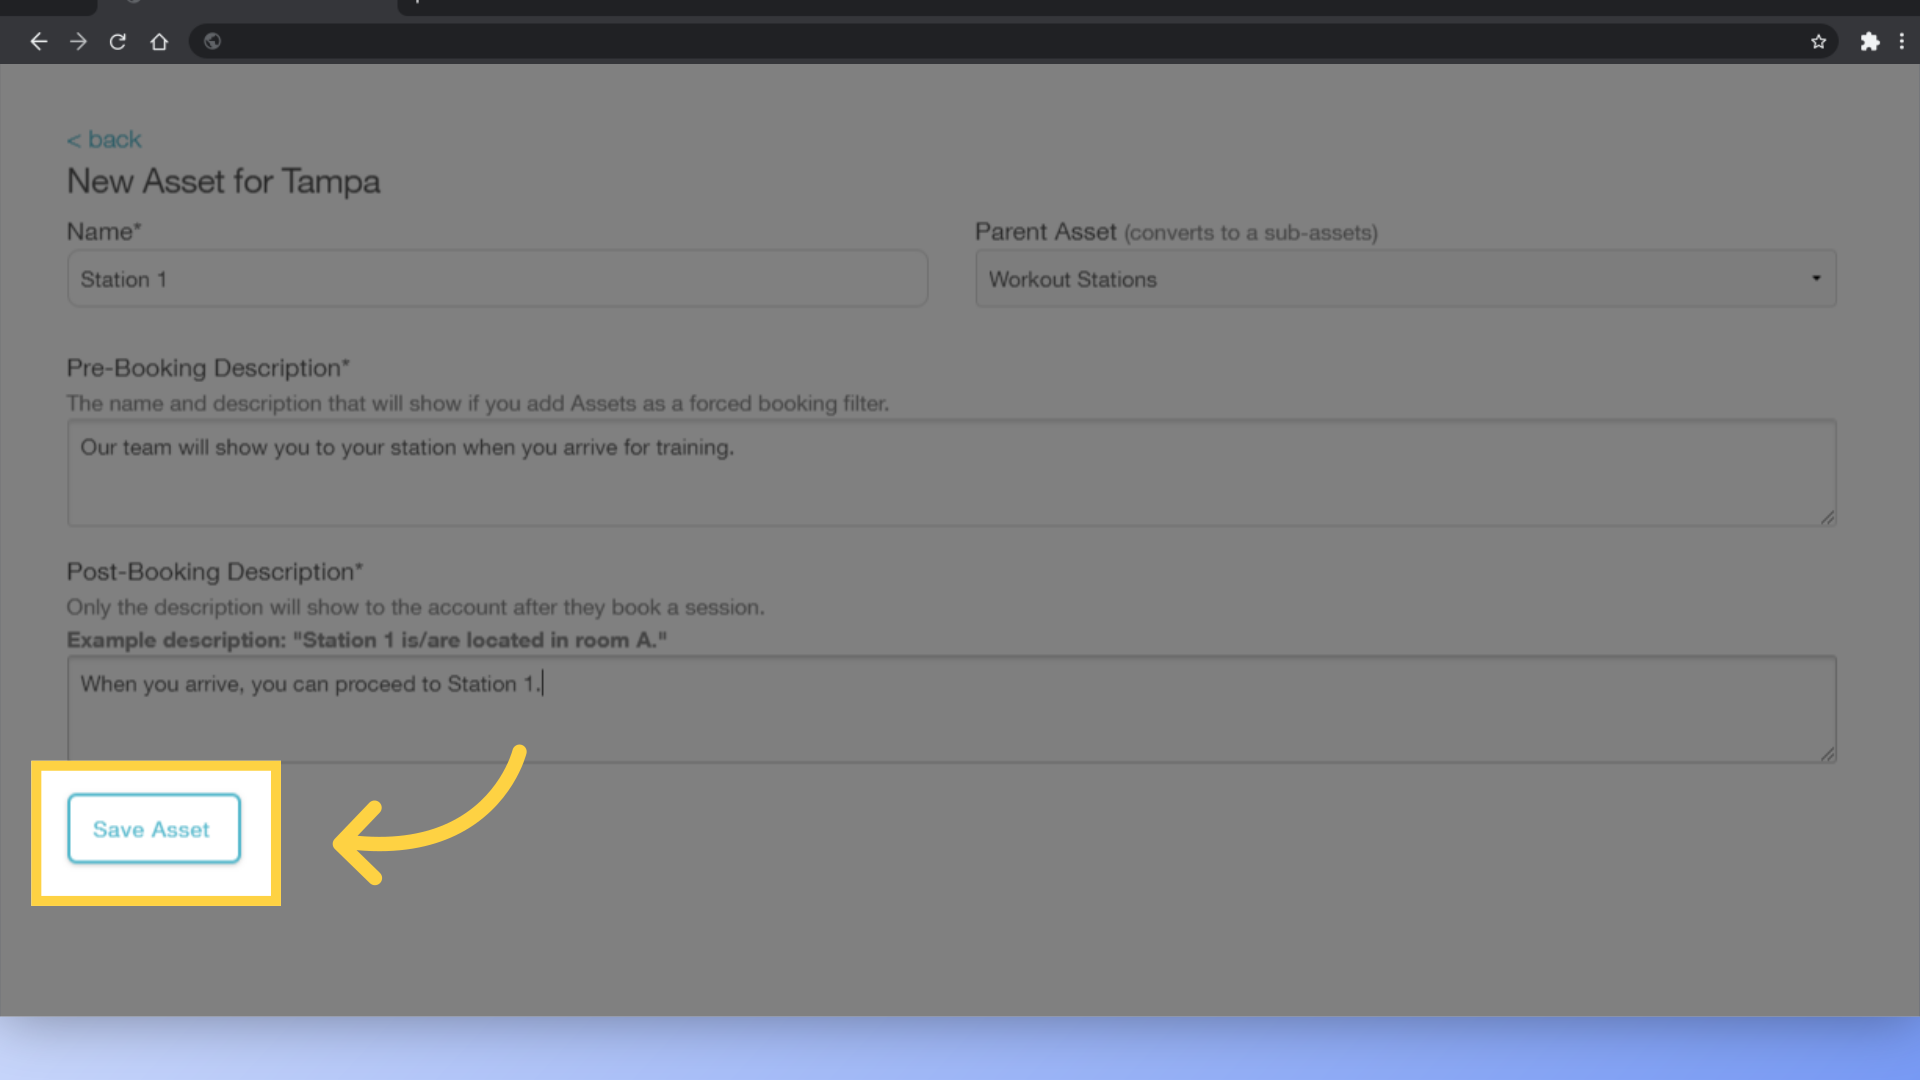
10. Click “Save Asset”.
Click “Save Asset” to save your new Asset.
11. Click “New Asset” again to create a Sub-Asset.
Now we’ll go ahead and add some Sub-Assets underneath the Workout Stations Asset that we just created. Click “New Asset” again to create a Sub-Asset.
12. Give your Sub-Asset a name and descriptions similar to the parent asset.
Give your Sub-Asset a name and descriptions similar to the parent asset. You can see what we’ve done here for our Station 1 example.
13. Make sure to specify the Parent Asset if you want this to be a Sub-Asset.
Note that we are setting up Station 1 underneath the Parent Asset of Workout Stations. Sub-Assets are useful if you have spaces or equipment to reserve individually and also want to allow clients to book all of them at once.
14. Click “Save Asset” to save and continue.
Click “Save Asset” to save and continue.
15. Continue creating your Assets and Sub-Assets.
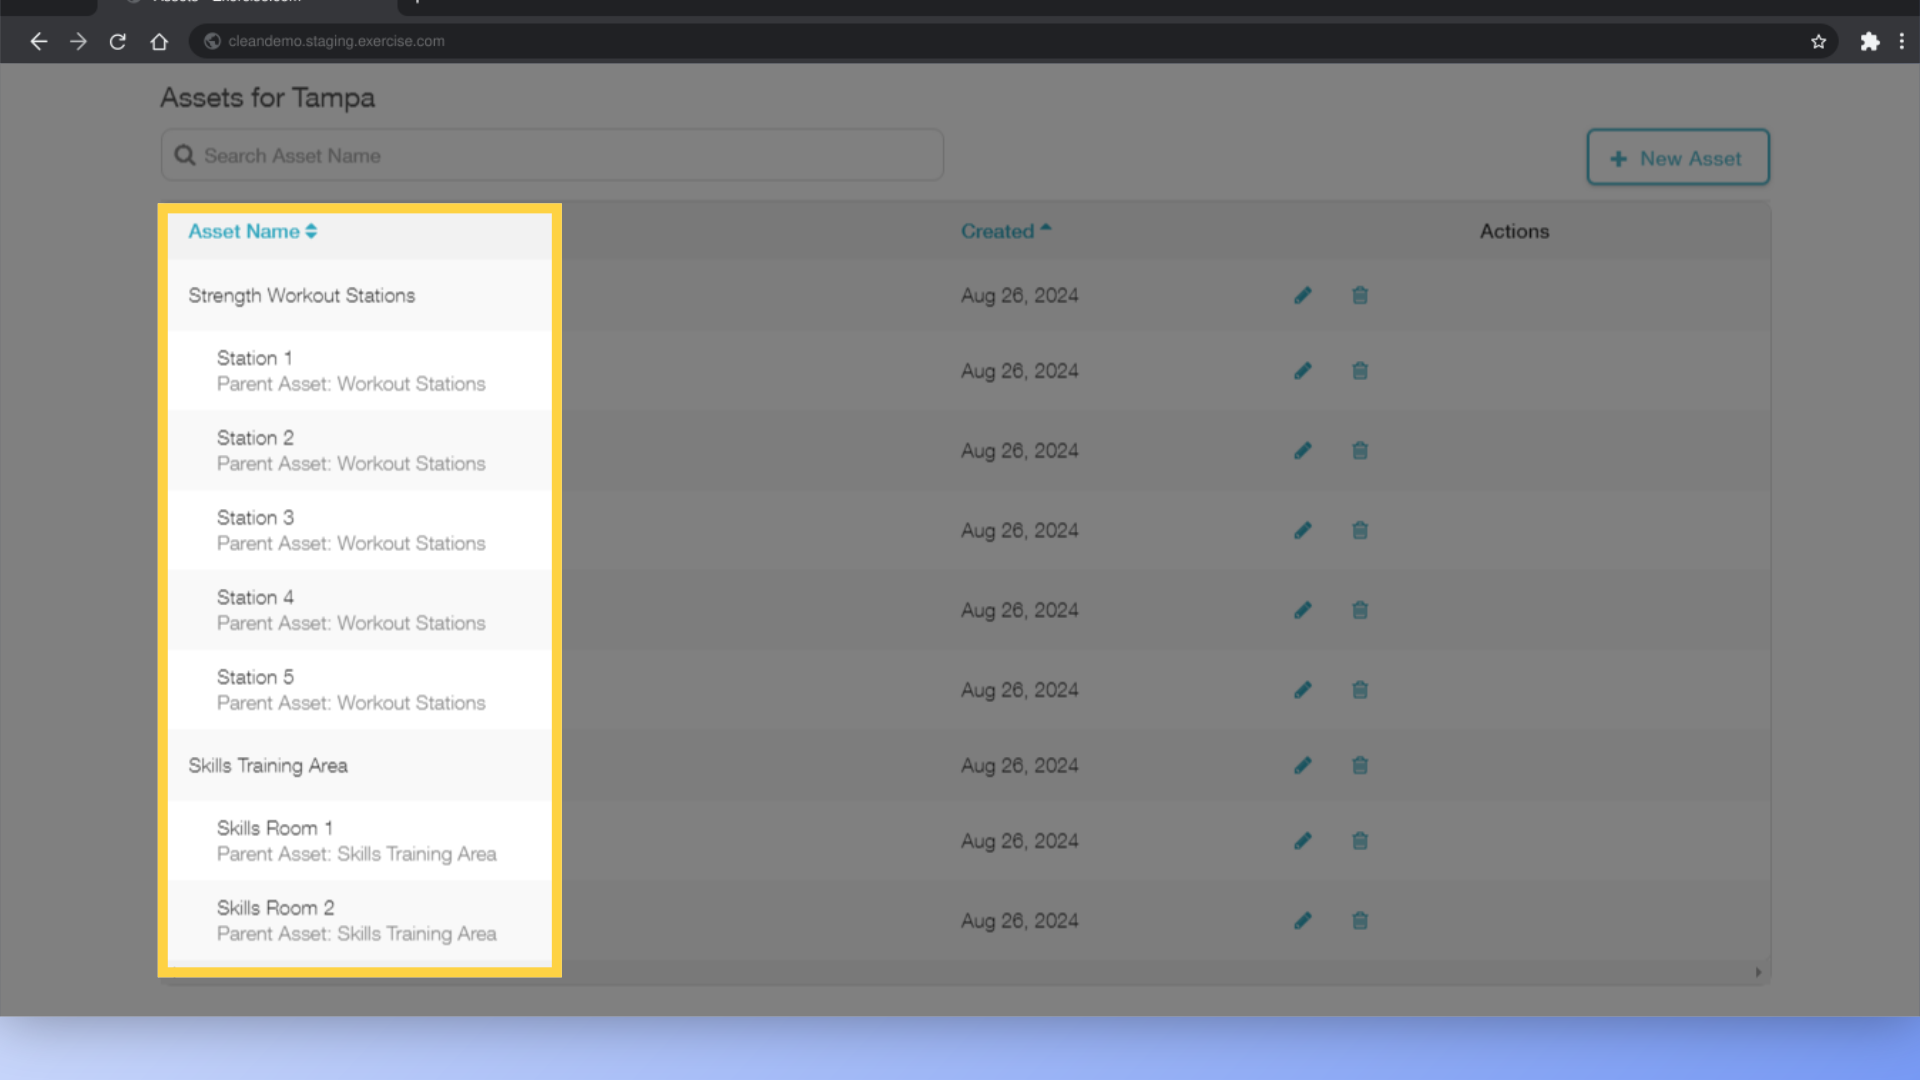
Continue creating your Assets and Sub-Assets so you’re ready to set up your schedule. For our example, we’ve added Stations 1 through 5 under “Strength Workout Stations”, and Skills Room 1 and 2 under “Skills Training Area”.
This guide covered creating Assets and Sub-Assets underneath a Location on your platform, and showed examples of what the pre and post-booking descriptions look like from the client’s perspective. Thank you for watching!


