How to Set Custom Profile Fields to Revenue Reports
Posted by
Support Team
on
December 31, 2024
— Updated on
March 31, 2025
Within our Workout Software, you have the ability to set custom profile fields to revenue reports.
This guide provides a step by step process on how to set custom profile fields to revenue reports.
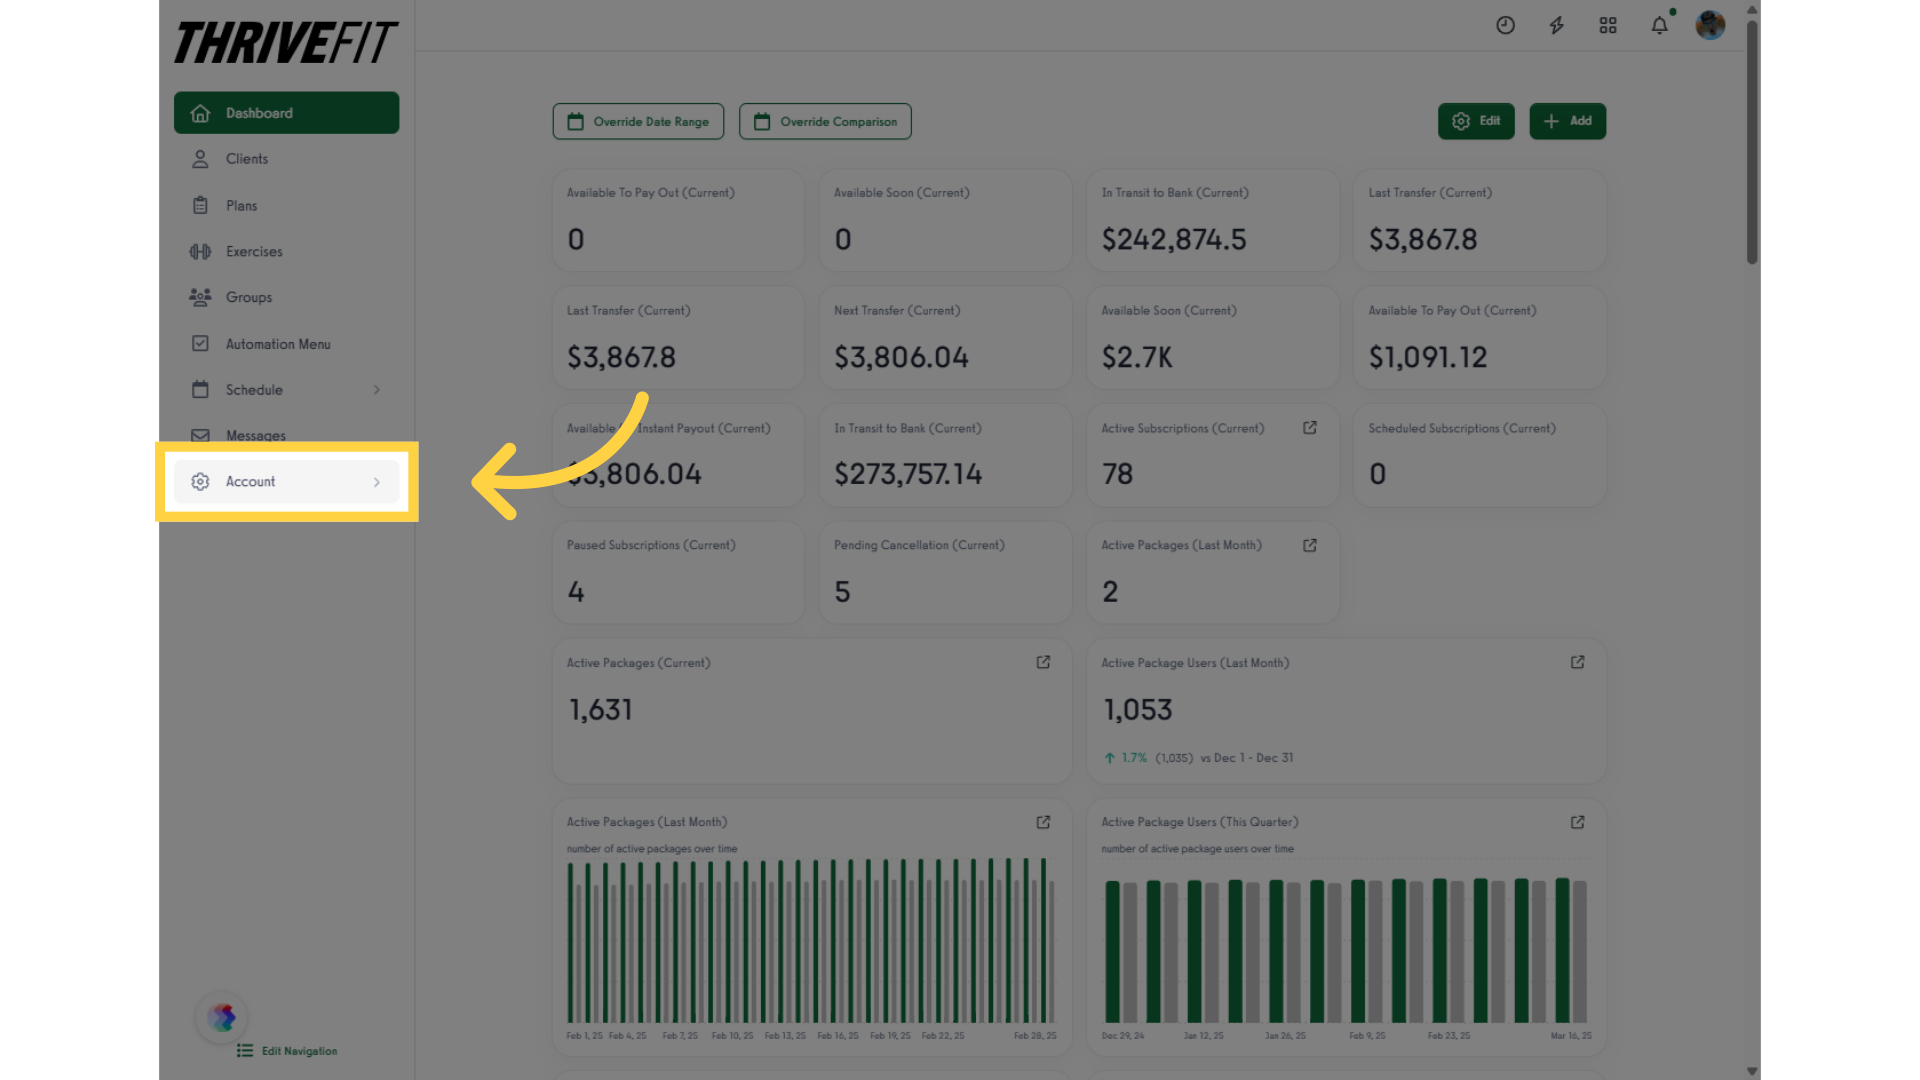
1. Account
Navigate to the “Account” section.
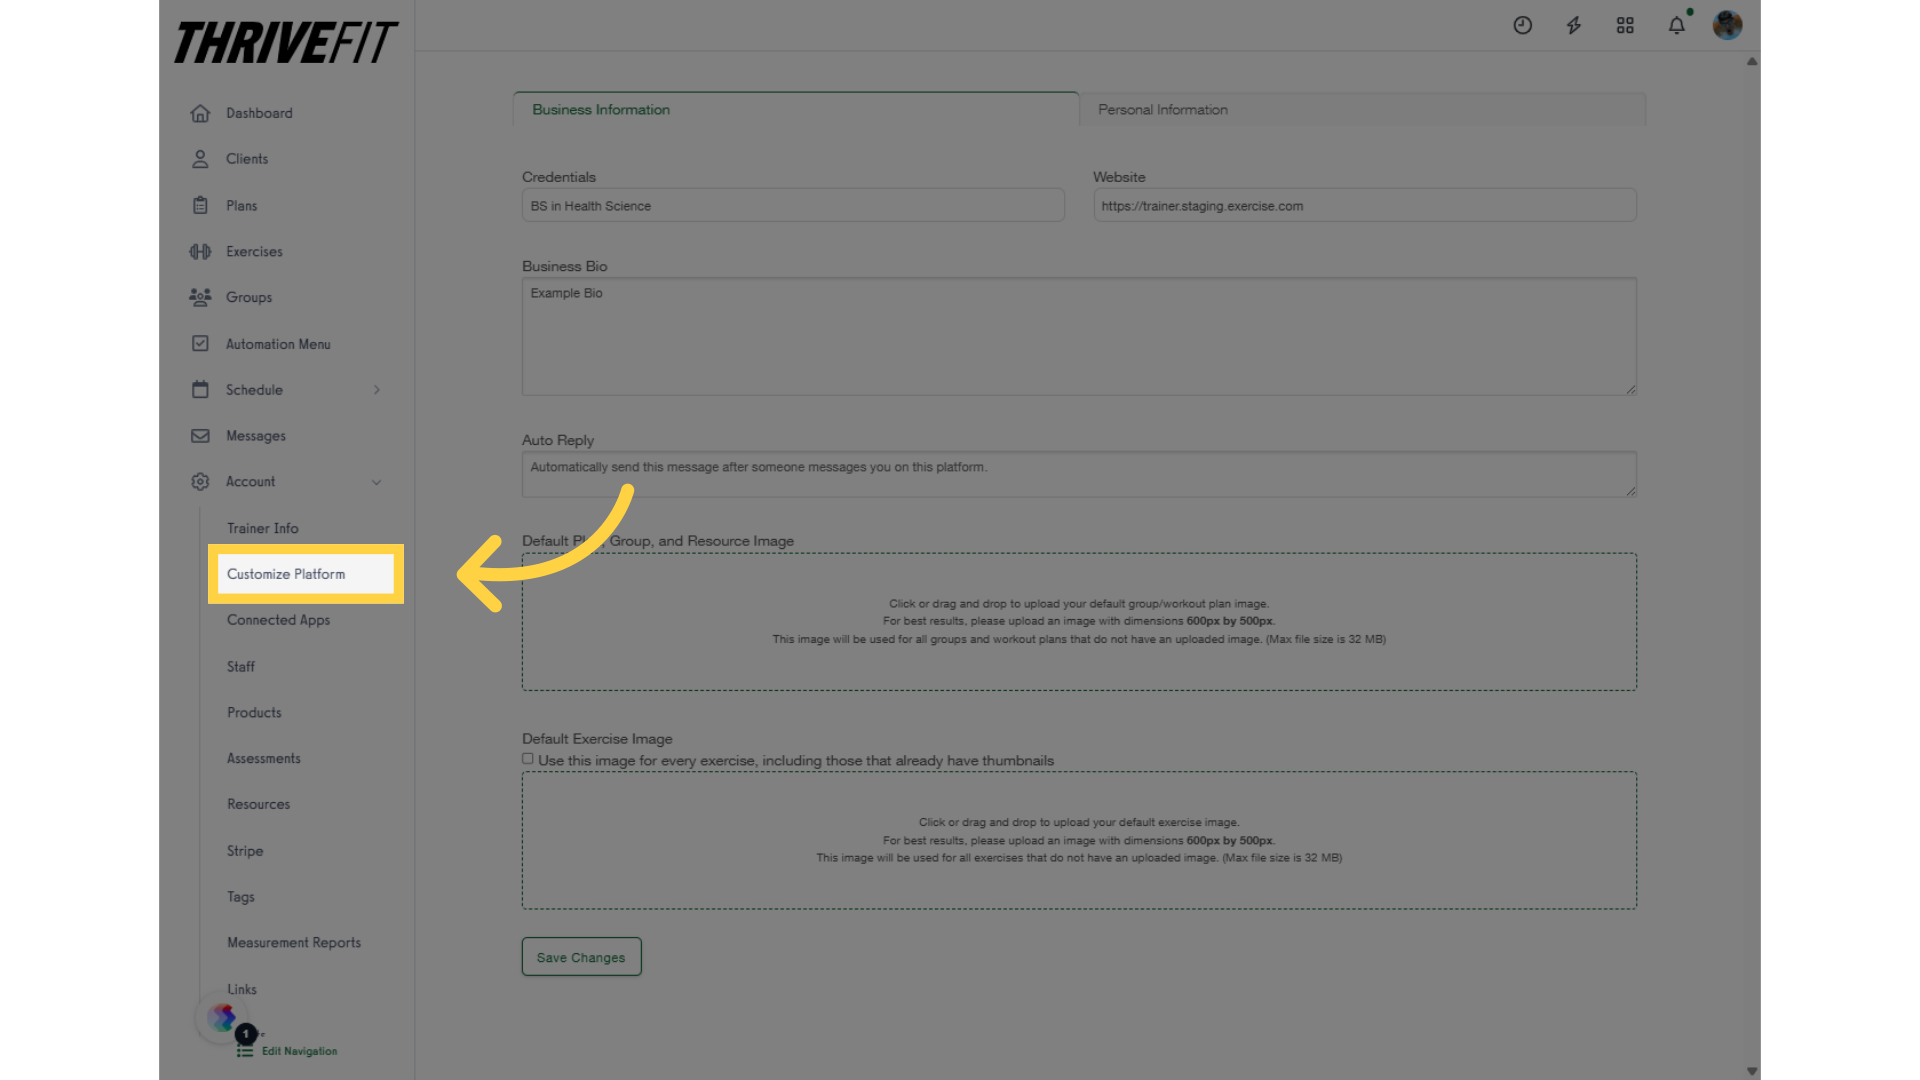
2. Customize Platform
Access the “Customize Platform” tab from the options.
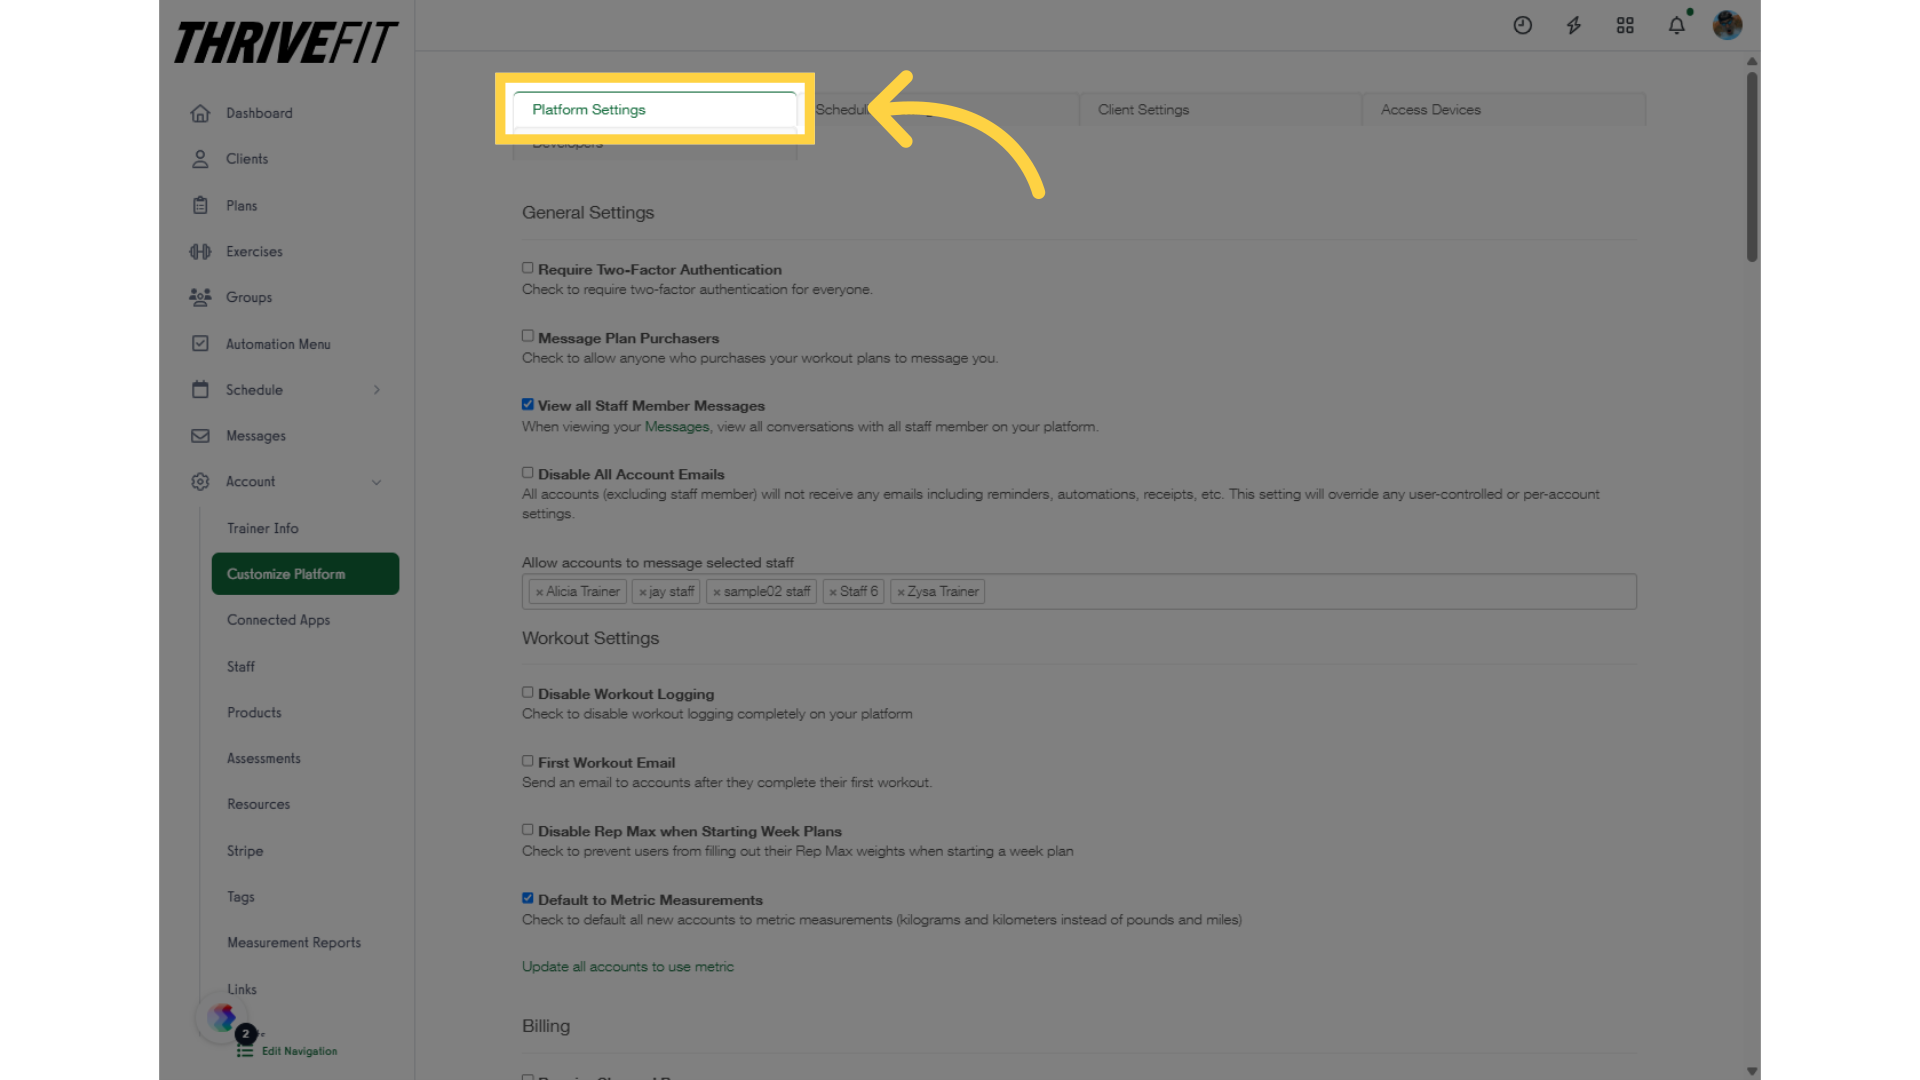
3. Platform Settings
Go to the “Platform Settings” panel.
4. Select Field
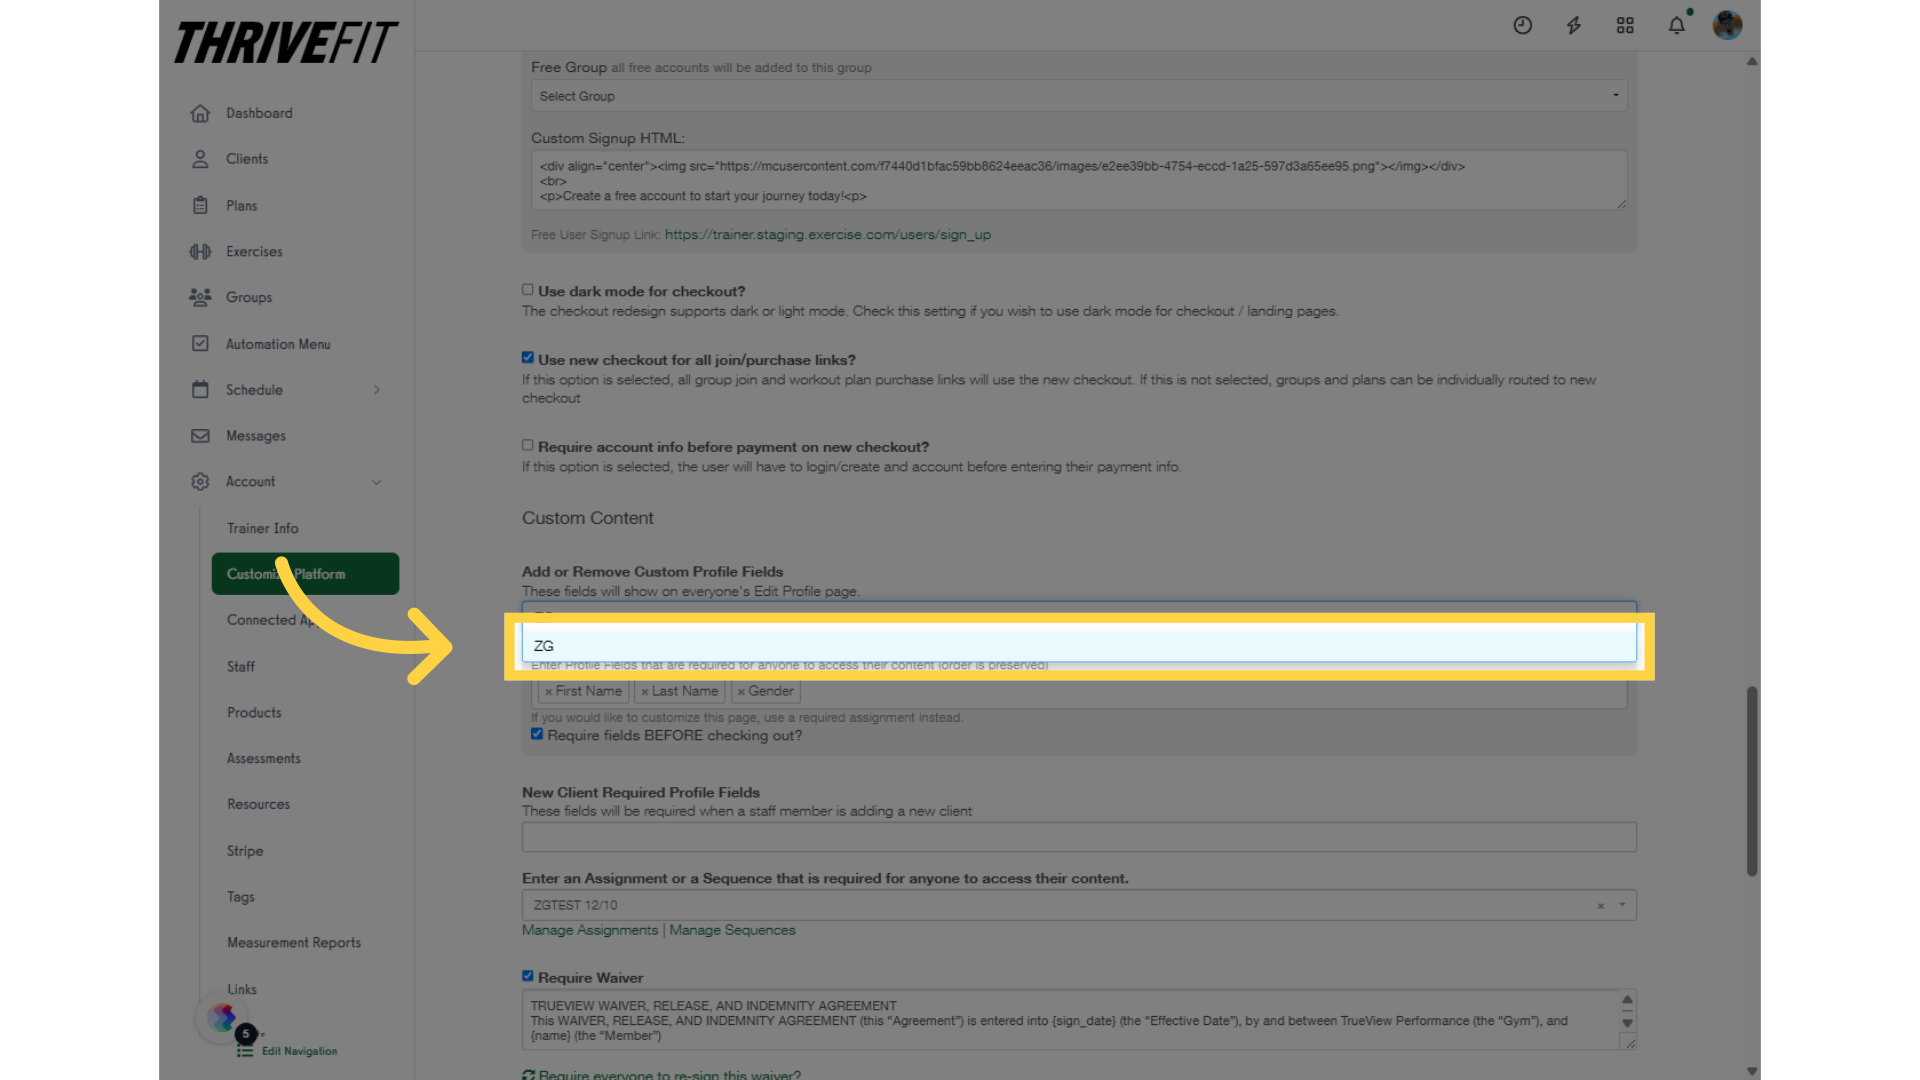
Under the “Add or Remove Custom Profile Fields” section, click inside the text field.
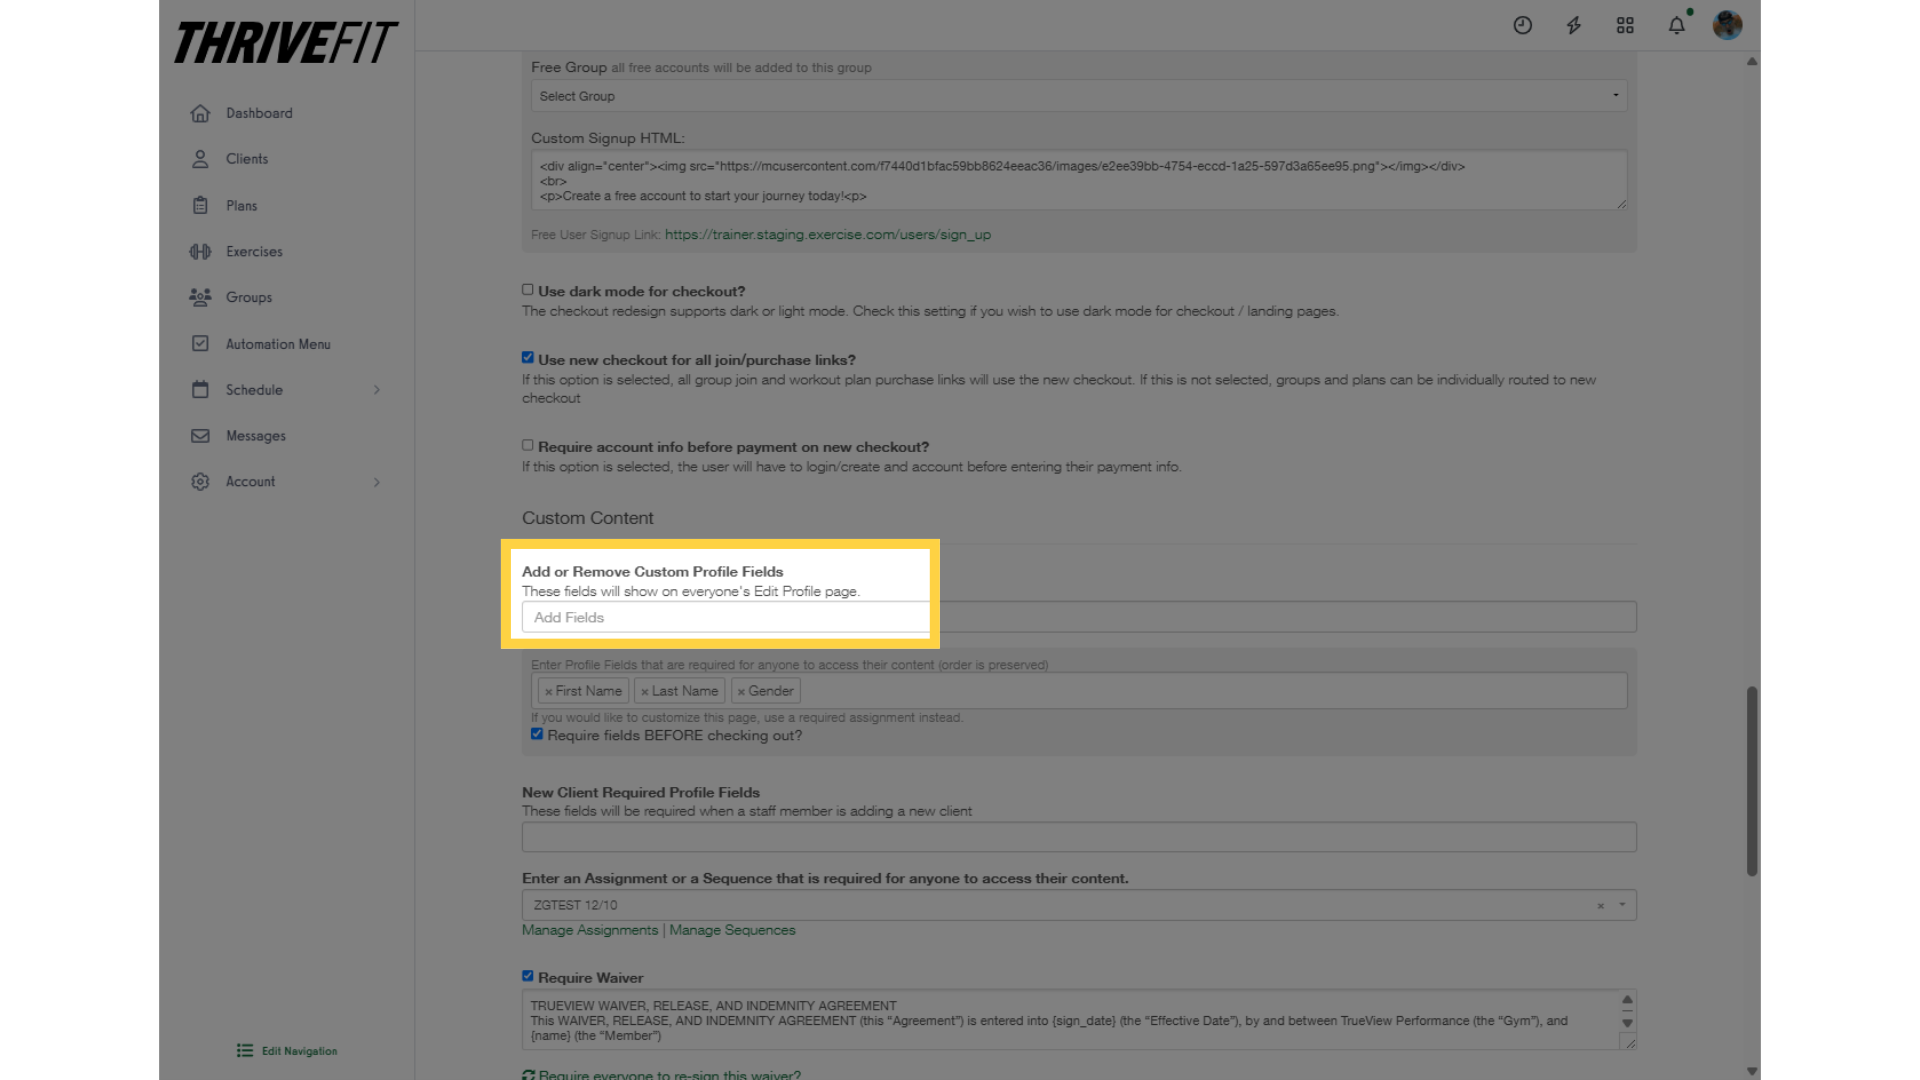
5. Enter Custom Profile Field
Enter the Custom Profile Field.
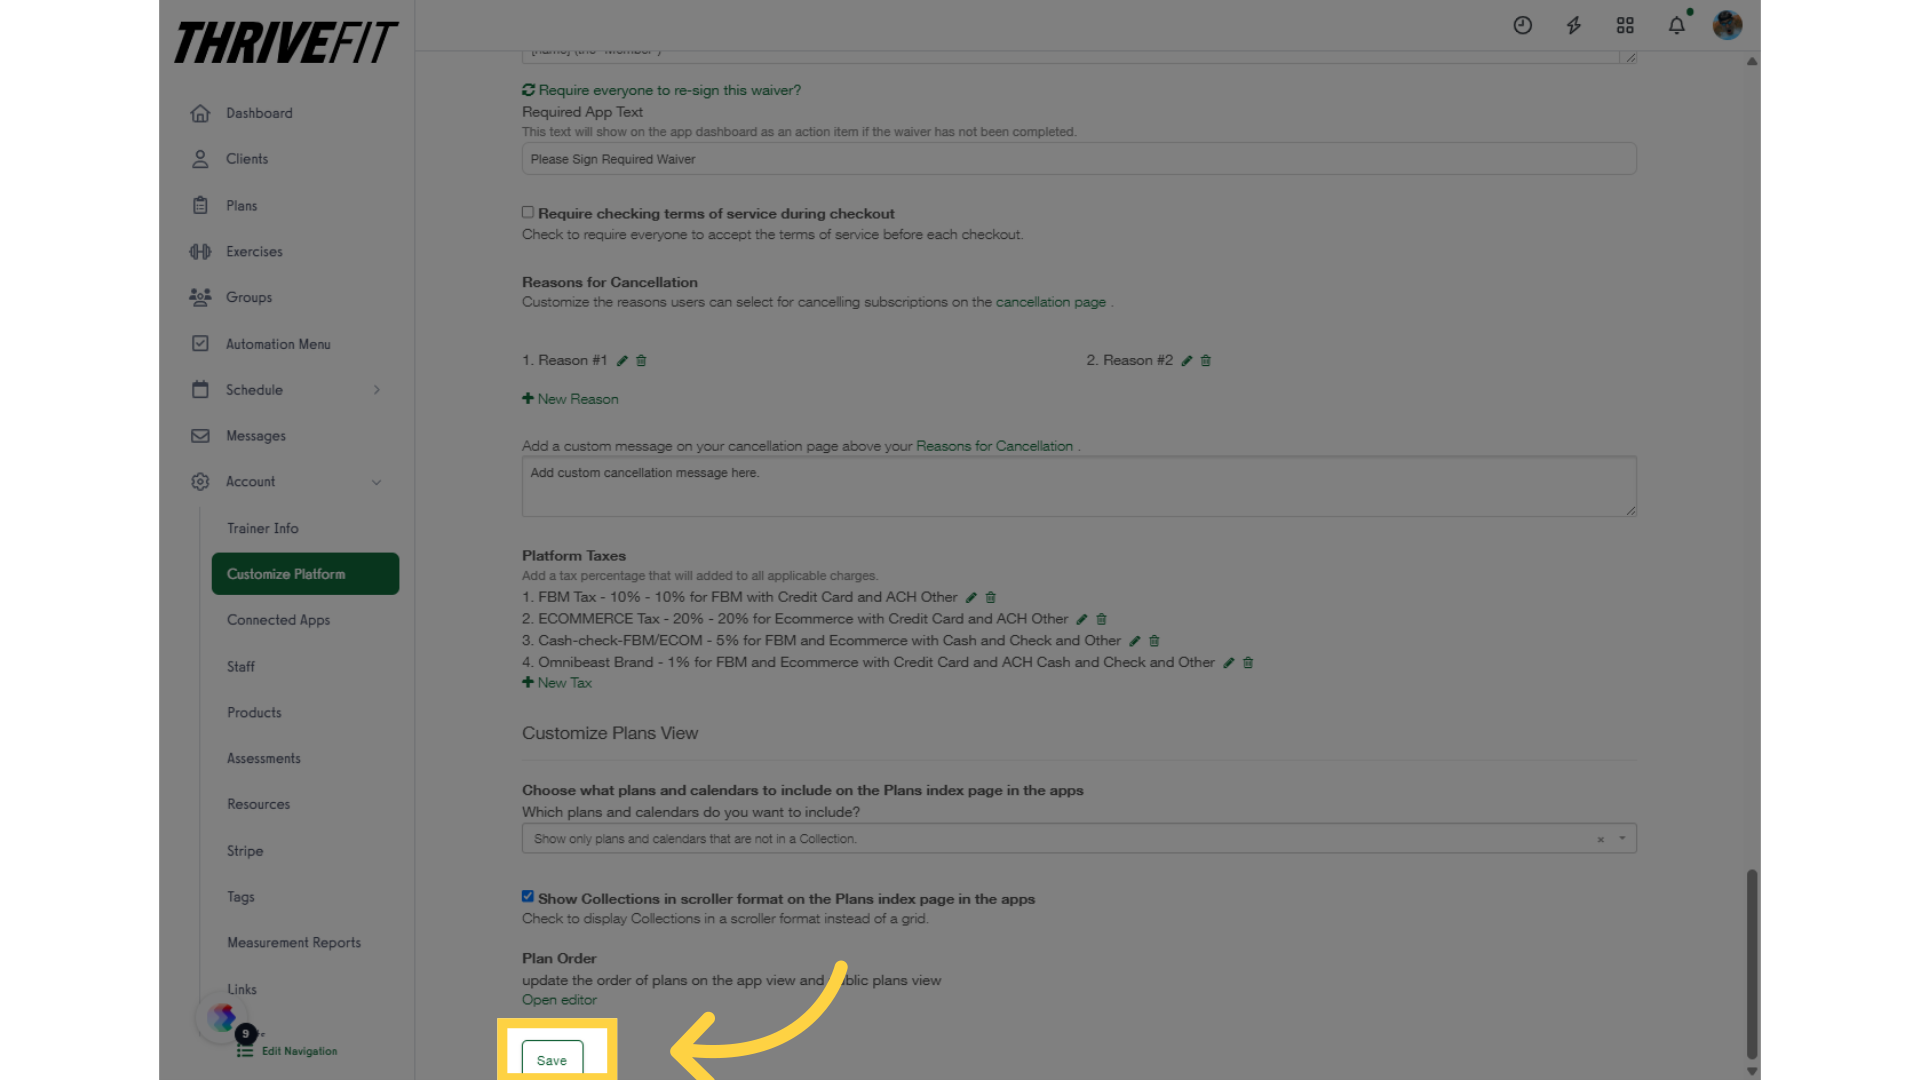
6. Save
Save the settings.
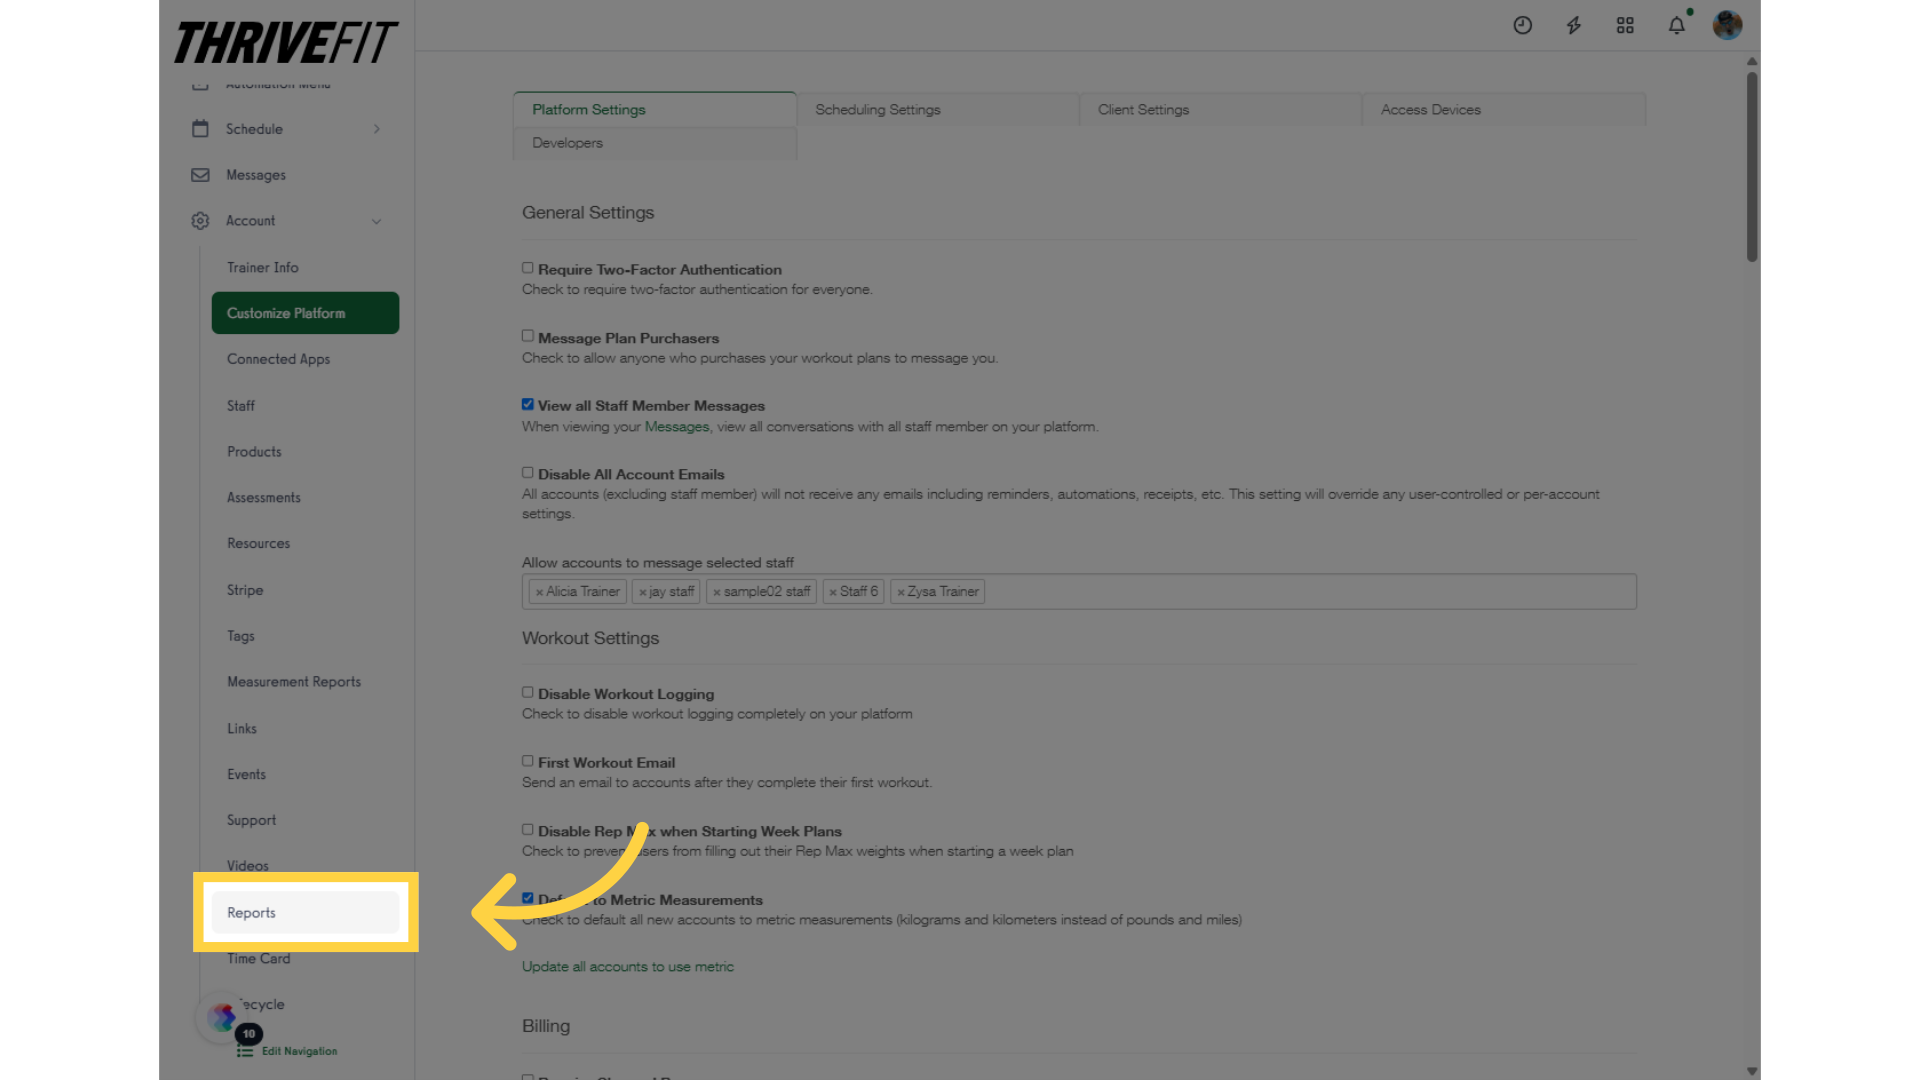
7. Reports
Go back to the “Reports” tab.
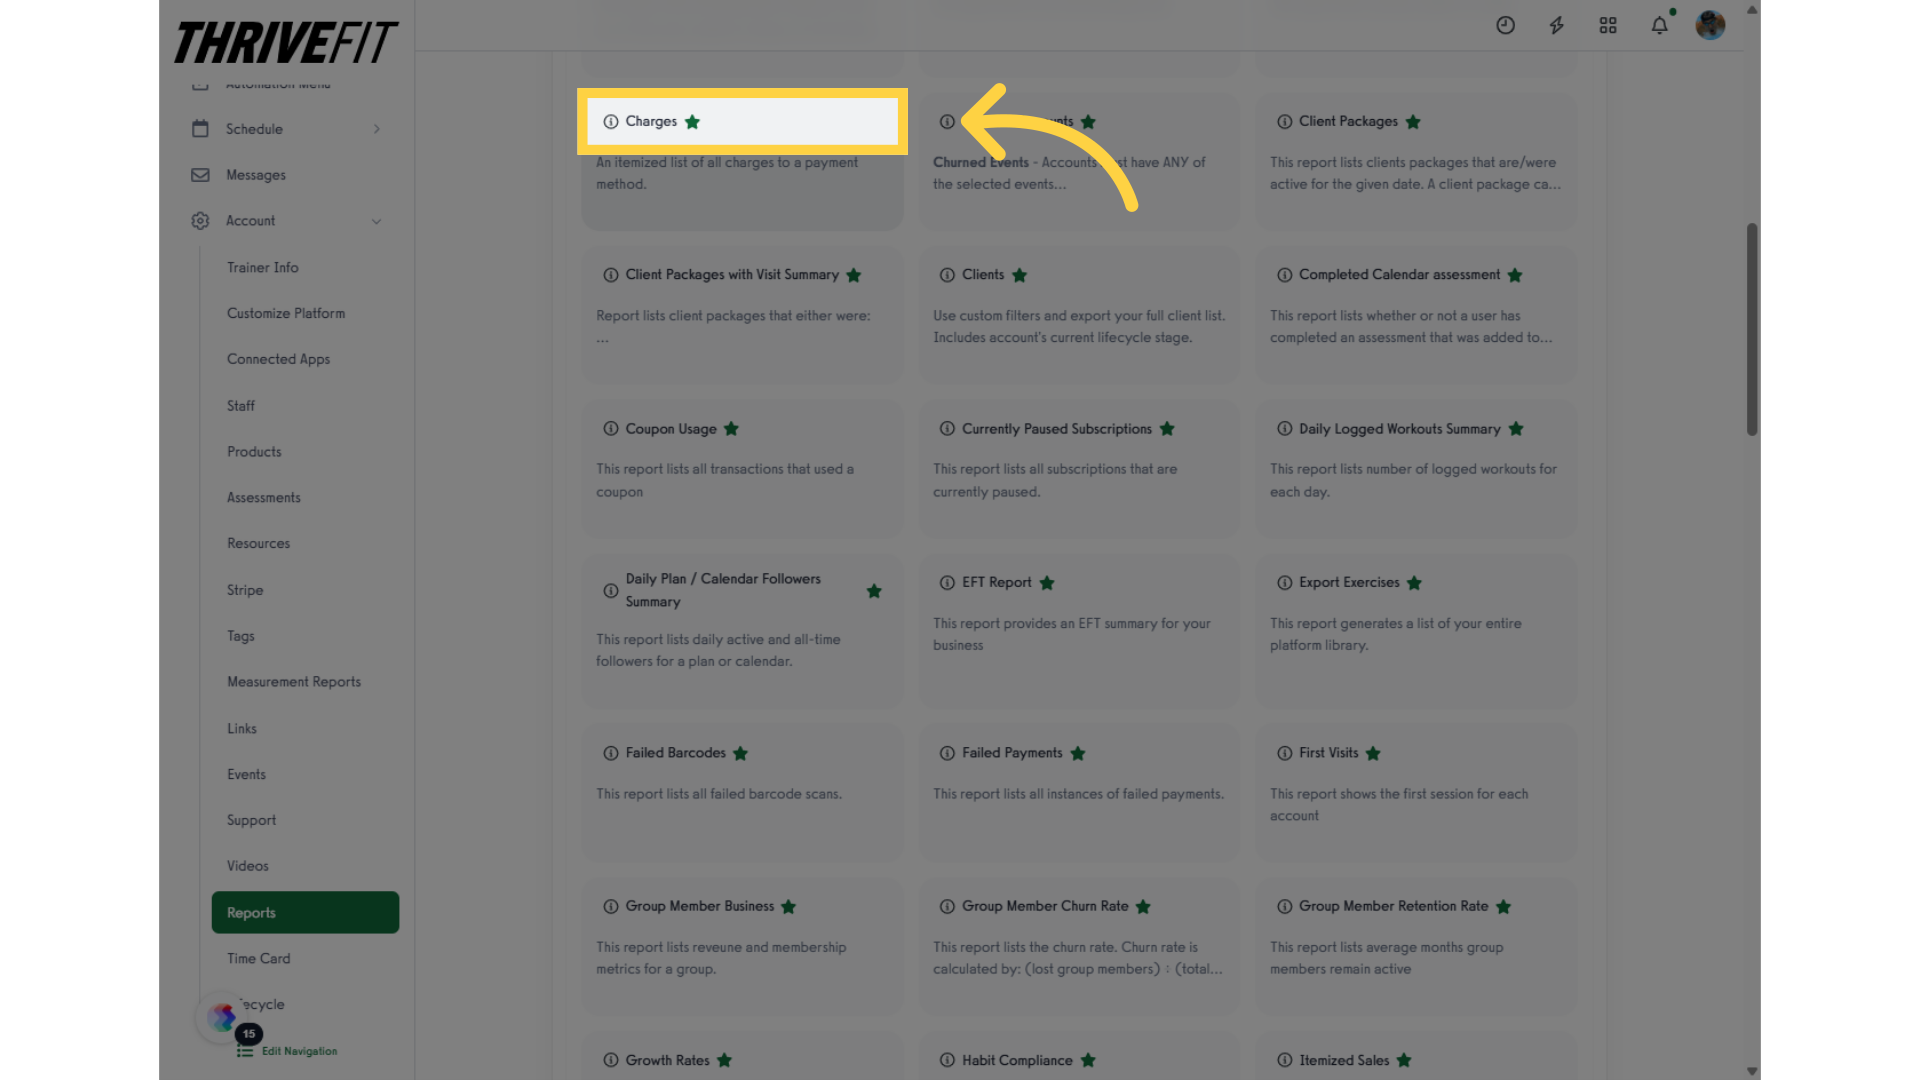
8. Charges Report
Select the “Charges” report.
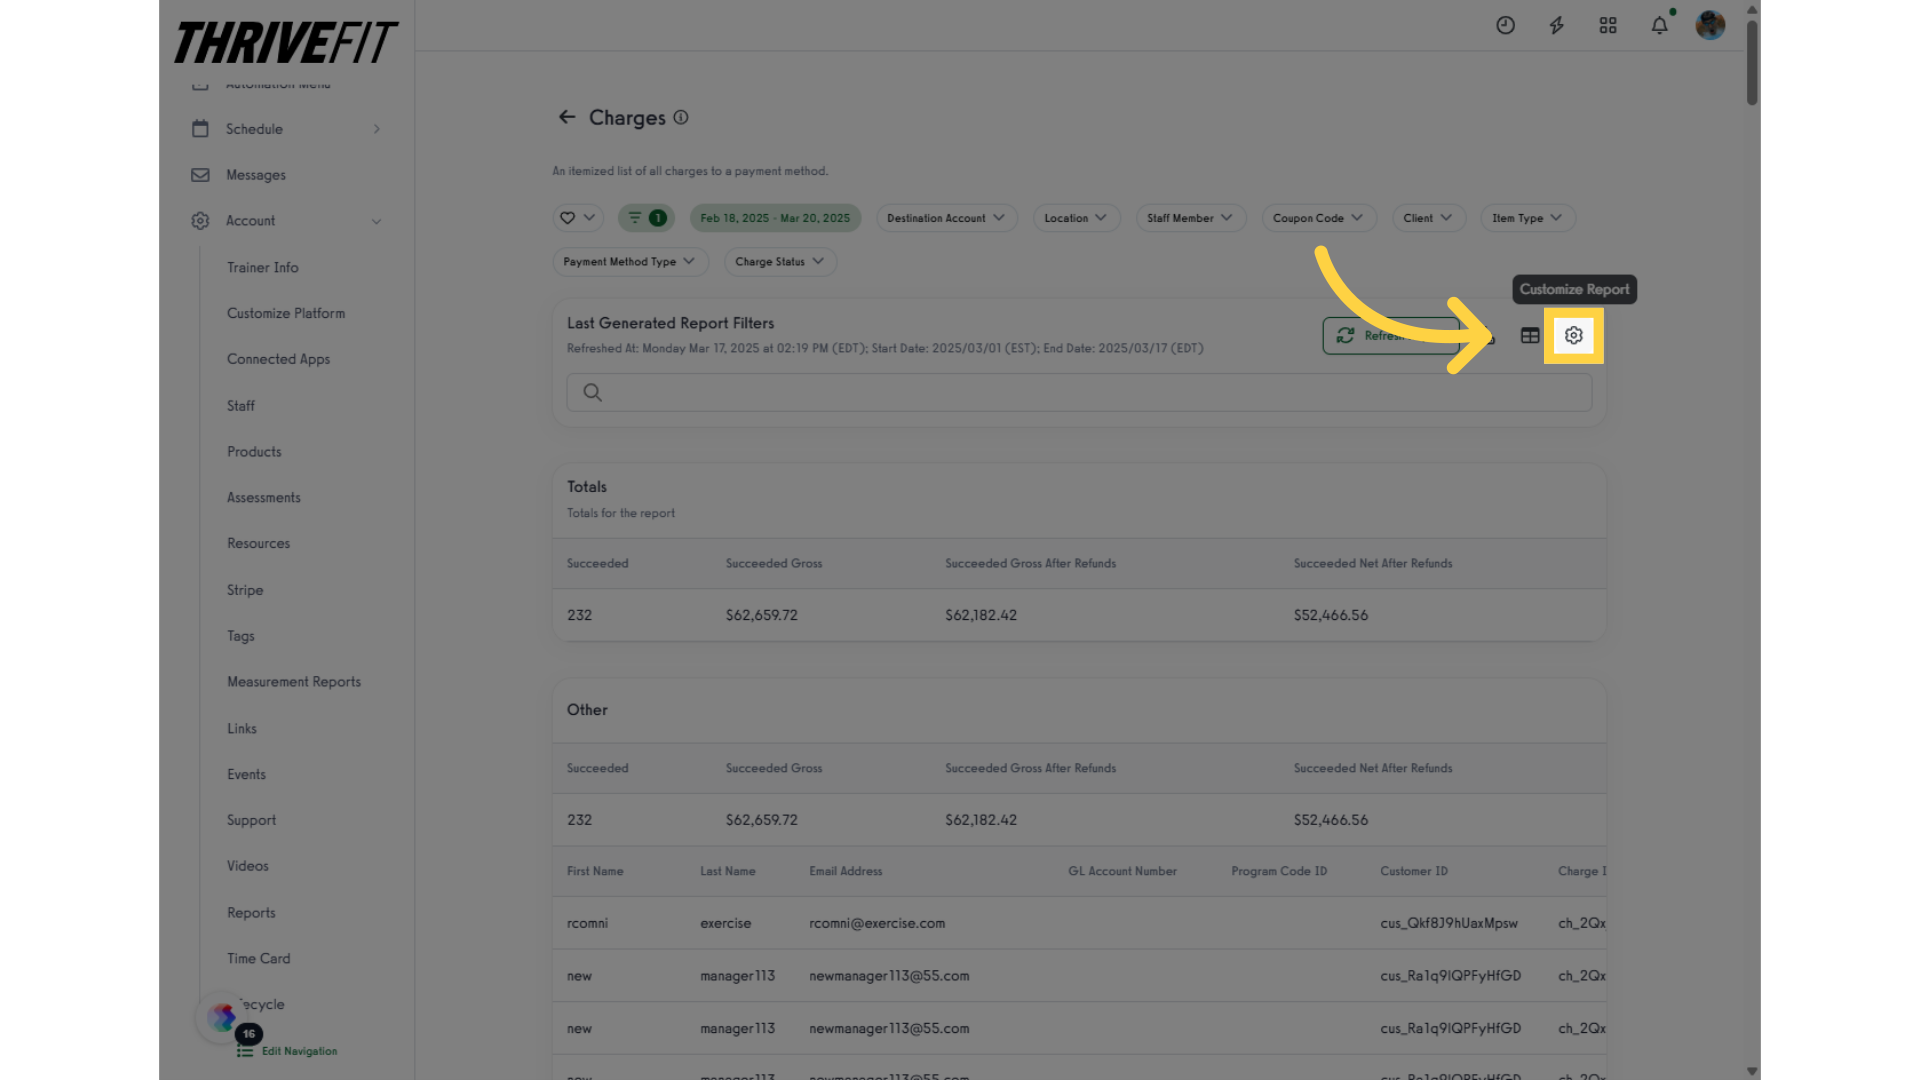
9. Customize Report
Click the “Customize Report” option.
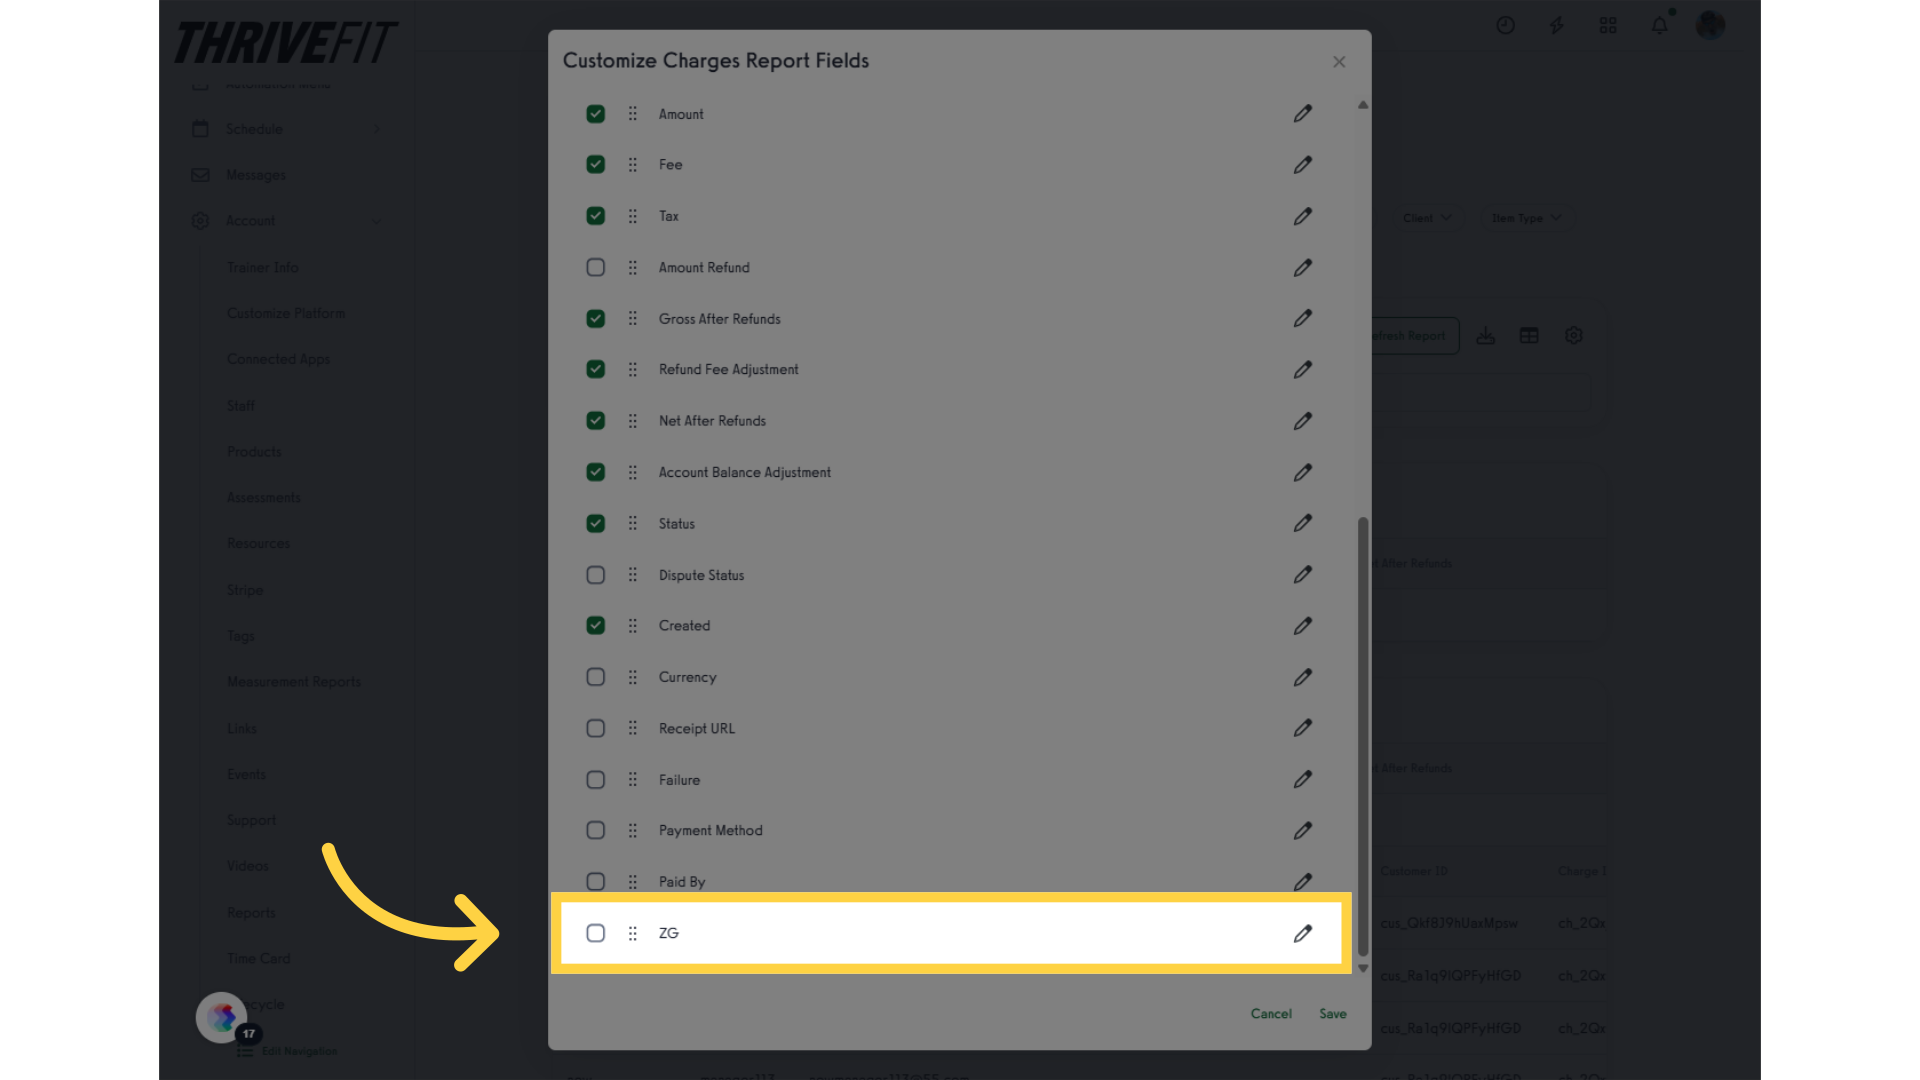
10. Select the Field
Enable the newly added custom profile field.
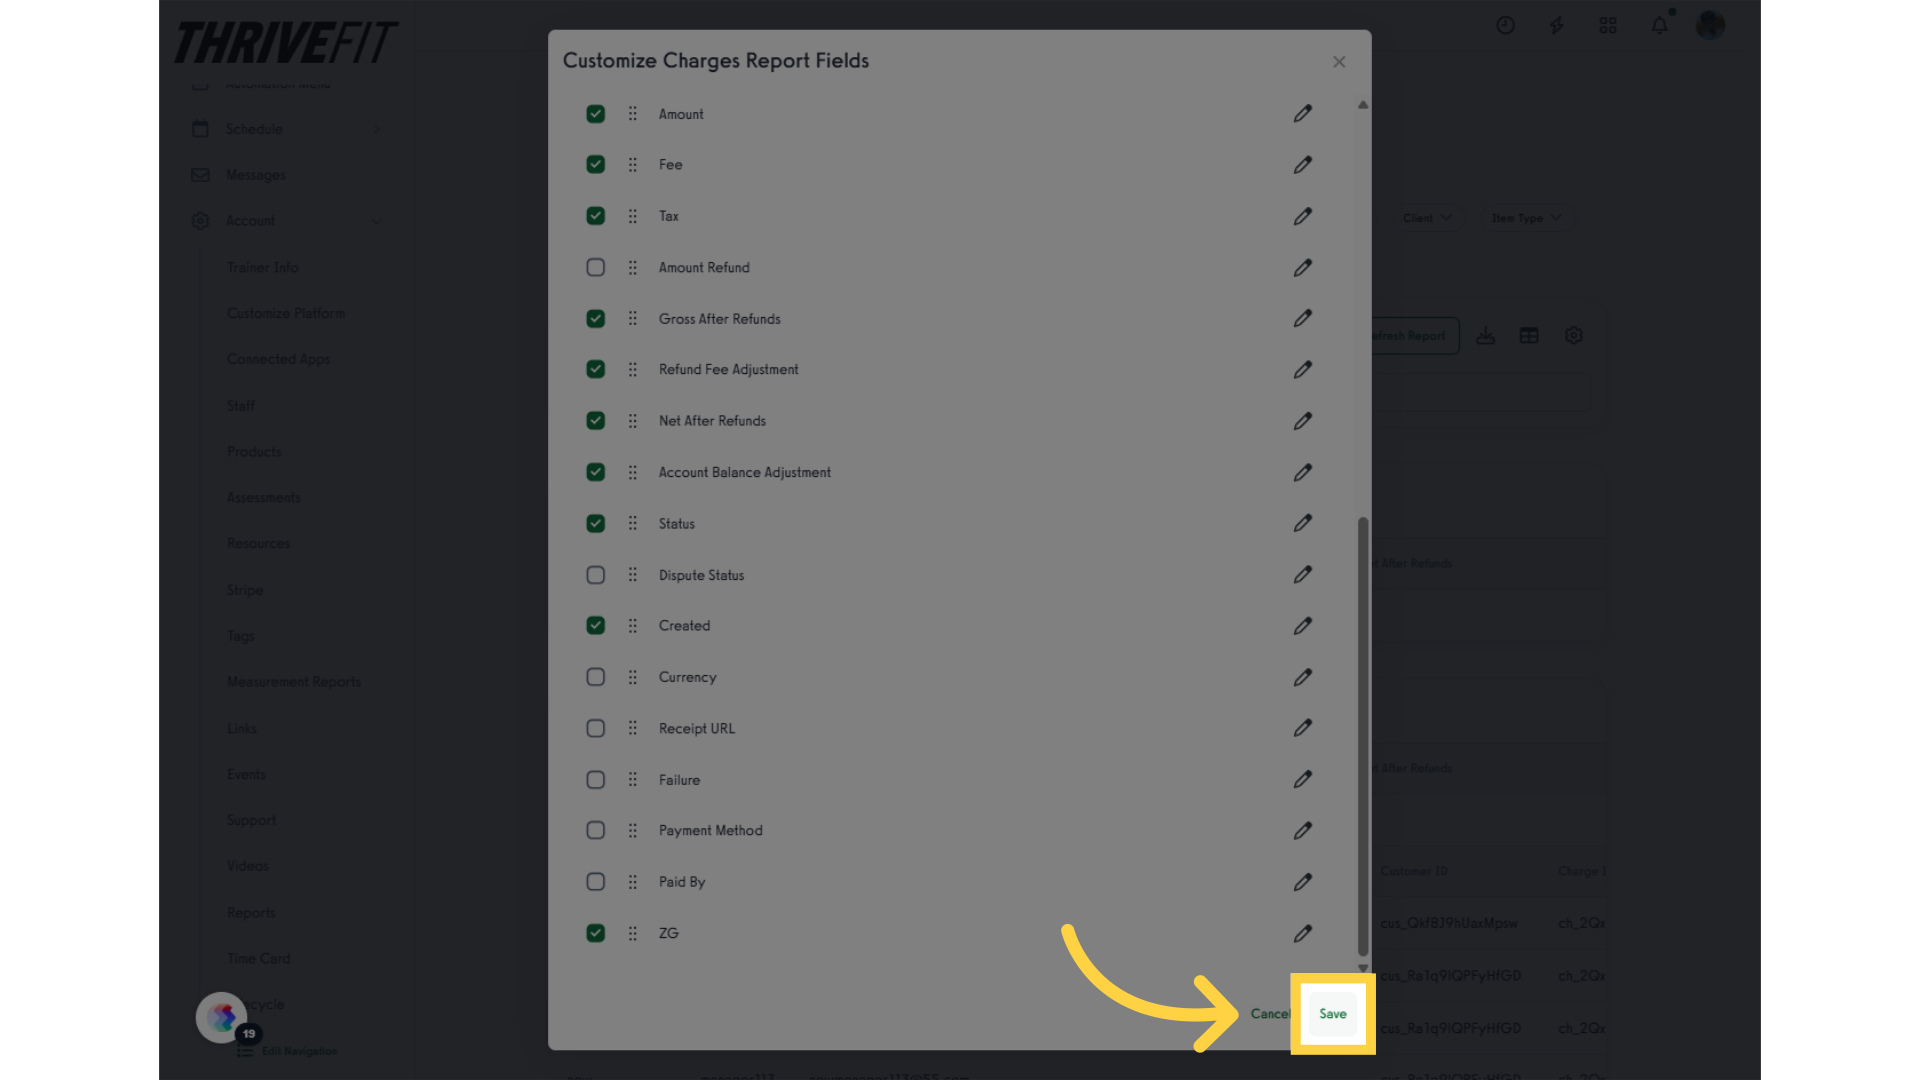
11. Save
Click Save to apply the changes from the report customization.
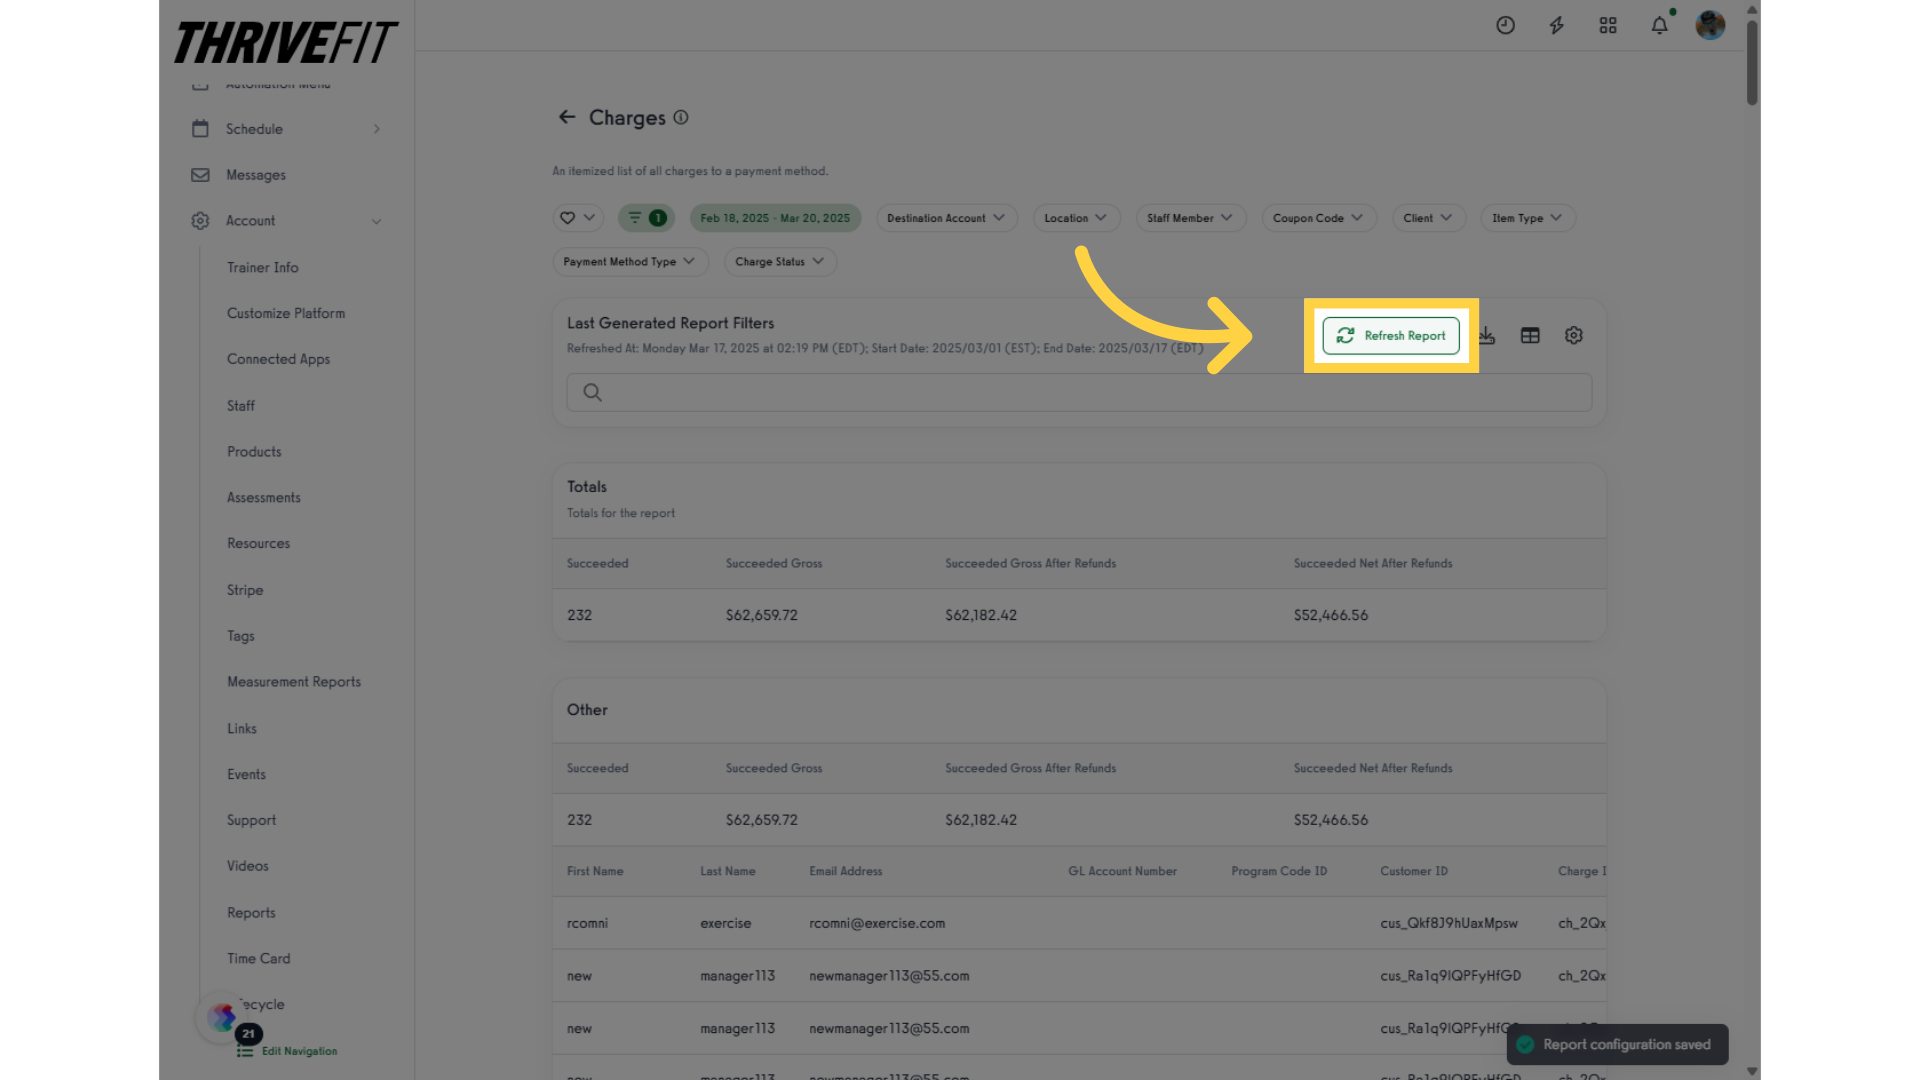
12. Refresh Report
Refresh your report to see the latest data reflecting your recent customizations.
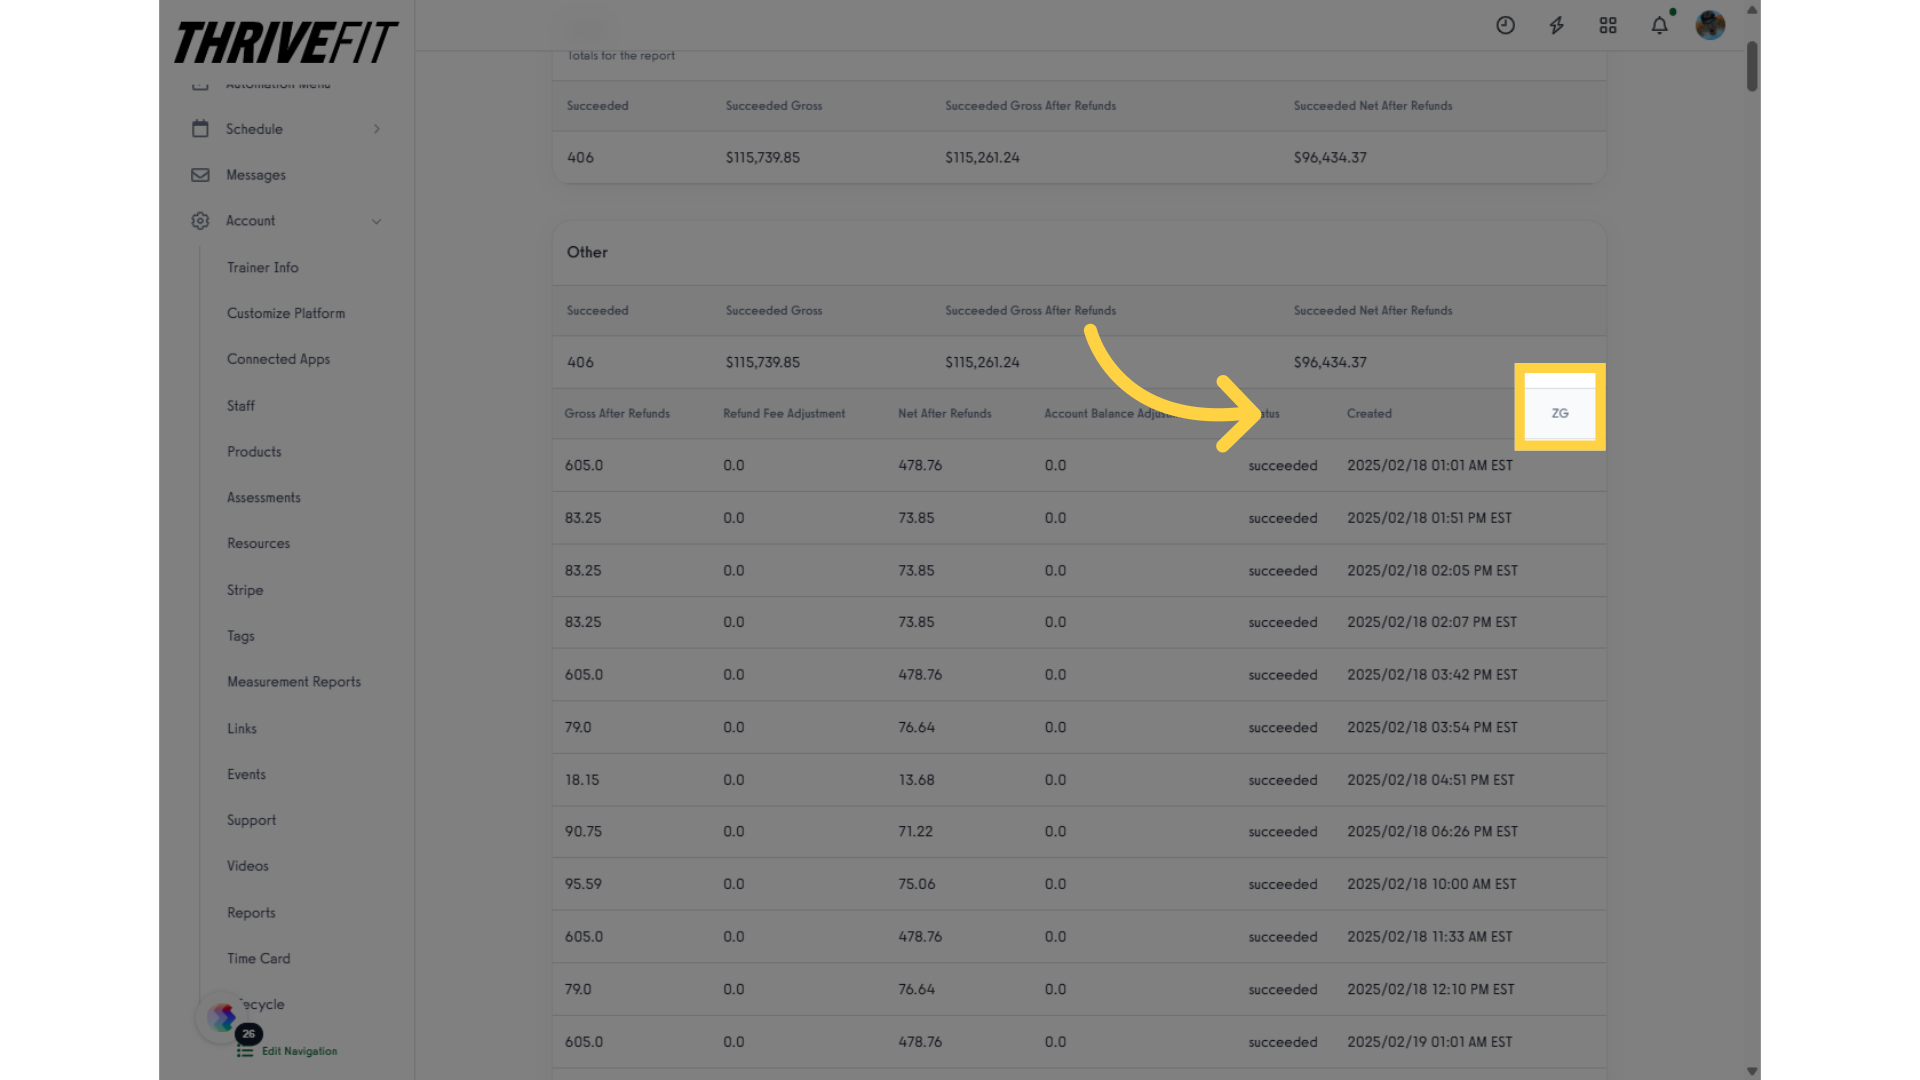
13. View New Column
Verify that the newly added field appears in the column of the report.
This guide covered the steps to set custom profile fields to revenue reports.
This should apply to the following reports:
Clients
Nutrition Macros
Workout Compliance
Habit Compliance
Active / Scheduled Subscriptions
Charges
Itemized Sales
Itemized Visits
Started and Cancelled Subscriptions
Average Reply Time
Client Package with Visits Summary
Assessments
Birthday
MIA
VIP
Waiver
Visit Totals Per Client
Required Assessments


