Guided Logger Video Recommendations
When filming exercise videos for Exercise.com apps with Guided Logger, your exercise videos will be displayed in both square (1:1) and portrait (9:16) formats. The goal is to capture high-quality footage that can be adapted for both orientations without needing to film twice. Here are best practice strategies to achieve this:
1. Film in a High-Resolution Format (4K or Higher)
Why? Higher resolution allows you to crop and reframe in post-production while maintaining quality.
Best Setting: Shoot in 4K or 6K (even if your final output is 1080p) so you can crop vertically without losing clarity.
2. Frame with Center-Safe Composition
Use a wide shot with extra headroom and footroom. Keep the subject centered so that cropping for vertical format (portrait) won’t cut off important parts.
Avoid placing key elements too far to the sides, as they may be lost when cropping for portrait.
Include extra room on sides as well. Make sure the framing has room on the left and right to account for various aspect ratios of Android phones. This is especially important if you are filming side views of exercises like planks, push-ups, etc.
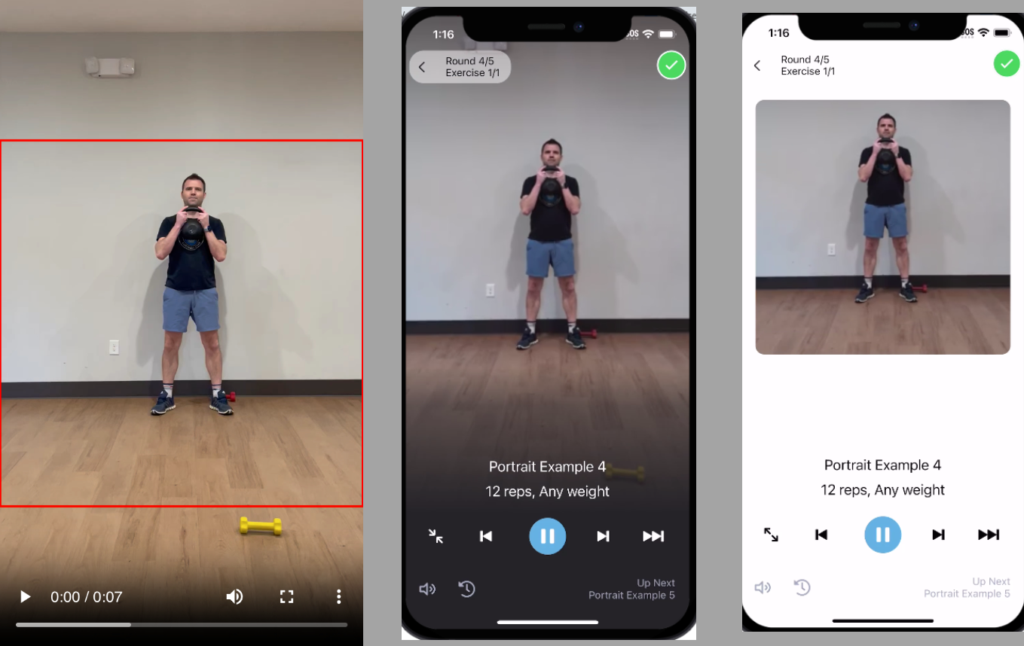
SEE GOOD EXAMPLE – the subject will show completely in square and portrait:
SEE BAD EXAMPLE — the head is cut off in square mode:

3. Use the “Safe Zones” Grid
Enable guidelines on your camera or monitor to keep the subject within a “center-safe” area.
4. Shoot at a Slightly Wider Focal Length
Why? This allows space to crop without distortion while keeping the subject well-framed.
5. Consider Dual Camera Setup
If budget allows, consider using two cameras simultaneously:
- One in square (16:9)
- One in portrait (9:16)
This ensures perfect framing for both formats without cropping in post.
Exercise.com will be able to support separate videos for Guided Logger and non-Guided Logger modes in this case.
We recommend just shooting once in portrait for ease of setup.
6. Optimize for Movement
Keep the subject’s range of motion in mind. If they move too far left or right, it might be cut off in the portrait crop.
Avoid excessive zooming or panning, as these may not translate well when cropped to vertical.
7. Record in 60FPS (If Possible)
Why? This allows smooth motion adaptation when repurposing footage for different formats (e.g., slowing down or adjusting speed for social media platforms).
If standard speed is fine, 30FPS is sufficient.
8. Lighting Considerations
Keep the lighting setup flexible so the subject looks good in both square and portrait crops.
Avoid harsh side lighting that could create odd shadows when reframed.


