How to Review Lifecycle History for Any Account
With the Exercise.com’s fitness business management software, it’s easy to review the account lifecycle history for any account on your platform.
This guide will take you through the process of reviewing lifecycle history for any account in your custom branded platform. You can review each account individually, or use the “Account Lifecycle Transitions” report to review all accounts at the same time.
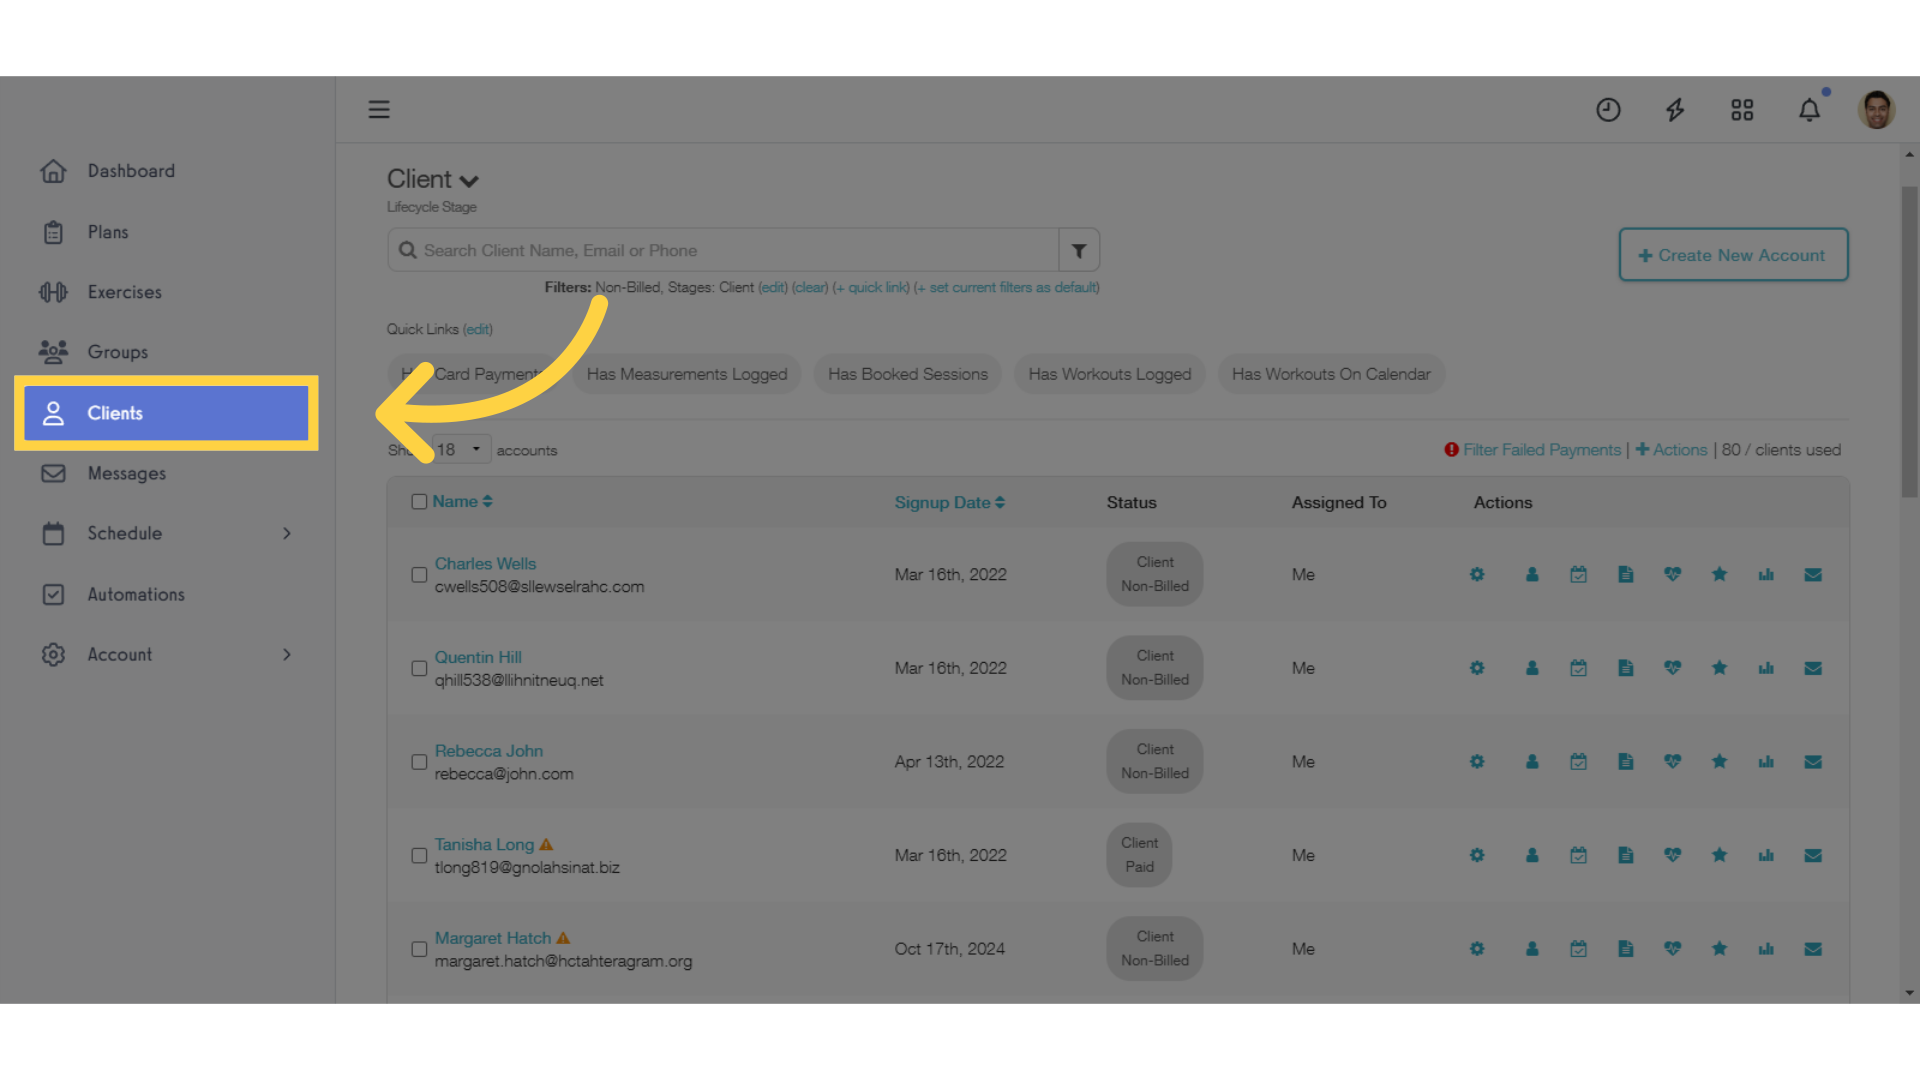
1. Click “Clients” to see the accounts on your platform.
Start by clicking the “Clients” tab to see the accounts on your platform.
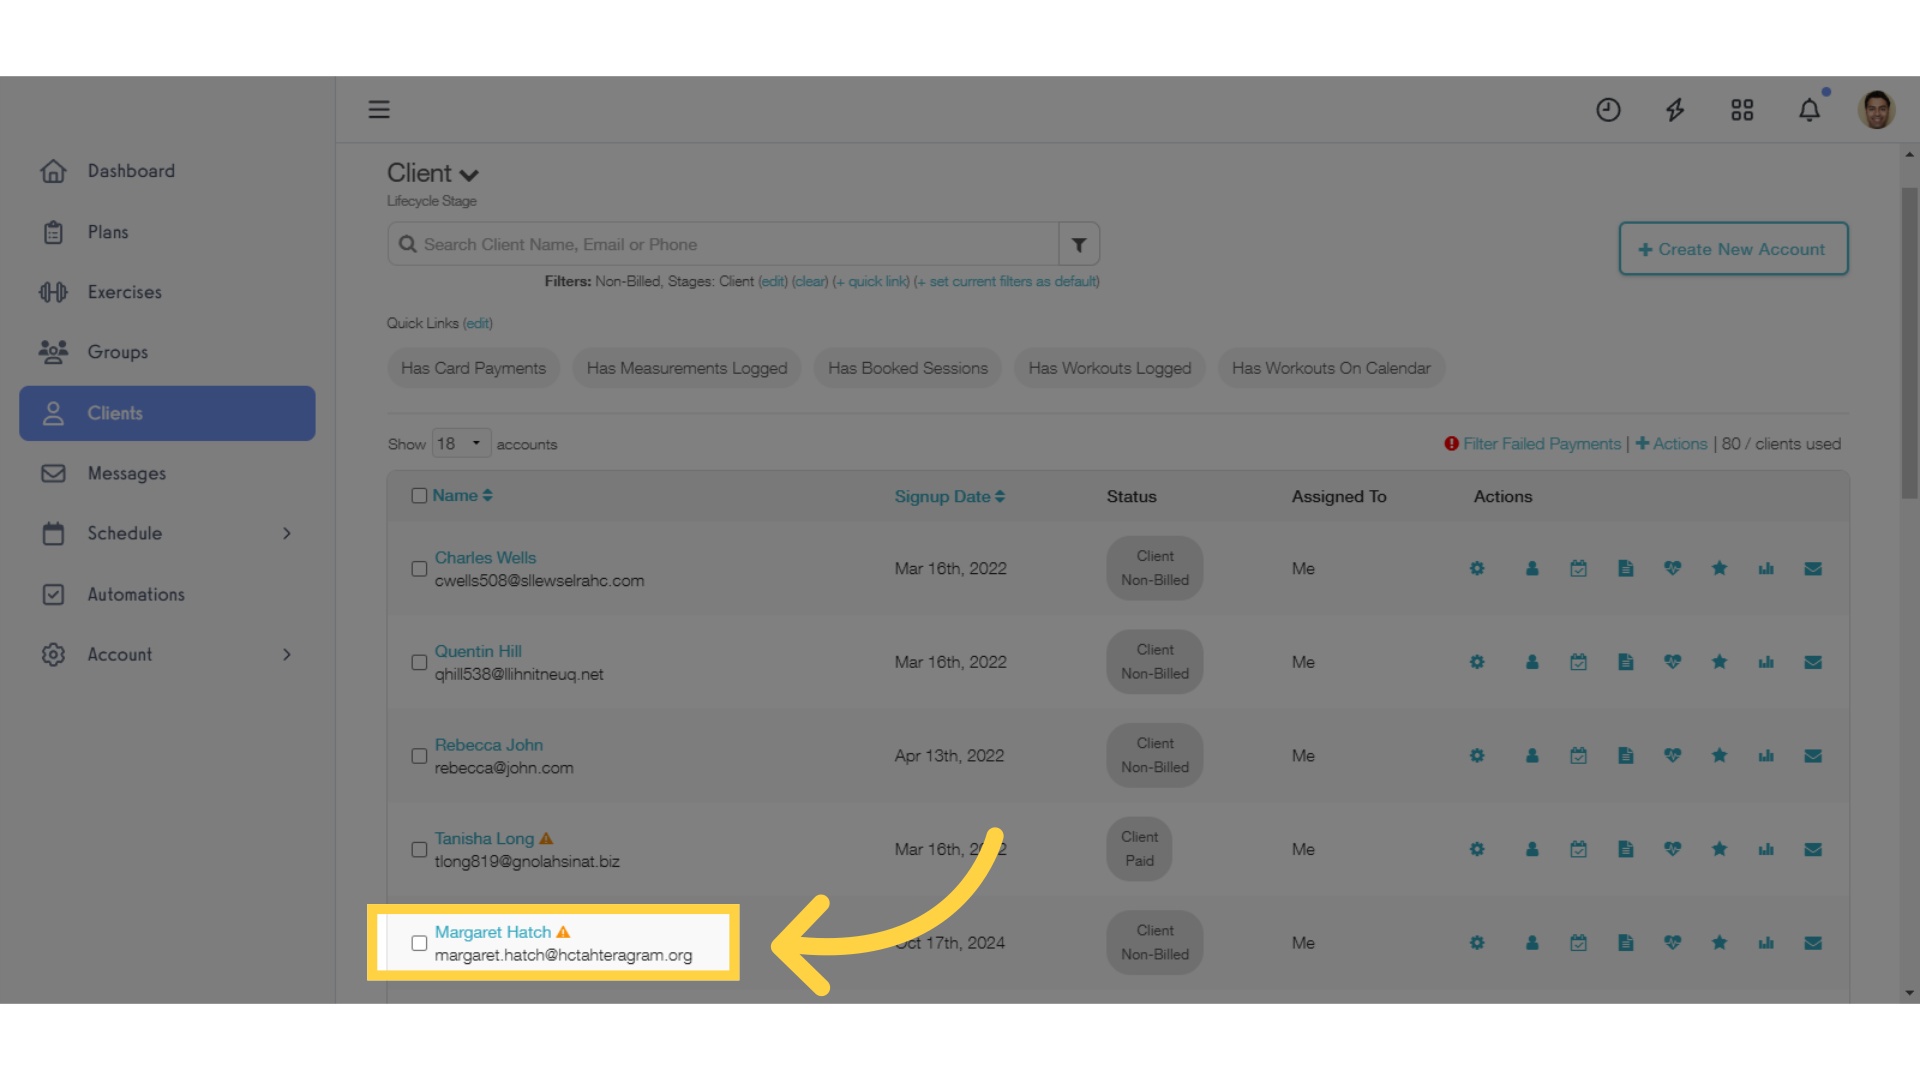
2. Click the name of the account you want to review.
Click on the name of the account that you want to review lifecycle history for.
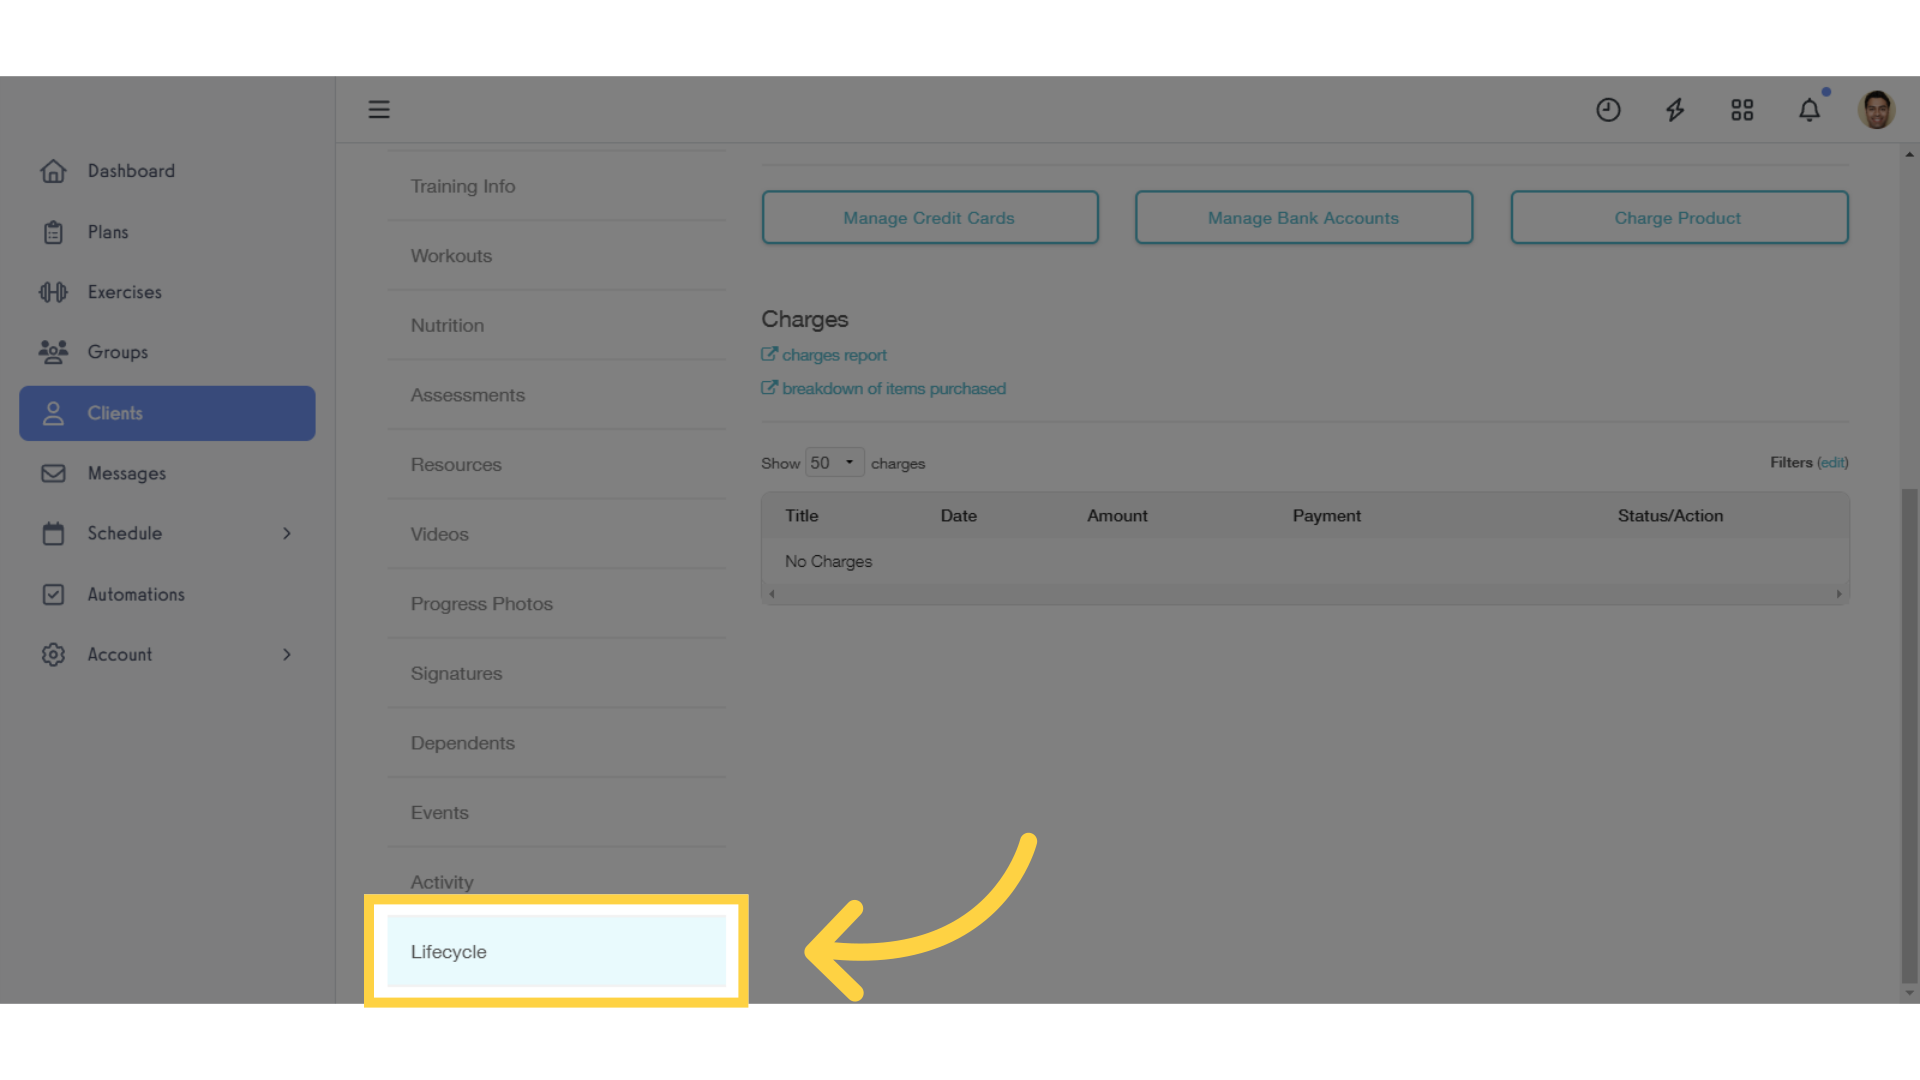
3. Click “Lifecycle” on the left side menu.
Scroll down the left side menu and click the “Lifecycle” option.
4. You’ll see the history of changes from stage to stage for this account.
You’ll see the lifecycle history for this account on this page.
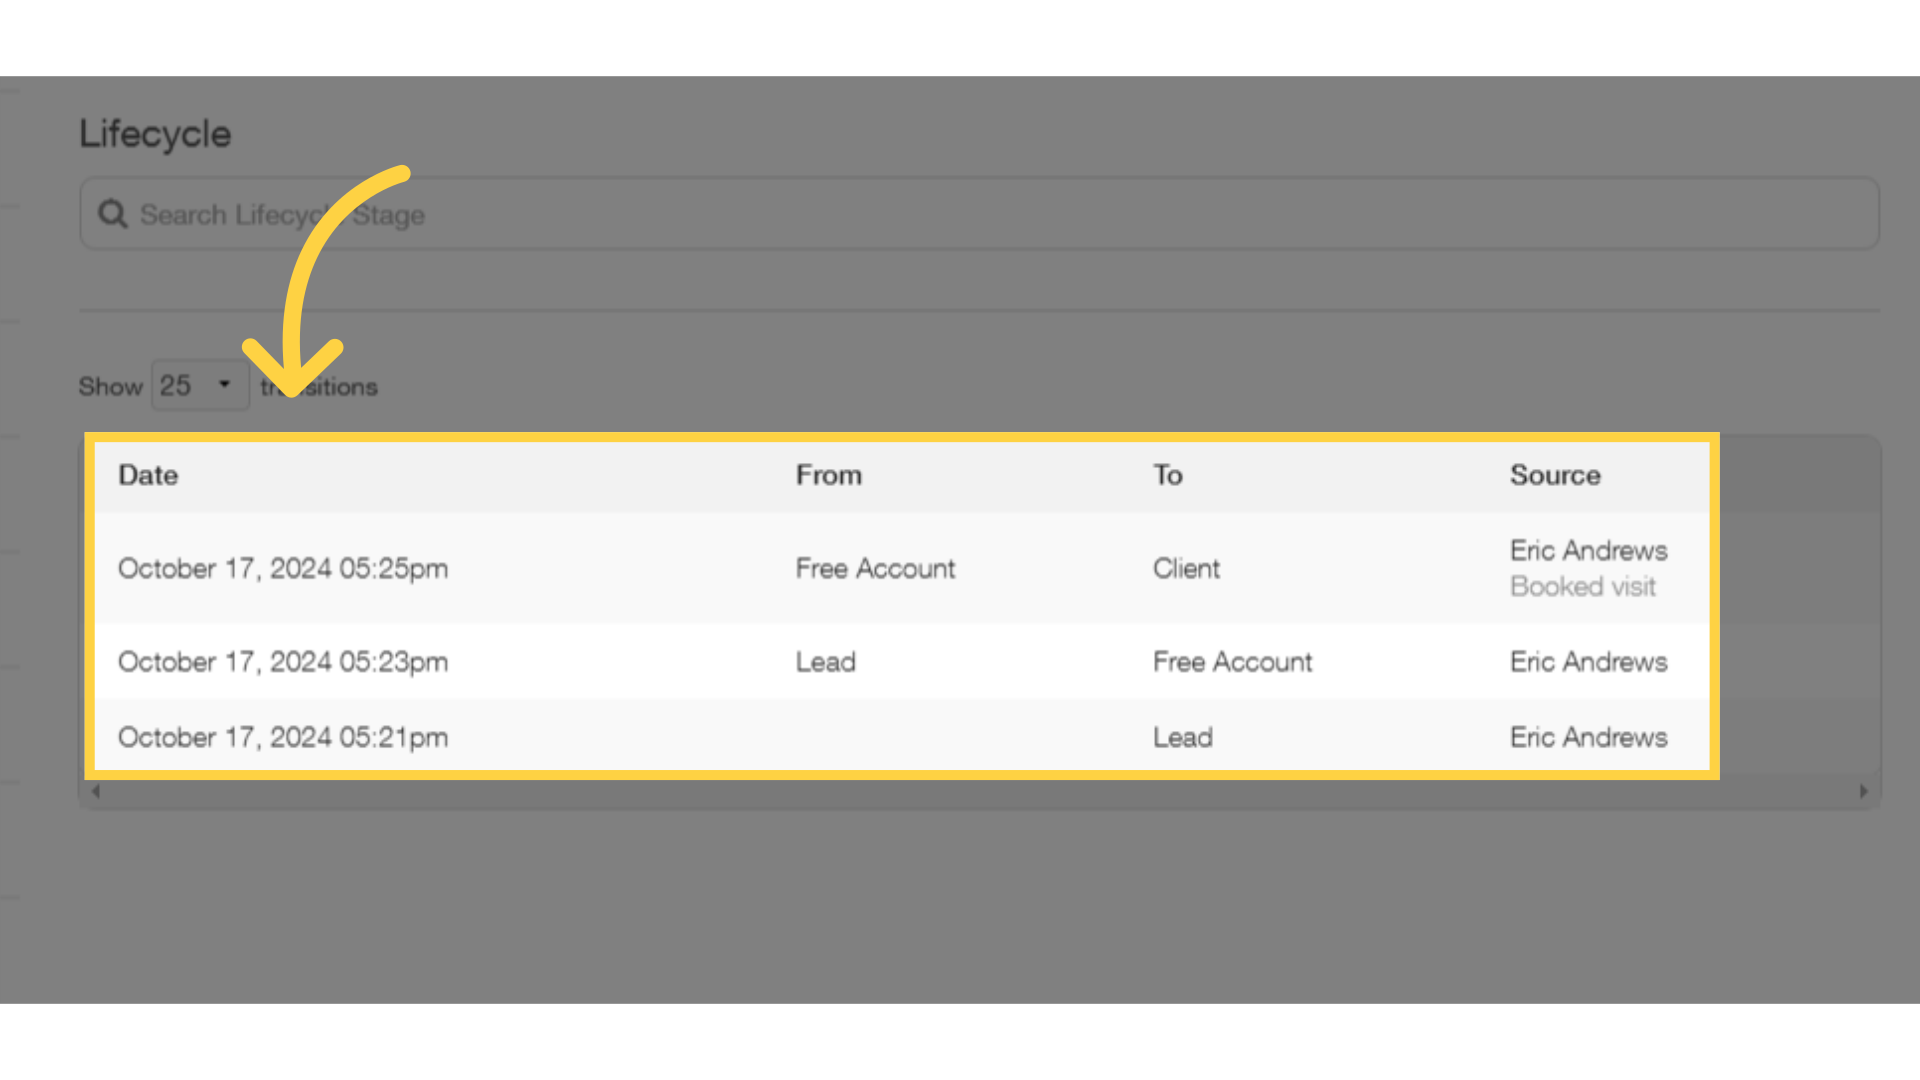
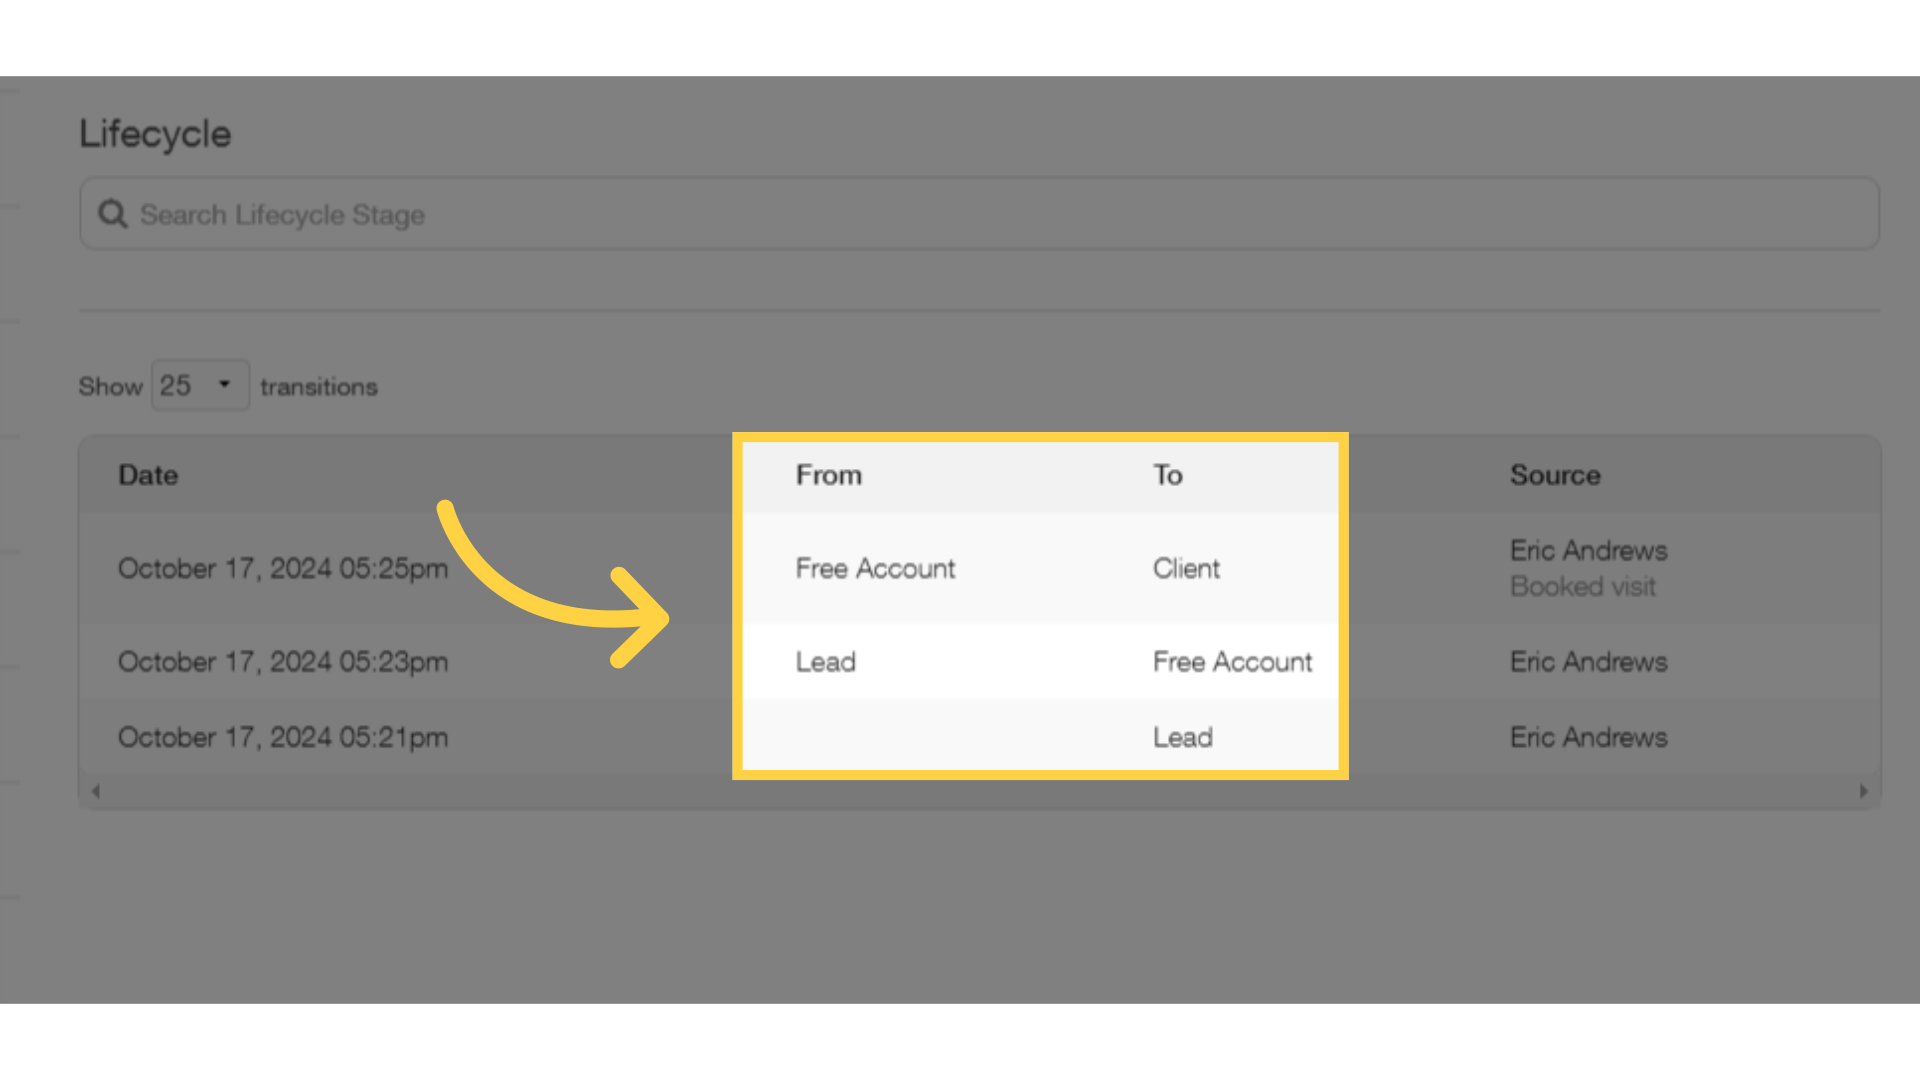
5. The “From” and “To” columns give you the stage of the account before and after each transition.
The “From” and “To” columns give you the account stage before and after each transition in the account history. In this example, you can see that this account started as a lead, then moved to a free account, before finally upgrading to a client account in the system.
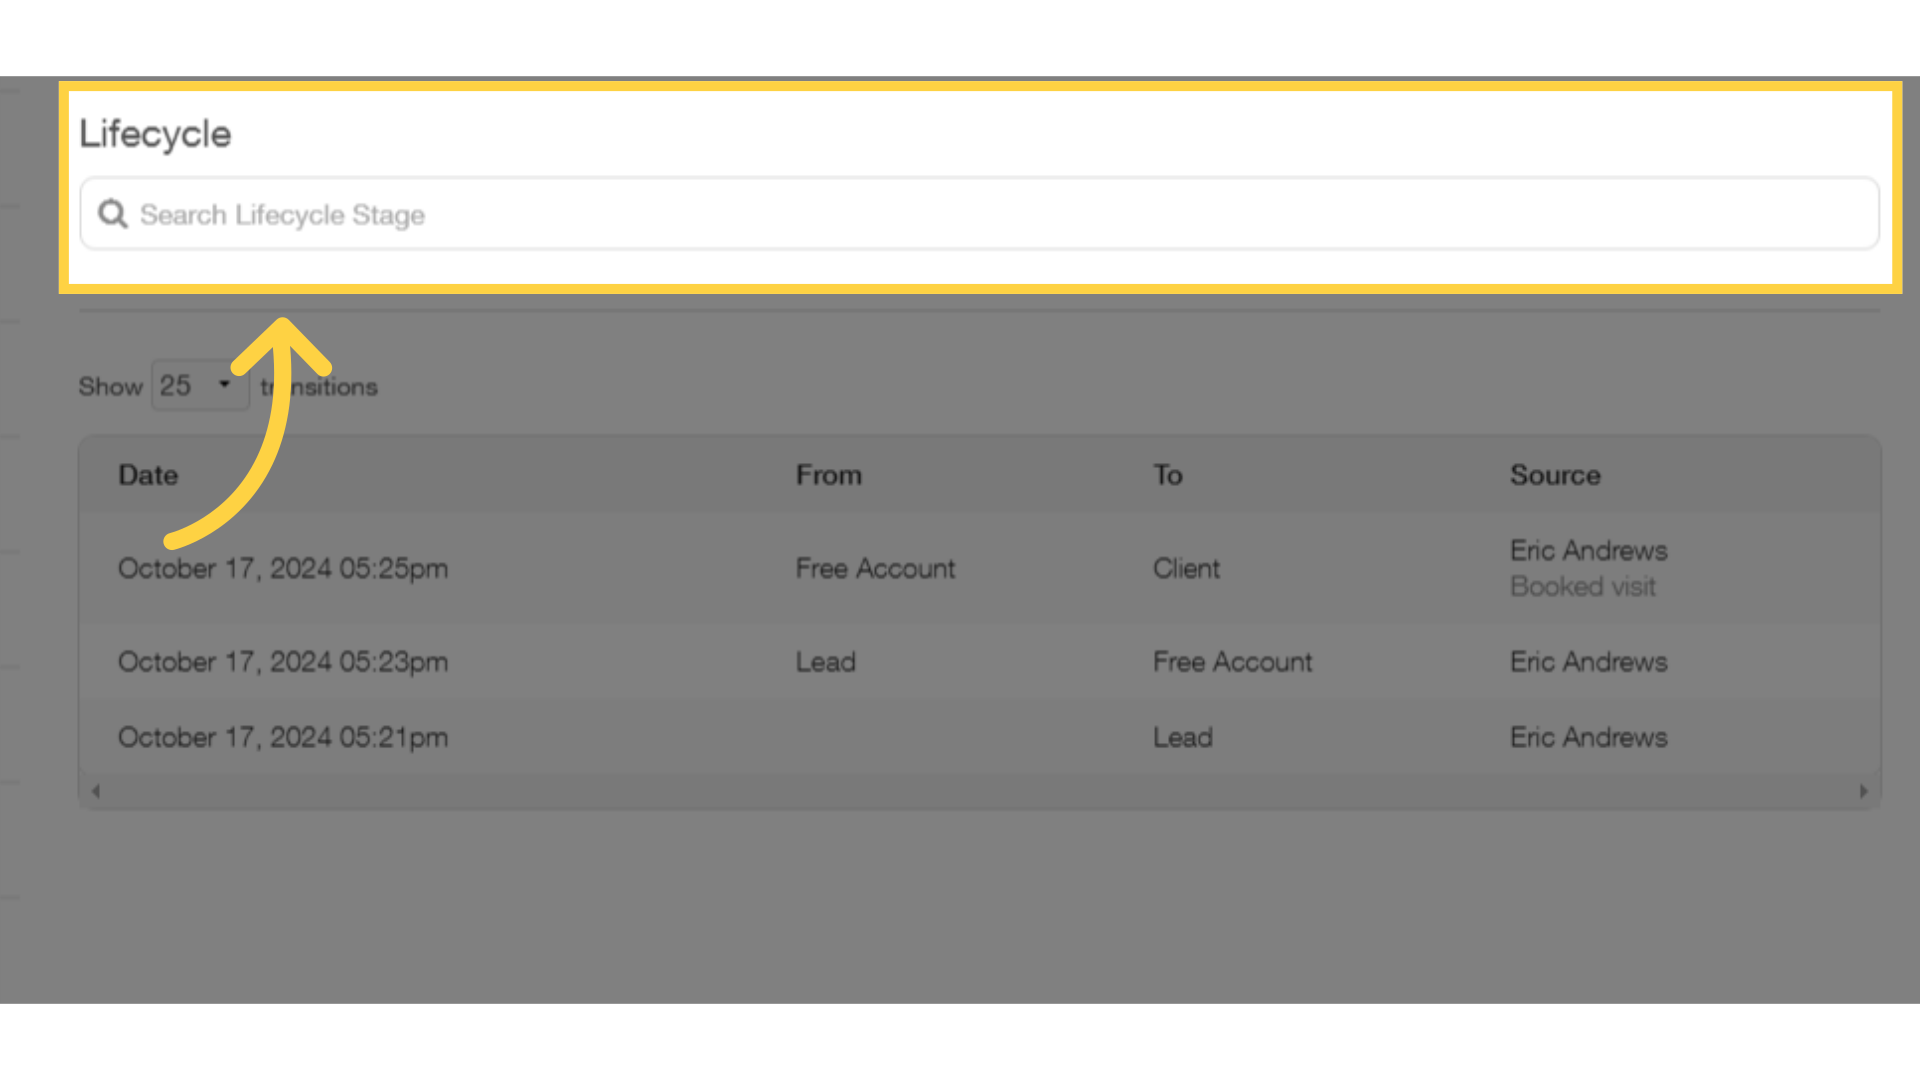
6. You can also search by stage to filter the event history.
You can also use the search box to filter the event history to only the stage that you want to review.
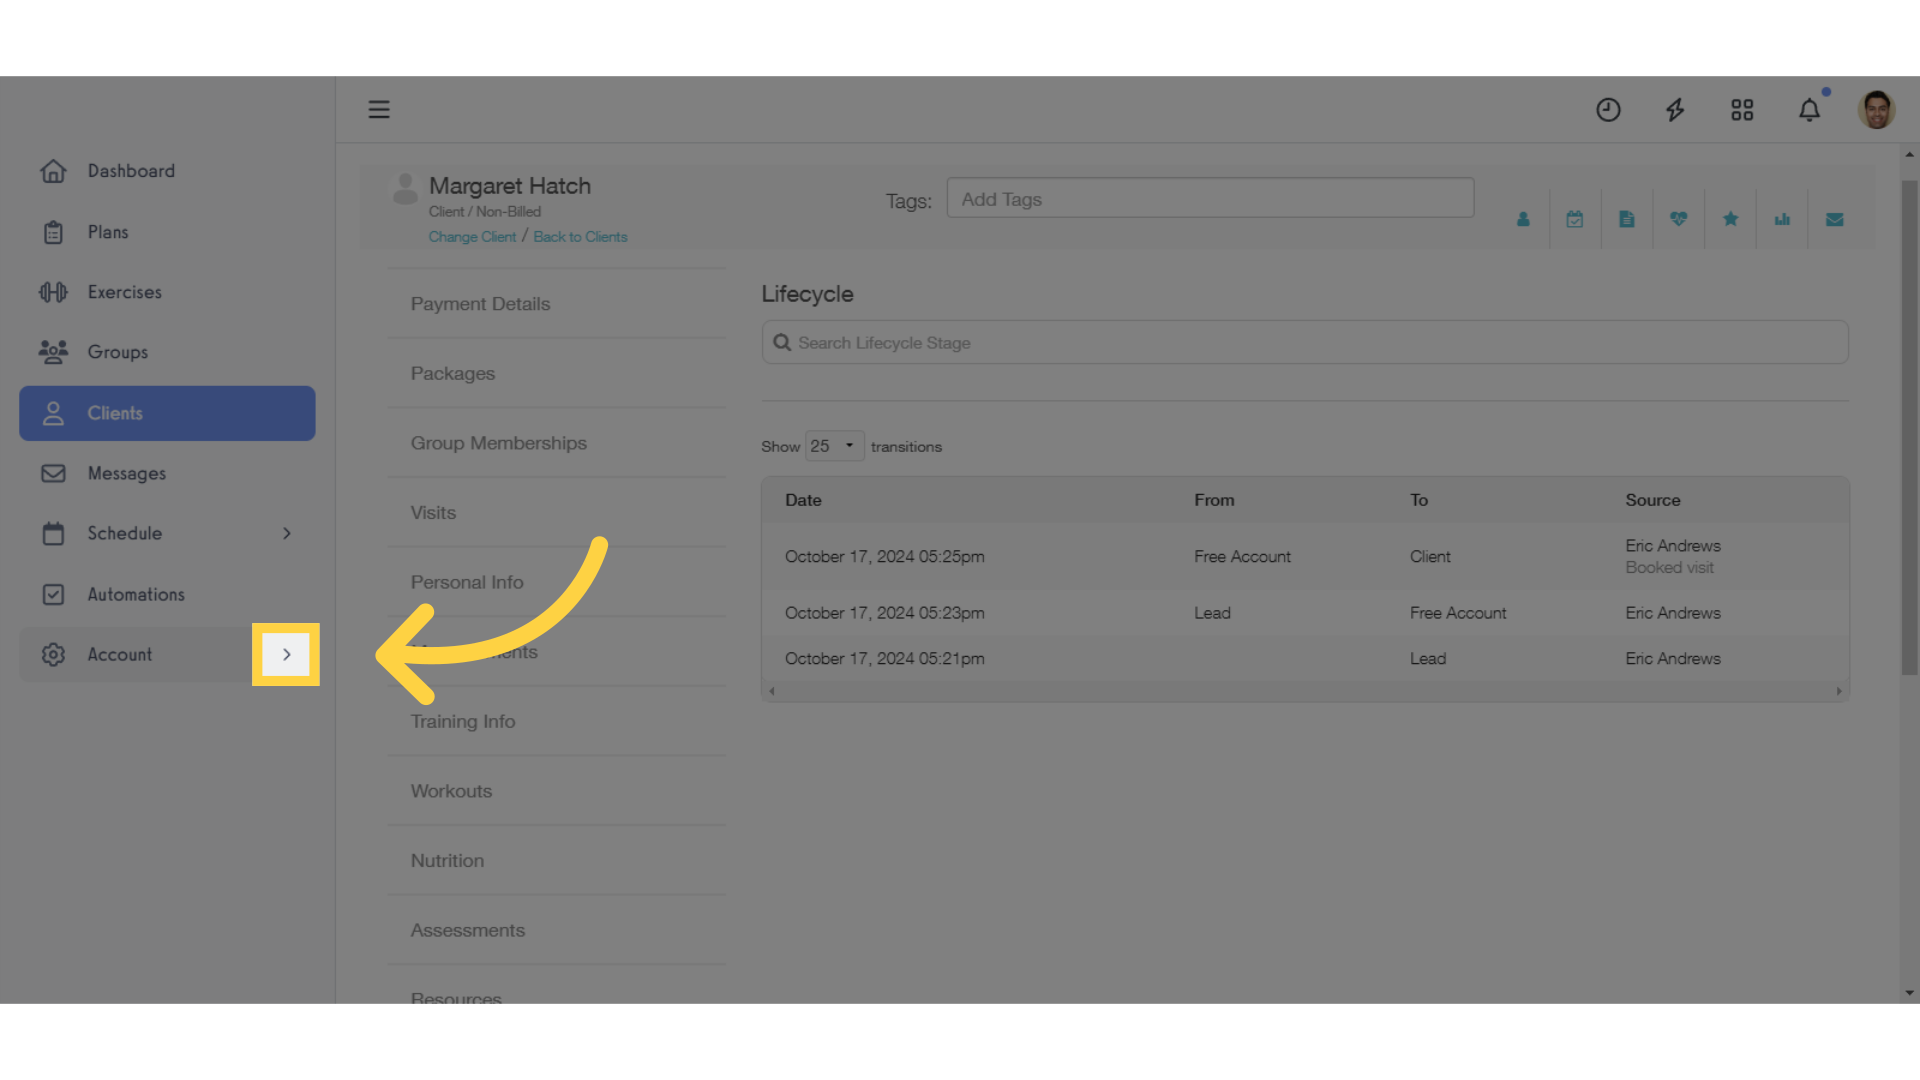
7. To access reports, click the arrow on the “Account” tab.
To review account transitions for all accounts at once, click the arrow on the left side menu “Account” tab.
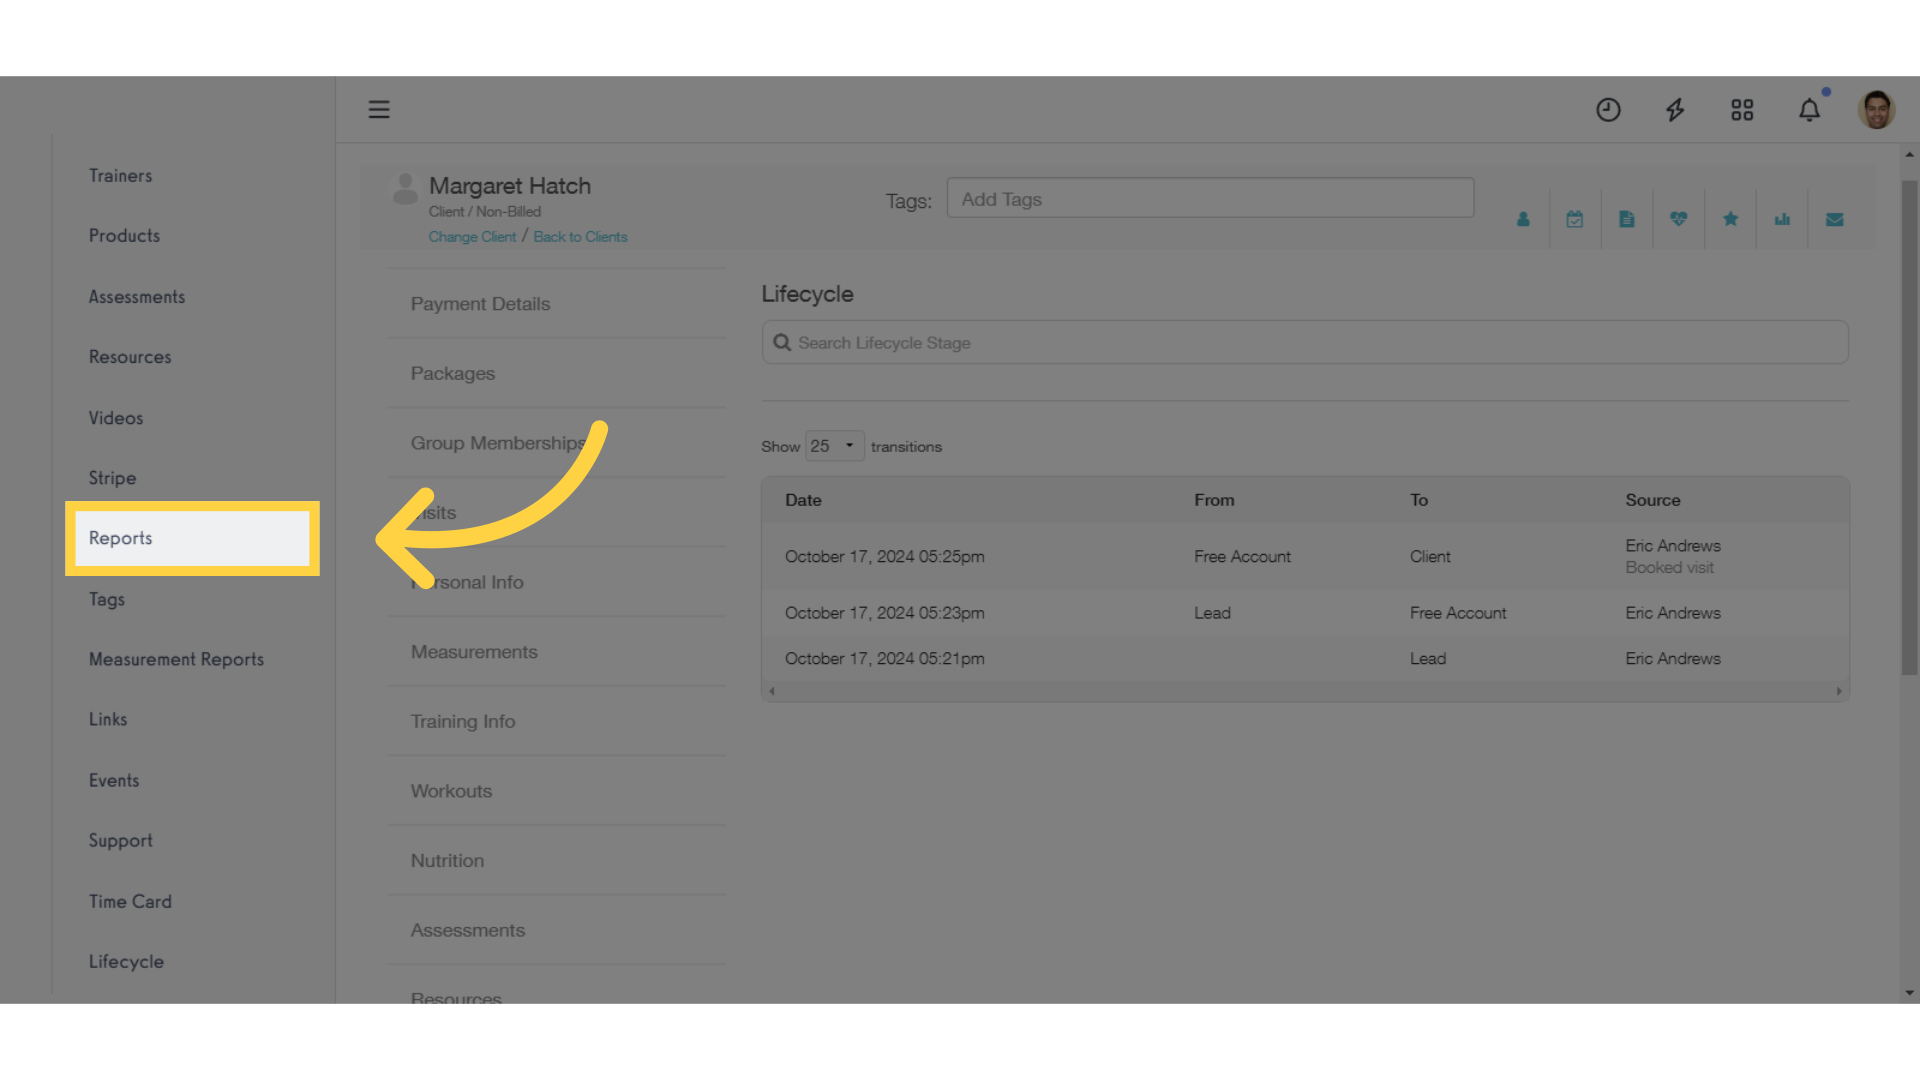
8. Click the “Reports” on the left side menu.
Click on the Reports tab in the left side menu.
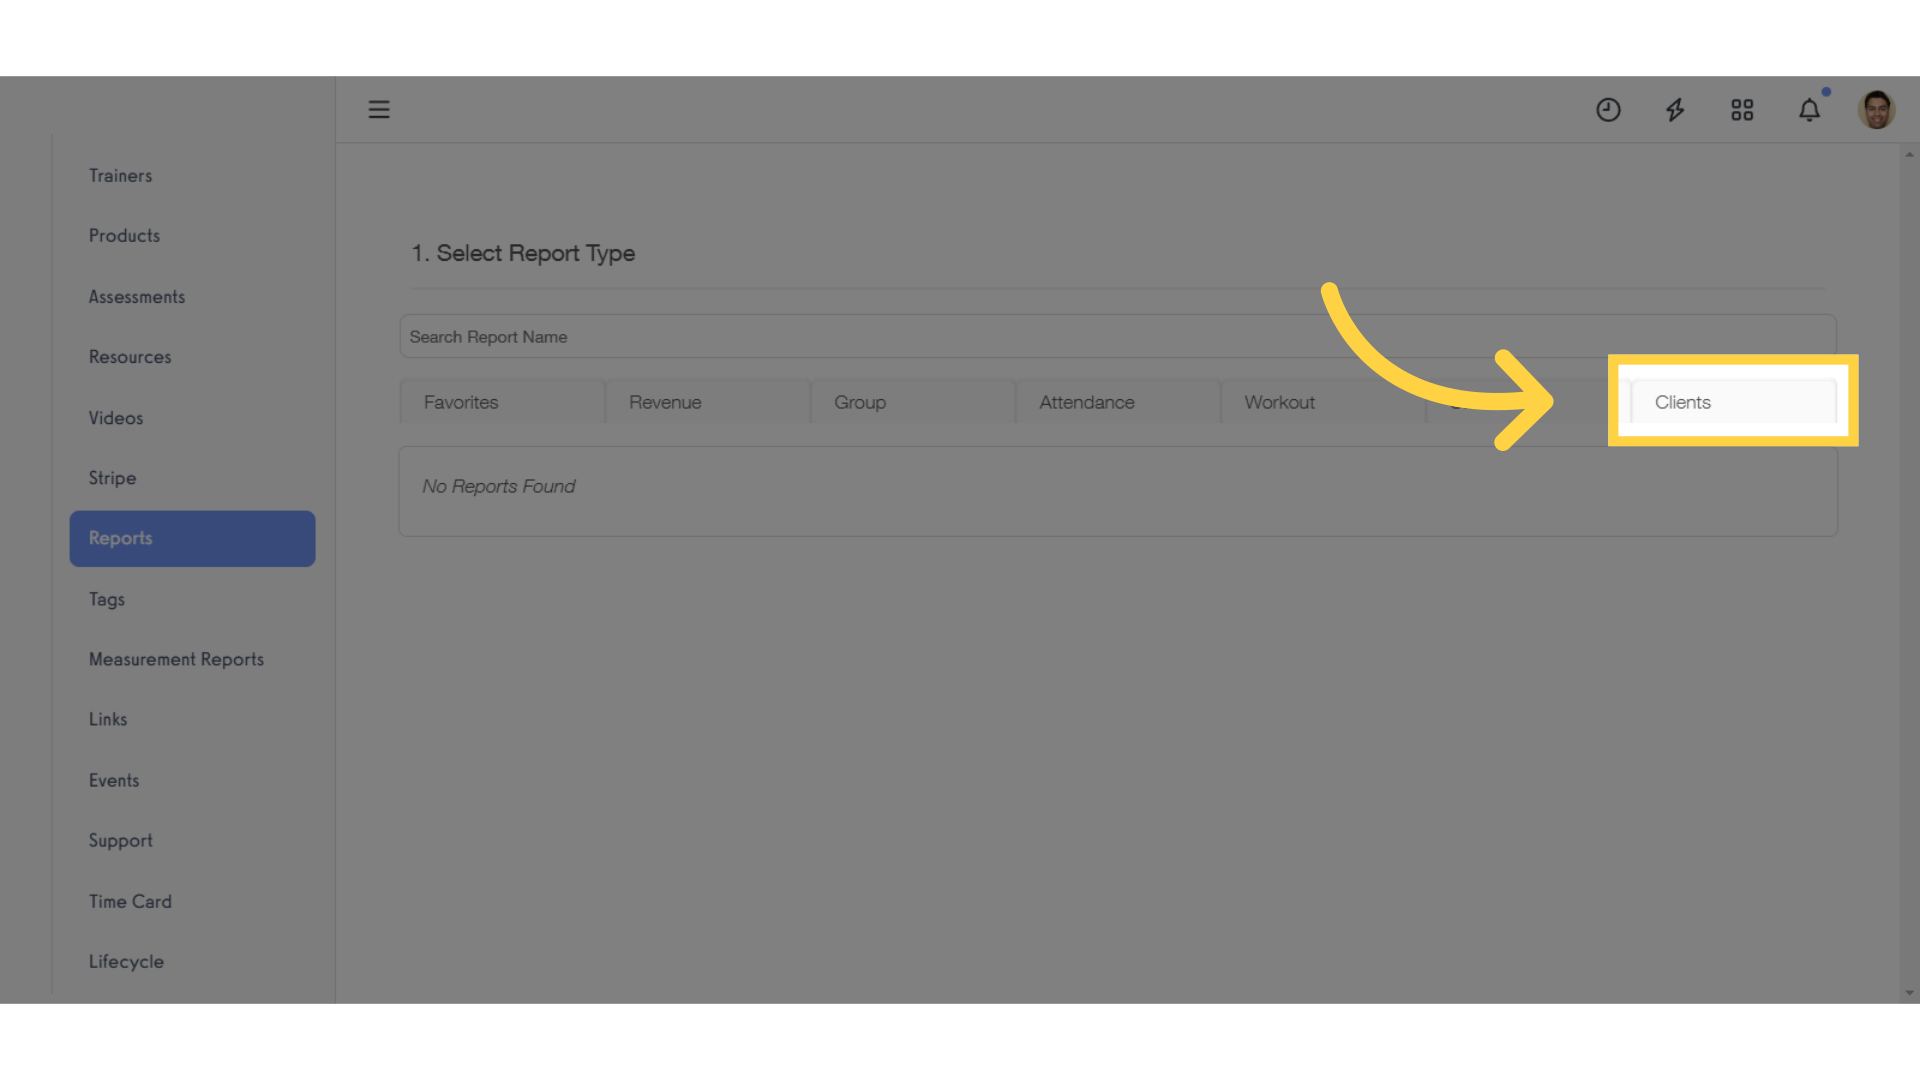
9. Click the “Clients” option on the Reports page.
On the Reports page, click the Clients option to see reports that are related to client accounts.
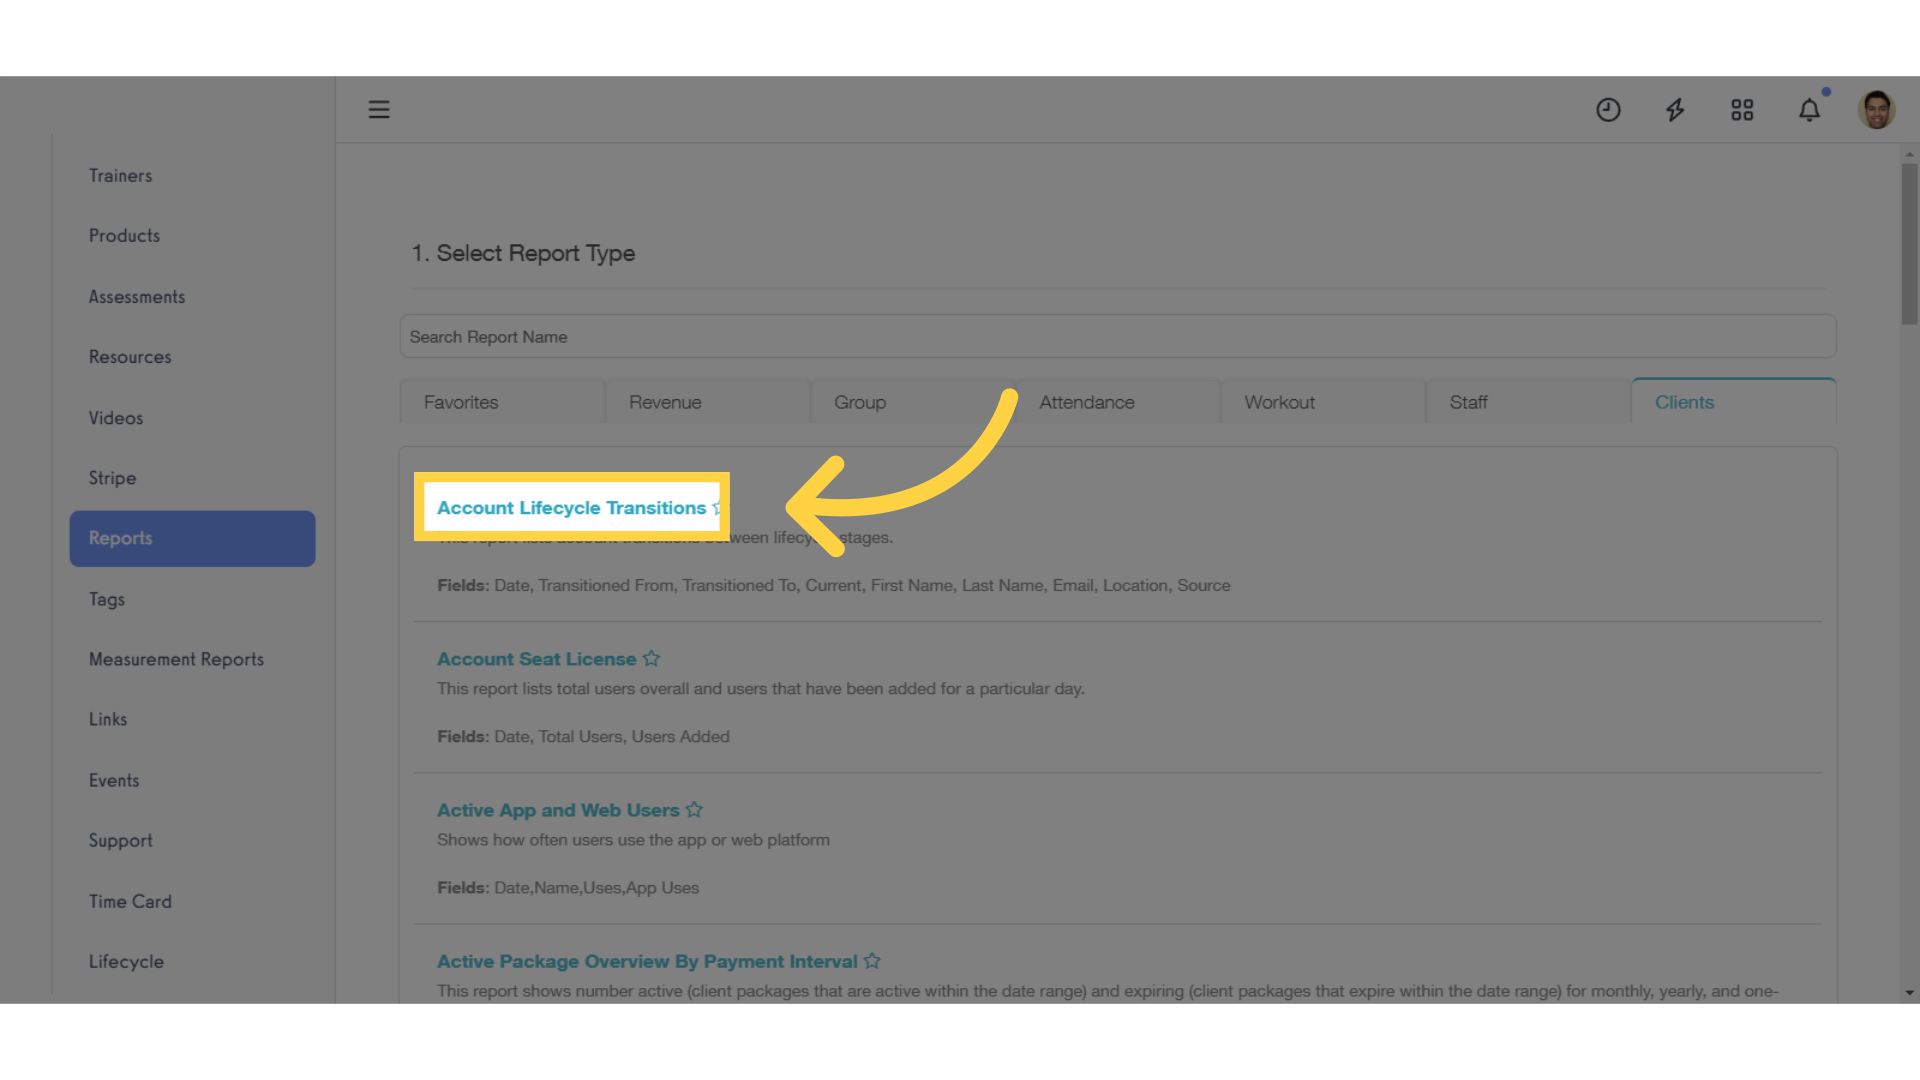
10. Click the “Account Lifecycle Transitions” report.
Select the Account Lifecycle Transitions report to review lifecycle stage history for all accounts.
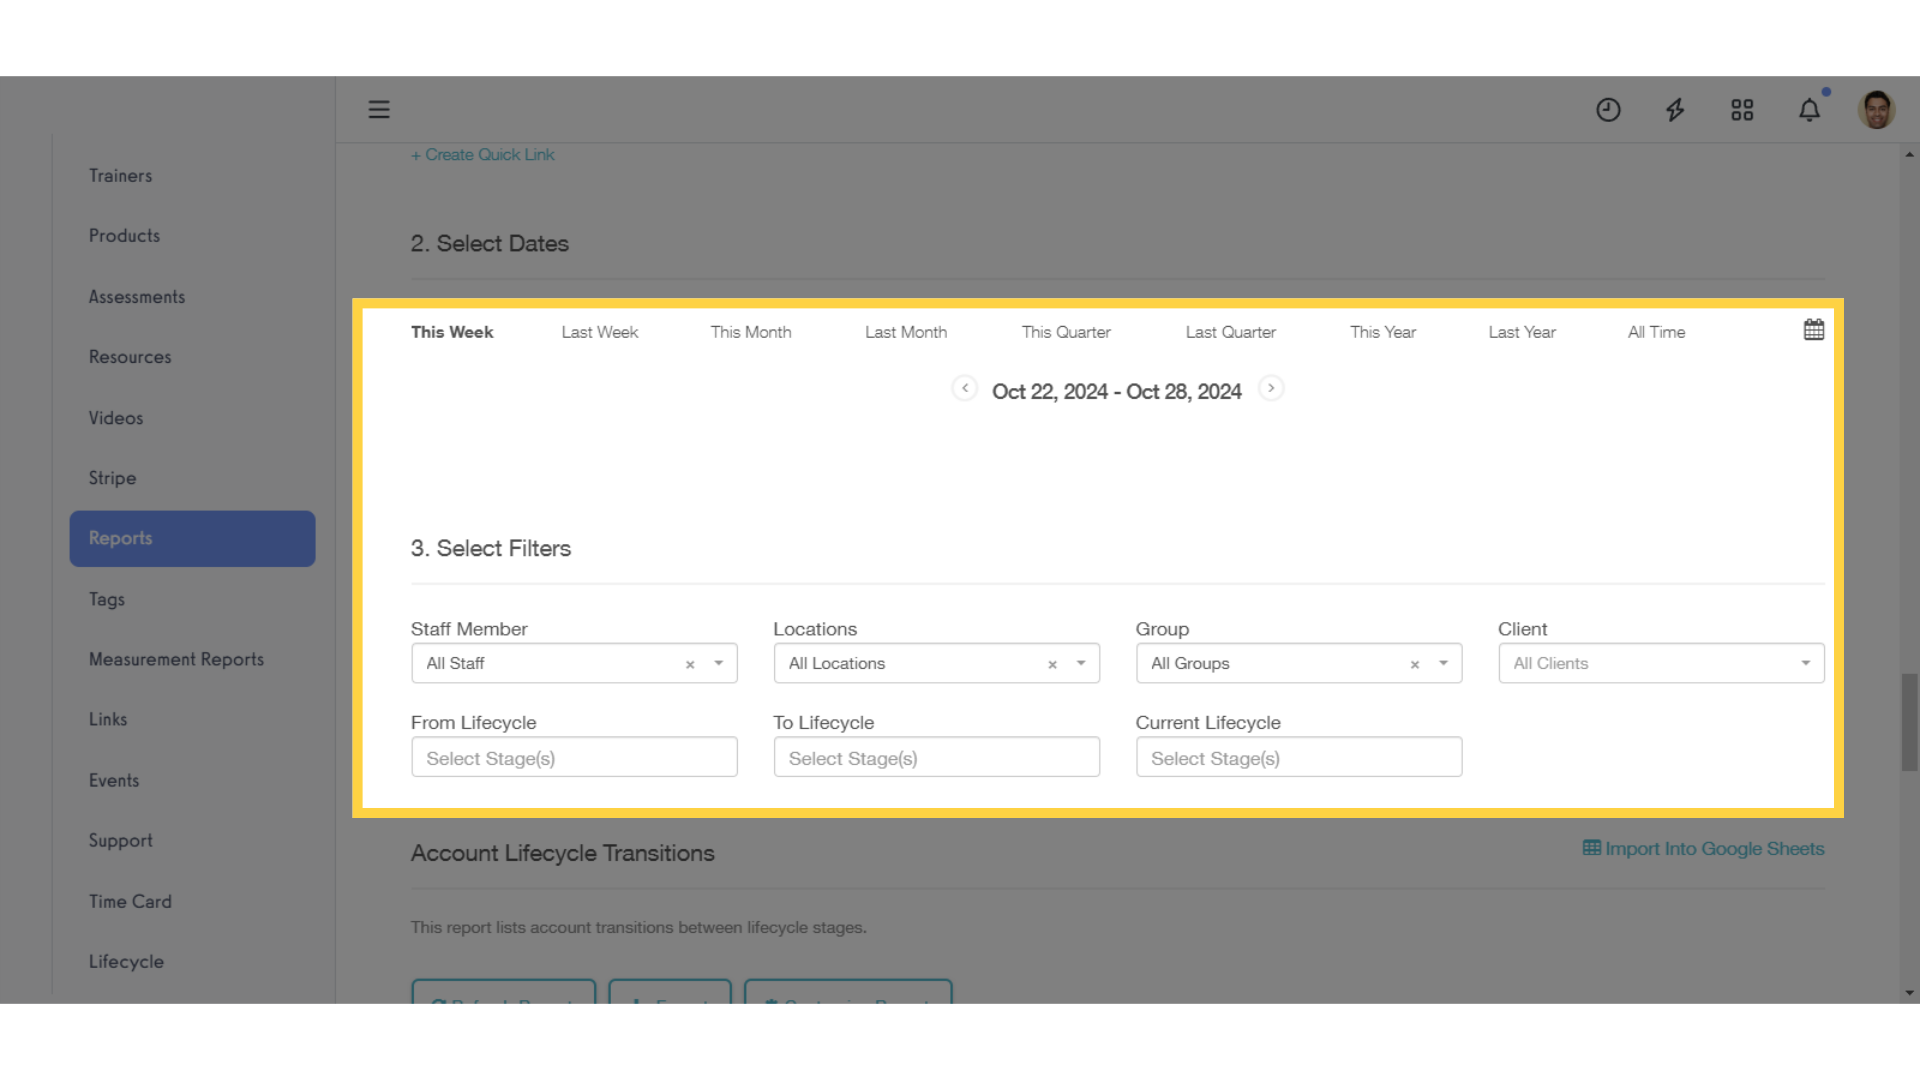
11. Choose your date and filters.
Set the date you want to review, then set the filters.
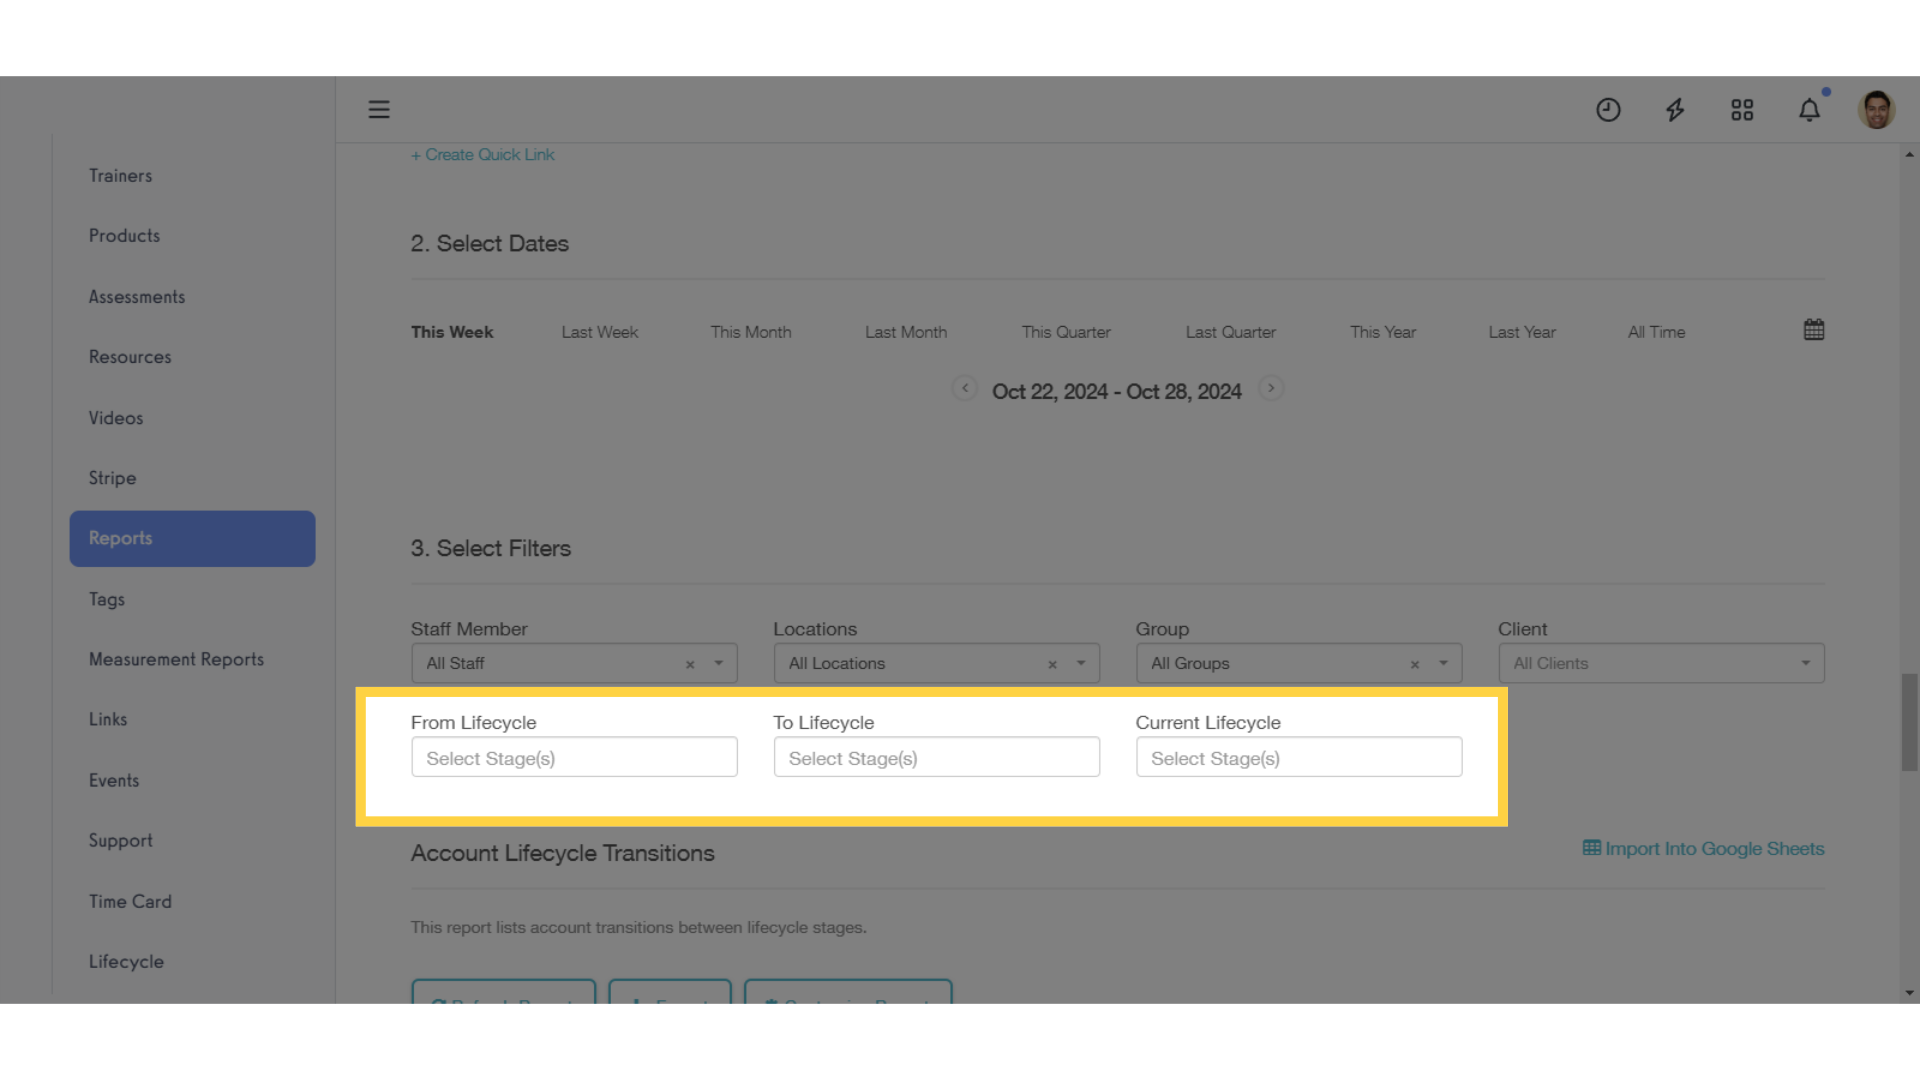
12. You can limit the results by “From”, “To”, and current stage.
You can use the “From Lifecycle” filter to see all actions where any account was changed from the stage you select. The “To Lifecycle” filter will show you all the actions where any account was moved to the stage you select. The “Current Lifecycle” stage filter allows you to see the transitions for accounts that are currently in the stage you select.
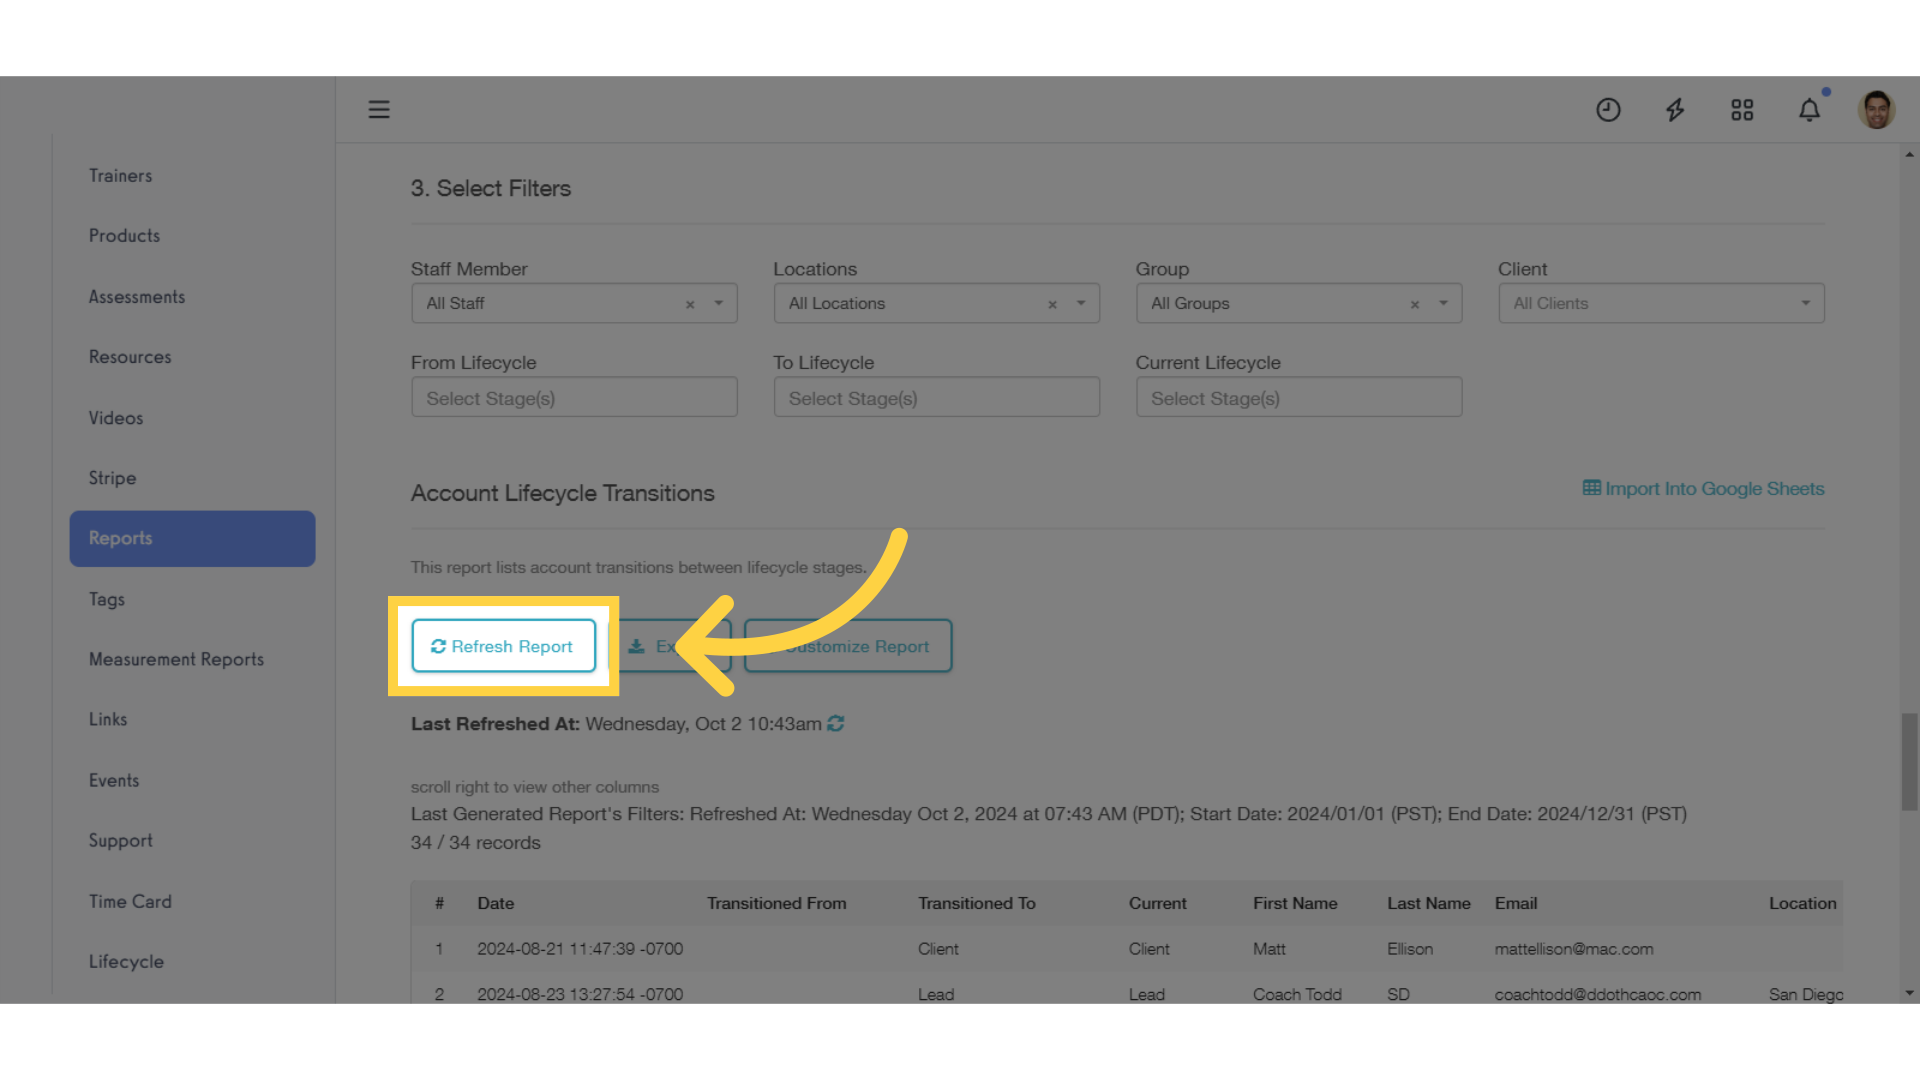
13. Click “Refresh Report” to get the latest results.
Make sure to update the report by refreshing it.
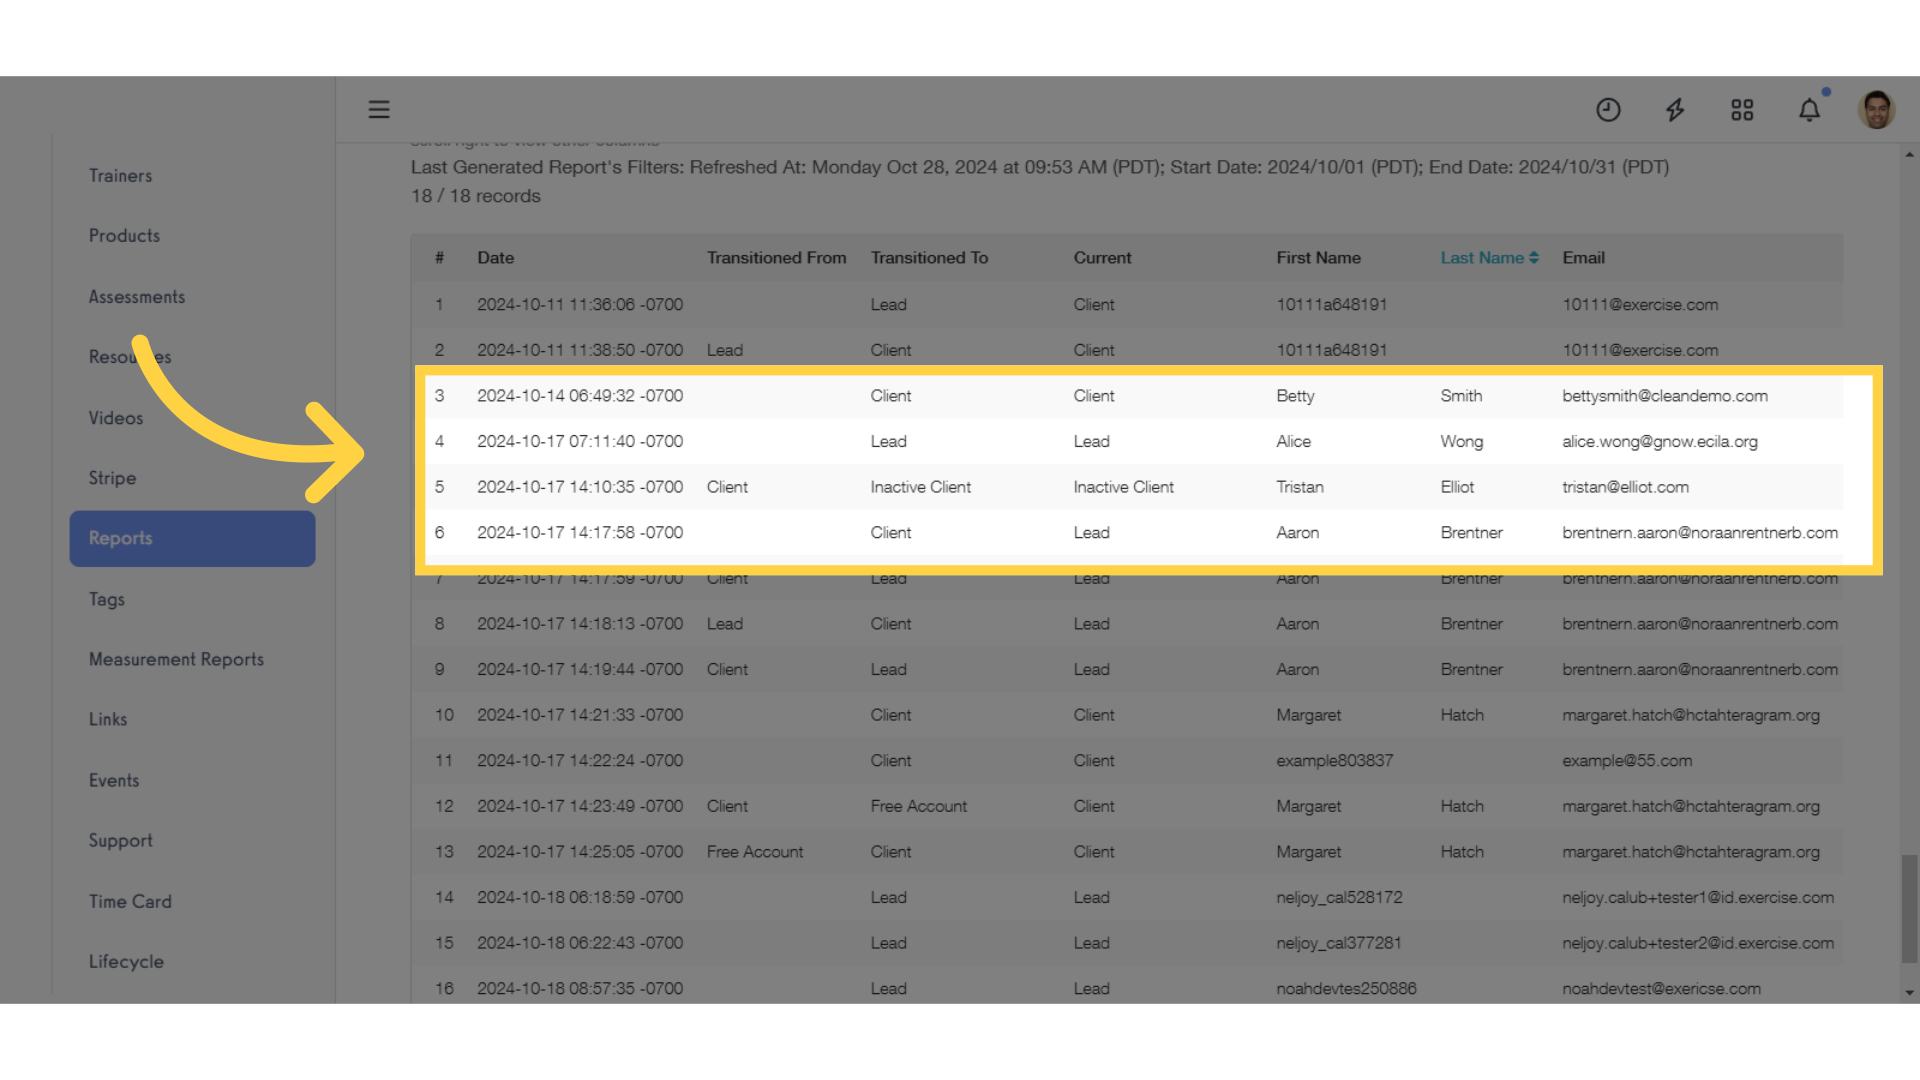
14. You’ll see the transition actions for all accounts, based on your selected filters.
On the report, you’ll see each transition to a new stage that matches the date range and filters you’ve applied.
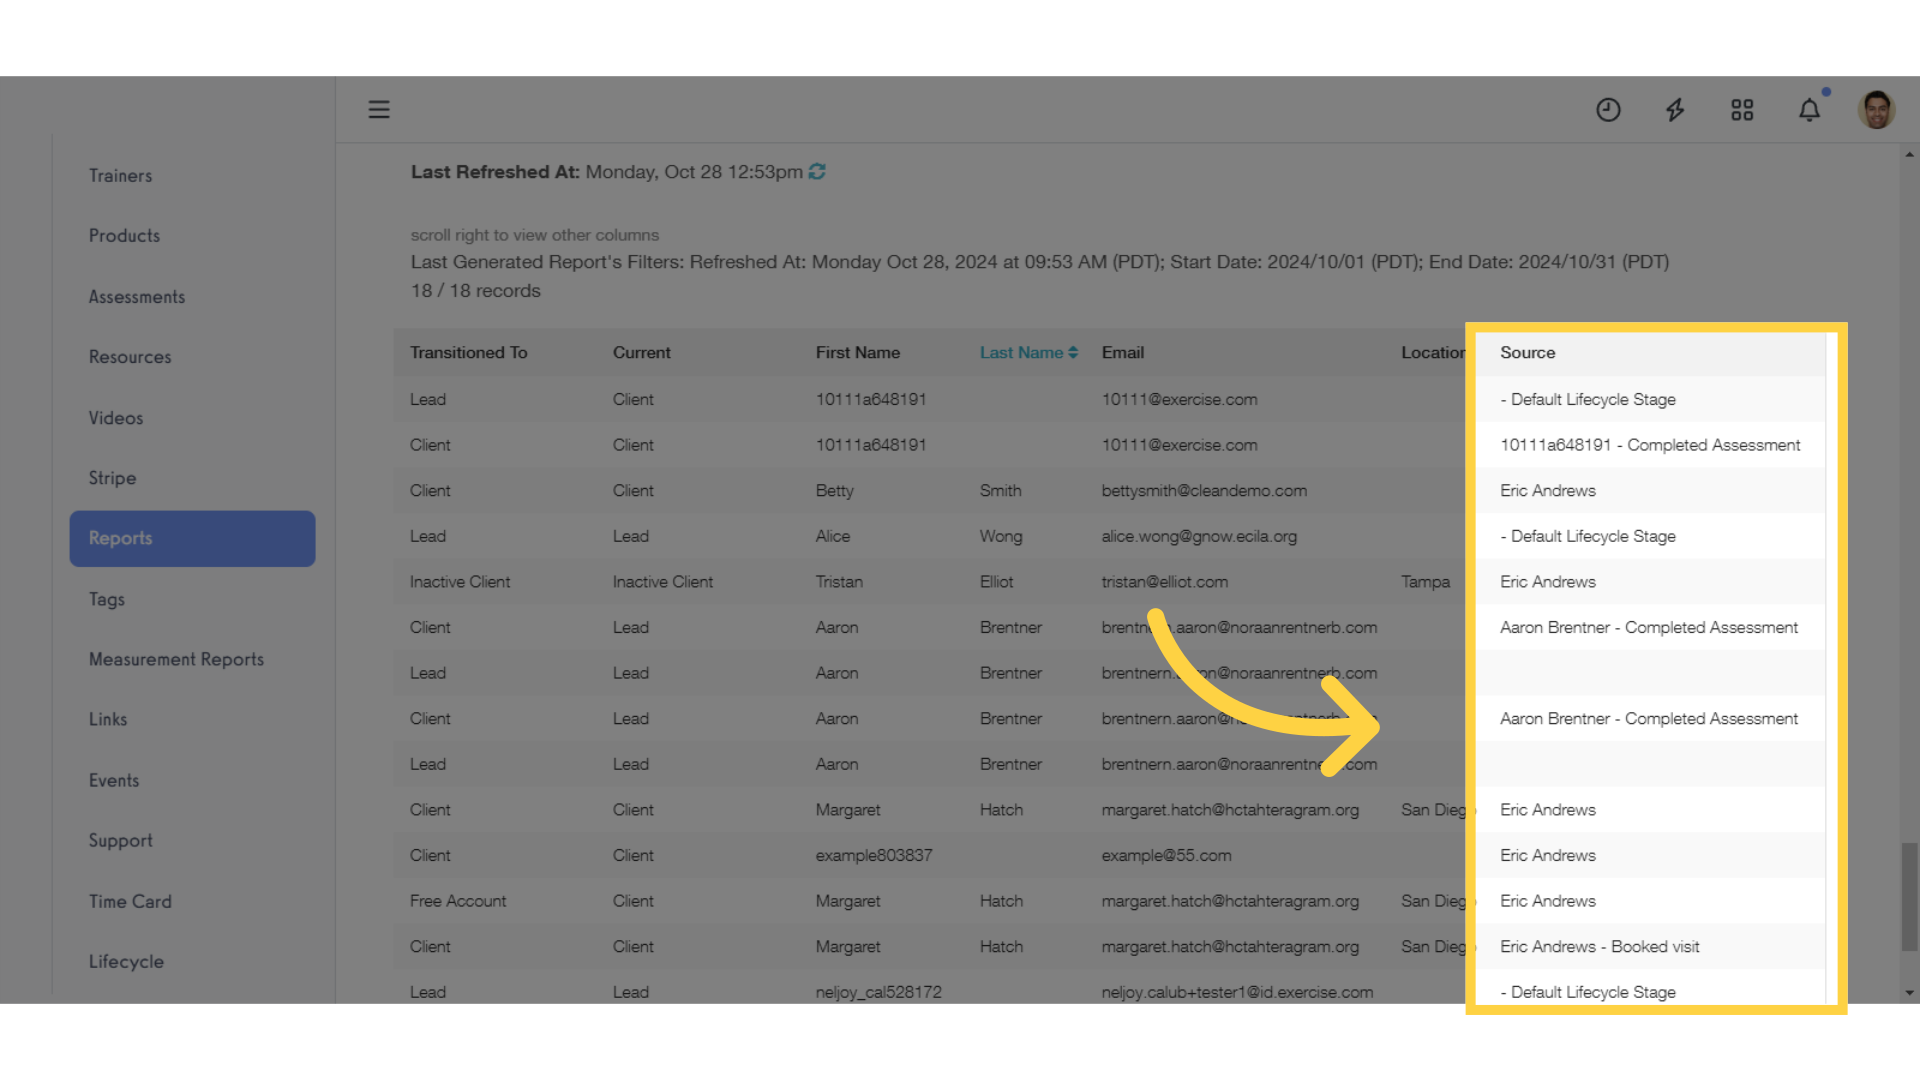
15. Scroll to the “Source” column in the report to see what triggered the change to a new stage.
You can refer to the “Source” column in the report to see what triggered the change to a new stage. If a name is listed in this column, it means a staff member manually updated the lifecycle stage for this account.
This guide showed you how to review lifecycle stage history for any account – whether reviewing one account at a time or all accounts at once.
Now you can easily review each account’s lifecycle history at any time.


